
Tasty Tips and Tricks
A smorgasbord of tips to make your work go faster and get better results


This article appears in Issue 17 of CreativePro Magazine.
You know that feeling when you learn something you didn’t know about an app you use every day, and it feels like a little secret or a decadent treat? That’s how I feel when I ingest a little nugget of information that I have never tasted before. Of course, I then want to run and share with everyone who will listen (and even those who won’t). In this article I’ve put together a digital charcuterie board—or just “snack tray,” as we used to call them—of little tips and tricks for you to nibble on. They are small and bite-size, because moderation is key!
How to Customize Presentation Icons in PowerPoint
Icons are a versatile tool for visual presentations, replacing boring bullets and playing an integral role in storytelling. Custom presentation icons are crucial to building a strong brand identity across presentations, and they can be easy to create. You can use existing icons from all sorts of places to create custom placeholders to give them a truly unique look. One example of this is split- color icons (Figure 1).

Figure 1. Examples of custom presentation icons
- In PowerPoint, choose Insert > Shapes > Oval.
- Shift-drag to draw a circle on your slide.
- To change the circle to a semicircle, choose Shape Format > Edit Shape > Change Shape > Chord.
- Drag either end of the straight-line segment to make a semicircle.
- Duplicate the semi-circle by Option/Alt-dragging it.
- Rotate the duplicate semi-circle 180° and line up the straight edges of the two objects. These edges don’t have to be vertical. Experiment with funky angles for different effects.
- If necessary, remove the outline color and pick new fill colors. Colors that are one shade apart in the same hue often work well.
- Finish by grouping the two semicircles.
—Richard Goring
Check Your InDesign File Using Preflight Profiles
InDesign’s Preflight panel allows you to check if your document meets the requirements of your print service provider or any standards that you set up. It lists any mistakes it finds, and you can click one to jump to its location in the document. This way, you can find mistakes and correct them before sending the document to the printer or exporting a final PDF.
Open the Preflight panel (Window > Output > Preflight), and you’ll see that there is a [Basic] profile as a default. Errors in the document compared to this default profile will be listed here. This is a good start, but you should create your own custom profile to detect the kinds of errors you want to prevent. Here’s how:
From the Preflight panel menu, choose Define Profiles.
Click the + at the bottom of the list on the left.
Type a name for your profile, then choose all the settings you’d like it to catch.
Common errors to search for using the Preflight profile include:
- Minimum resolution of raster images
- Spot colors that are not needed
- Overset text
- Non-proportional picture scaling
- Registration swatch is used
- Exact size of the document
- Bleed or no bleed
- Color spaces not allowed
Click Save.
To use your new profile, choose it from the Profile menu at the top of the Preflight panel, or from the bottom of the InDesign application window (right next to the green or red circle that indicates if you have any errors in the document) (Figure 2).
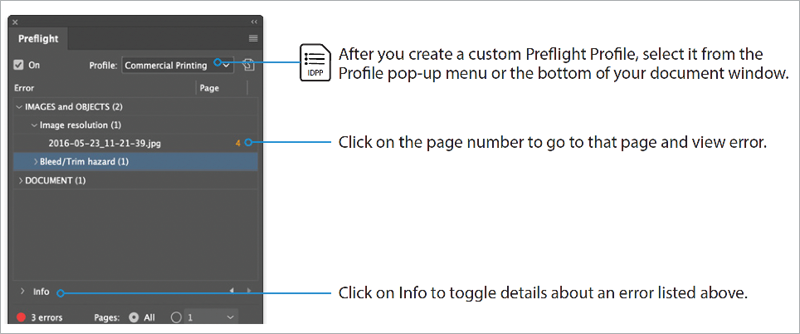
Figure 2. How to use the Preflight panel in InDesign
—Laurie Ruhlin
Customize Your InDesign Hyphenation Settings
Hyphenation is a compromise. Nobody loves a hyphen, but without hyphens our text would look bad. Left-aligned text would have a very uneven rag; justified text would be very gappy.
So, hyphenation is necessary, but it needs to be controlled. The exact settings you use will depend upon the nature of the text you’re working with. Figure 3 shows my preferred numbers.

Figure 3. Nigel French’s custom hyphenation settings for InDesign type
—Nigel French
Filter Photoshop Layers by Name
Photoshop makes it easy to filter by layer name. Use Command+Option+Shift+F (macOS) or Control+Alt+Shift+F (Windows) to toggle on Layer Search in the Layers panel, and automatically select Filter By Name. Now you can just type the name of the layer to find it quickly. This tip assumes you have named your layers (which we always do, right?) and know the name of the layer that you’re looking for.
—Julieanne Kost
Use Photoshop’s Neural Filters to Remove a Color Cast
Photoshop’s neural filters can dramatically reduce difficult workflows to just a few clicks using machine learning powered by Adobe Sensei.
One such option is the Colorize filter which will automatically assign colors to a black-and-white image using artificial intelligence. But you can also use this same feature to remove a color cast from photos (Figure 4). It’s especially good at fixing skin tones.

Figure 4. You can use Photoshop’s Colorize neural filter to remove color cast from photos.
- First, make sure your image is in RGB (Image > Mode > RGB Color).
- Choose Filter > Neural Filters. Photoshop will switch to the Neural Filters workspace.
- In the list of filters, click the button to download and enable the Colorize filter.
- In the list of filter settings, make sure that Auto Color Image is turned on.
- Use the sliders for saturation and color to tweak the image as desired.
- At the bottom of the window, choose the output you want (Current Layer, New Layer, New Document, and so on) and click OK.
—Jesús Ramirez
Make Smarter Adjustments in Photoshop
When we think of nondestructively applying one of Photoshop’s adjustment options, (e.g., Curves or Hue/Saturation), many of us have trained ourselves to always create an adjustment layer.
However, adjustment layers can be tricky to manage because they are not directly linked to the layer to which they are applied. Moving one up or down the layer stack will change the appearance of your image.
But, if you apply an adjustment from the Adjustments menu to a Smart Object, instead of adding an adjustment layer, it will behave exactly like a Smart Filter. This means the adjustment will stick to the layer, making it impossible to accidentally separate the Smart Object and adjustment (Figure 5). This will allow you to:
- Double-click the adjustment name to update its settings.
- Double-click the sliders icon to change the adjustment’s blending mode and opacity.
- Click the eye icon to hide the adjustment.
- Use the Smart Filters mask to locally mask all adjustments applied to the Smart Object.
- Duplicate the adjustment to other Smart Objects, using the exact same settings.
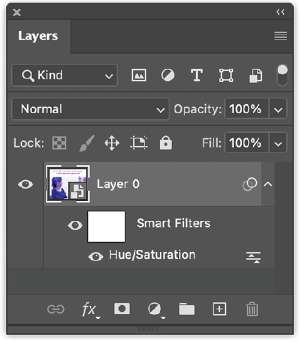
Figure 5. Apply adjustments to Smart Objects to maximize your flexibility and efficiency.
Use these steps to apply a smart adjustment:
- Select one or more layers from the Layers panel.
- From the Layers panel menu, choose Convert to Smart Object.
- Choose Image > Adjustments and choose an adjustment.
—Bart Van de Wiele
Move Content from a Creative Cloud App to PowerPoint
My favorite way to move stuff from InDesign (or any other Creative Cloud app) to PowerPoint is by using Creative Cloud Libraries! The key is that you need the Adobe Creative Cloud add-in for PowerPoint (Figure 6). You can find the add-in here.
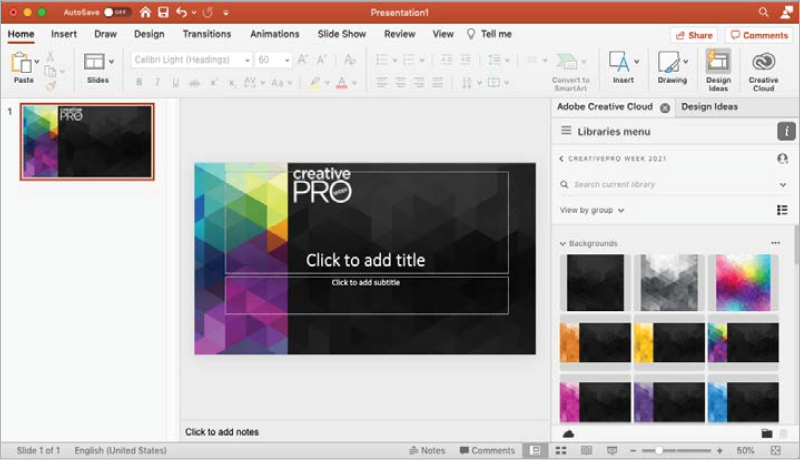
Figure 6. The Adobe Creative Cloud add-in lets you access items from a Creative Cloud Library inside of PowerPoint.
—David Blatner
Don’t Make a Dumb Mistake with Smart Text Reflow
InDesign’s Smart Text Reflow feature (found in Type preferences) can be a great timesaver when you’re working with long documents. For example, it helps to use Smart Text Reflow to add pages automatically to a table of contents as it grows. Just remember that changing the number of pages in your TOC may affect page numbering after it, making the page numbers in your TOC inaccurate. To fix that, be sure to run Update Table of Contents (Layout > Update Table of Contents) after the number of pages in your TOC is stable.
—Russell Viers
Put a Watermark on a PDF
At times you might want a watermark on your PDF—for instance, to give a visible notice to discourage misuse of the work or to note that the document is a proof (Figure 7).

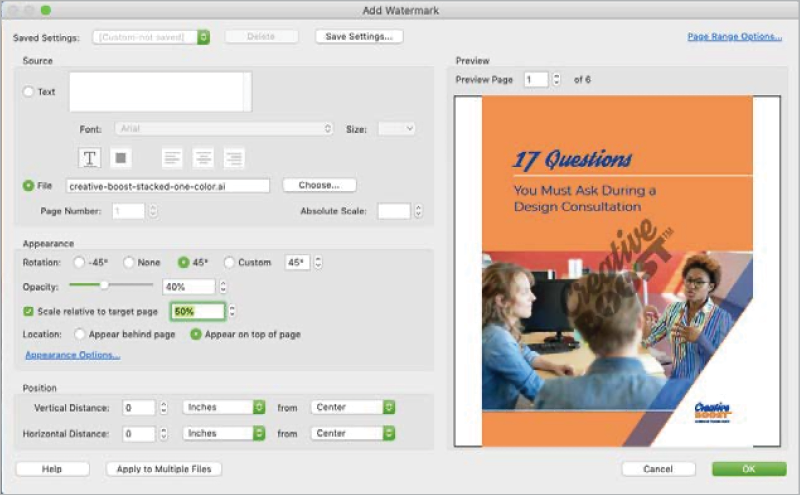
Figure 7. Using plain text (top) and an image (bottom) to create a PDF watermark
- Create your watermark and save it as an image (if desired).
- In Acrobat, open the PDF to which you want to add the watermark.
- Go to the Tools tab and search for edit, or select Edit PDF from the righthand toolbar (if you added it already).
- Choose Watermark > Add.
- Add and style text for the watermark, or upload an image.
- Adjust the opacity, angle, size, and placement.
- Select the Appearance options to specify if the watermark should appear on screen and/or when printed, and whether to keep the position and size constant when printing on different page sizes.
- Click OK and save.
—Colleen Gratzer
Learn the PowerPoint Shortcuts That Matter Most

Of course, you know that shortcut keys are time-savers for working in PowerPoint. And while you may already be using a lot of these, the key is to make sure you’re actively using the ones you need to be using all the time. I’m talking about the ones that really matter, like starting your slideshow using Command+Return/Ctrl+Enter instead of using that tiny little button on the lower-right corner. I’ve known this shortcut forever and still click that silly button. Don’t be like me! Review these common shortcuts and make sure you get in the habit of using them:
- Command+Return/Ctrl+Enter: Start a slideshow
- Command/Ctrl+D: Duplicate the selected item
- Command/Ctrl+Y: Redo the last action
- F3+Shift: Cycle through the All Caps, Sentence Case, and Lower Case settings
- Command/Ctrl+L: Left-align text
- Command/Ctrl+R: Right-align text
- Command/Ctrl+E: Center-align text
- Command/Ctrl+J: Justify text
- Shift+Arrow: Decrease the selected object’s width
- Option/Alt+Arrow: Rotate the selected object 15 degrees
—Jole Simmons
Commenting is easier and faster when you're logged in!

Recommended for you

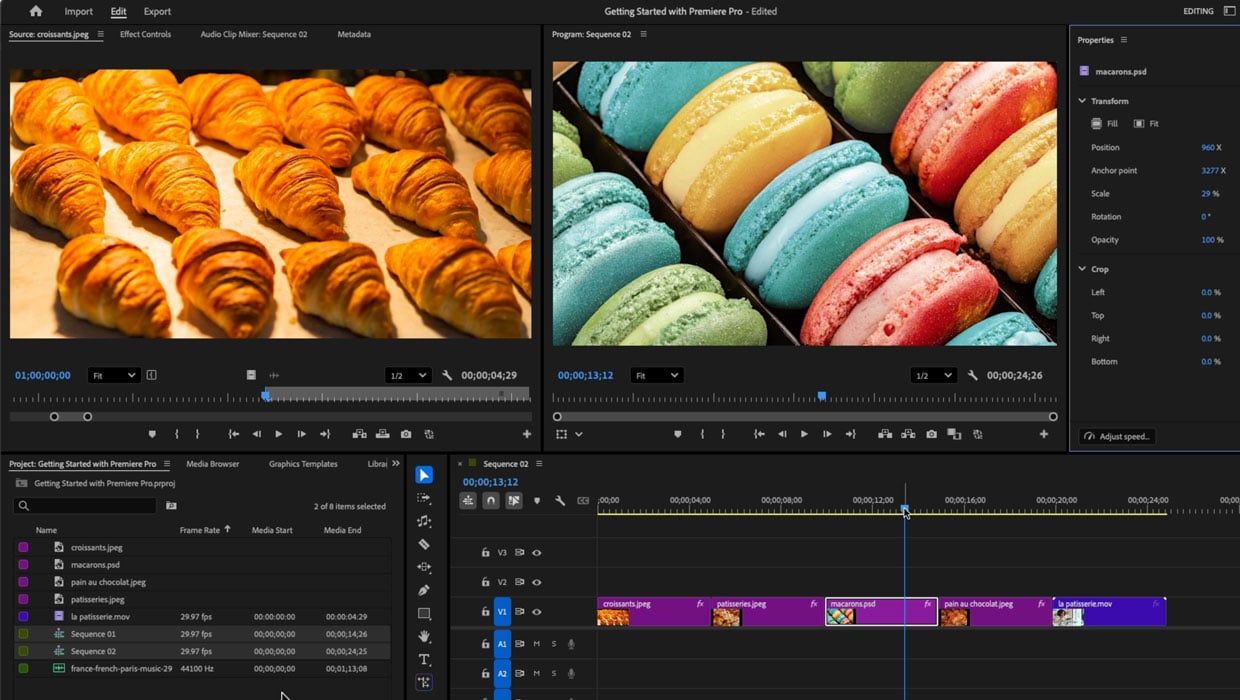
Members-Only Video: Getting Started in Adobe Premiere
Have you ever wanted to build your video-making skills but were intimidated by t...

Creating Custom Shadows in Photoshop
Learn how to create shadows that add a whole new layer of meaning to a photo.