
Supercharge Your Workflow
Erica Gamet shares a bunch of add-ons that can help you get your work done faster and easier without sacrificing quality.


This article appears in Issue 83 of InDesign Magazine.
When talking about workflow automation in InDesign, you undoubtedly know about styles, and maybe have even ventured into GREP, data merge, or XML. But those tools are generally reserved for tasks that require heavy lifting. What about those tasks that seem small and insignificant, but that also seem to eat up much of our workday? There are plenty of quick solutions that make the workflow process quicker and easier and that let you focus on your design and layout. Some are found right within InDesign and are simple to implement. Others are standalone helpers that can make your workflow fly!
Let’s take a look at some of the best ways you can save yourself time, get your work done faster, and look like a star to your client or boss!
Opening, Saving, and Navigating
Unless you’ve somehow hit the “layout lottery” and work only on the same file every day, you probably spend a lot of time opening and saving files. And you more than likely burn precious time traipsing through your computer’s files and folders, shuffling, renaming, and organizing them. (Don’t ask me how I know this.) It’s a tedious job, but if you want to supercharge this file organization process, a third-party productivity tool might be just what you need.
What better place to start than with app launchers? It should come as no surprise that app launchers’ main purpose is to launch apps. What might not be as obvious is that these productivity helpers also open often-used files, perform calculations, and give the user’s workflow a boost. While having an app easily accessible from the Mac’s Dock or Windows Start menu is helpful, launching an app with a keyboard shortcut is better. For example, as a trainer, I
need to maintain different versions of InDesign, and launching each one via a shortcut sure beats trying to distinguish CC 2014 from CC 2015 from CS6 based on those little icons alone. App launchers have grown to be sort of a mission control for everything you need your computer to do.
LaunchBar ($30; Mac-only; from Objective Development) is a powerhouse application that does so much more than I could possibly cover here. Workflow-wise, its strengths lie in quickly opening apps and documents, working with clipboard items, and navigating through recent items regardless of file type. Opening apps with LaunchBar is as easy as recalling user-defined abbreviations and viewing folders—and their deeply-nested contents. The app also learns your usage and preferences, and adjusts search results accordingly. The clipboard functions include remembering your clipboard history as well as merging clipboard items to paste each one as a single item.
Launchy (donationware; Windows and Mac; from Launchy.net) is a cross-platform application whose main function is launching apps and files. If you’re looking for a more slimmed-down launcher, Launchy delivers with graceful simplicity. Sometimes you don’t need all the bells and whistles; you just need to be able to glide deftly from Word for some text, out to InDesign to style that text and create a PDF, and then over to your email to send a proof to your client. Launchy serves up access to all these functions with hot-key access to its search window (Figure 1). From there, type part of the name, or enter a custom command, and you’re instantly presented with your quarry.
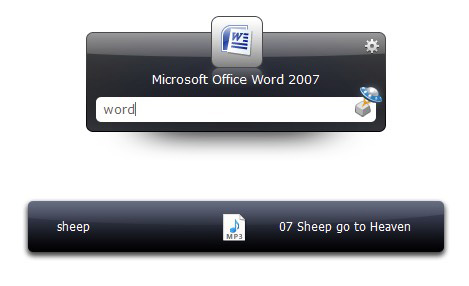
Figure 1: Start typing a file or app name in Launchy to quickly jump to that item.
Automating Tasks
No one likes to repeat themselves, and there’s a lot of that when it comes to workflow. Doing the same thing over and over can be crazy-making. Luckily, there are products whose main goal is to automate some of the repetitive tasks creative pros like ourselves have to deal with.
Keyboard Maestro ($36; Mac-only; from Stairways Software) lets you conduct your Mac’s functions to keep your workflow humming along. This full-featured productivity enhancer works with macros you create to launch other apps (Figure 2), work with your clipboard history, use shortcuts to enter everything from dates to URLs, even control iTunes!
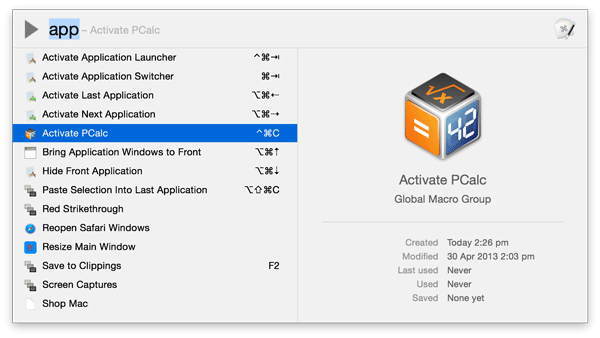
Figure 2: Set macros in Keyboard Maestro and trigger them with keyboard shortcuts.
Keyboard Maestro can perform recorded actions for those tedious tasks we spend too much time doing. Set an action to open a folder of images, open each image, and then manipulate the image by rotating and cropping that image. Knowing what it’s like to perform a task like that over and over, the advantage to a tool like Keyboard Maestro is glaringly obvious.
Automator (Free; Mac-only) (Figure 3) does just what you think it might: it automates. Built into Mac OS X, Automator runs actions, much like those in Photoshop, to save you from doing the same process over and over ad nauseam. I honestly haven’t used it much since its introduction back in 2005, but I love hearing how my fellow creatives are using it. Whether it’s batch converting images to a standard file format, or setting up a watched folder that automatically creates an email, complete with a PDF proof generated in InDesign, Automator wields a mighty production sword.
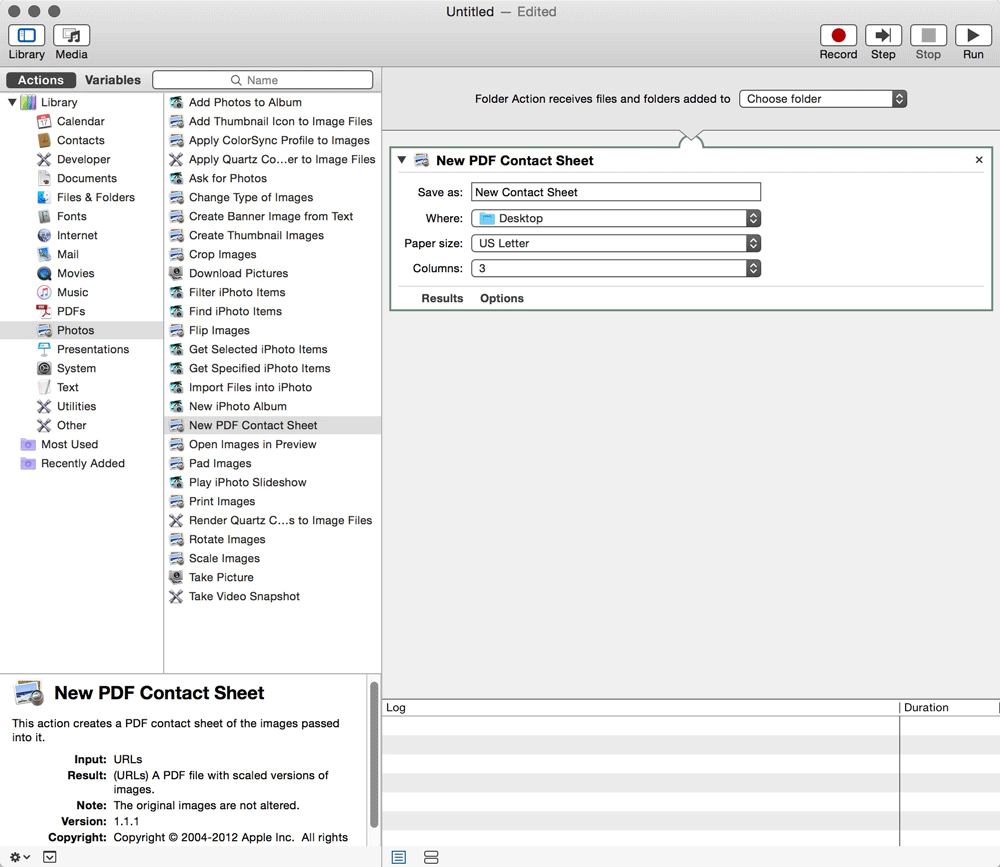
Figure 3: Set up workflows in OS X’s Automator.
Like an old friend you’ve reunited with on Facebook, I’ve recently been looking to “friend” Automator again. You can set up a series of actions that can be invoked either through Automator itself or through a particular app’s Services menu.
There are quite a few actions prebuilt into the OS, and many apps come bundled with others as well. Action sets are created within Automator and fall into categories such as workflow, service, and folder actions. Workflow actions are run from within Automator itself, as they often encompass a variety of tasks across multiple apps. Service actions are context-based, depending on which application they are launched from. Folder actions are applied to a watched folder and activated when something moves into that folder. For example, you can set up a watched folder that creates an iPhoto album whenever photos are placed into the folder. Since Apple’s productivity software, like Keynote and Pages, hooks right into iPhoto for its media, Automator would play a key role in creating albums that are quickly sorted and accessed from within those apps.
You can also purchase third-party Automator action packs, including Creative Cloud-specific ones. Automated Workflows offers software-specific “action packs” for Illustrator, FileMaker Pro, InDesign, and more. Their InDesign bundle automates bulk packaging, printing, and saving; merging multiple documents; placing text into frames while assigning paragraph styles; and automatically placing images into defined frames.
Default Folder X ($35; Mac only; from St. Clair Software) takes control of opening and saving files where and how you need them. As the name suggests, you can set up and easily recall any one of many default folders (even on an app-by-app basis). If you consistently need to save InDesign files to your Works in Progress folder, you can set that behavior as the default, eliminating the time it takes to drill down through a folder hierarchy. Even better, Default Folder surrounds all your Open or Save dialog boxes with a host of extra features that let you navigate to folders, rename files, or even manage your directories without switching to the Finder. It even knows what folders you currently have open in your Finder window and lets you open or save files into them (Figure 4).
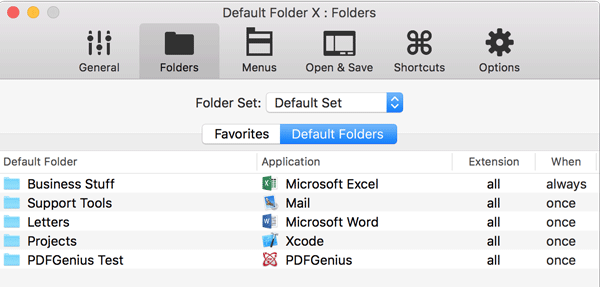
Figure 4: Assign a default folder for each application with Default Folder X.
Working With Text
Working in InDesign, we all deal with text at some point. So. Much. Text! If you’re among those who have to enter that text directly into InDesign, you know some of the pitfalls that come along with the task. For me, I find that if I’m keying in type, it’s often words and phrases that I use again and again, whether I’m working on a new software workbook or an annual report for a client. Luckily, there are options to keep you sane, and consistent, while entering text.
InDesign’s Autocorrect
Autocorrect is a substantial list of commonly misspelled words and their properly spelled versions that will—as the name suggests—autocorrect to the right version for you. And it’s built right into InDesign! It’s off by default; you can toggle it on in InDesign’s Preferences dialog box. You can choose to turn on auto capitalization there, as well. I generally activate Autocorrect only sparingly, as my “typos” tend to be overlooked, due to the fact they are actual words… just not the ones I meant to use. What I do use autocorrect for is sort of a shorthand dictionary. For instance, when I get tired of typing software titles with intercaps (I’m looking at you, InDesign) or spelling out Peritoneal Mesothelioma and other medical terms, I turn to Autocorrect to do the heavy lifting via text shortcuts.
To add a new text shortcut, open Preferences for Autocorrect (Figure 5), click the box to enable it, and then click Add. In the Misspelled Word field, enter the phrase you want to type, and put the full phrase in the second box. You can’t use special characters in the short phrase, so you’ll have to work with acronyms or easy-to-remember phrases (like “prms” for Peritoneal Mesothelioma). Some special characters, including diacritics, cannot be typed in the dialog box for the correction, so you’ll have to copy and paste them in.
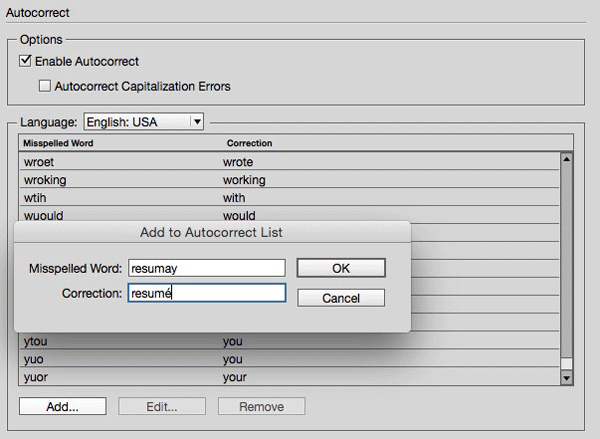
Figure 5: InDesign’s Autocorrect window.
Note that InDesign’s Autocorrect is an all-or-nothing prospect in that it’s either on or off. I tend to use it in short bursts, when I know I’m going to be typing in all my medical terms or computer software names. If you want it on all the time, but don’t want it correcting everything, you could always manually remove all of the built-in options by shift-selecting them in the dialog box, and then choosing Remove.
You can learn more about Autocorrect here and even learn how to insert special characters in this article.
Text snippet software
If you need more control over text snippets—and want to access them in any application—you’ll probably want to look into third-party software for this task.
On the Mac, the go-to application for system-wide text snippets is TextExpander ($45; from SmileSoftware.com). At its most basic, it lets you create a whole dictionary of snippets that will expand wherever and whenever you need. As an InDesign user, this can save you a ton of time if you find yourself typing the same thing over and over. If that repetitive text is a long phrase, hard to spell, or otherwise trips you up, TextExpander (Figure 6) can make these task so much easier.
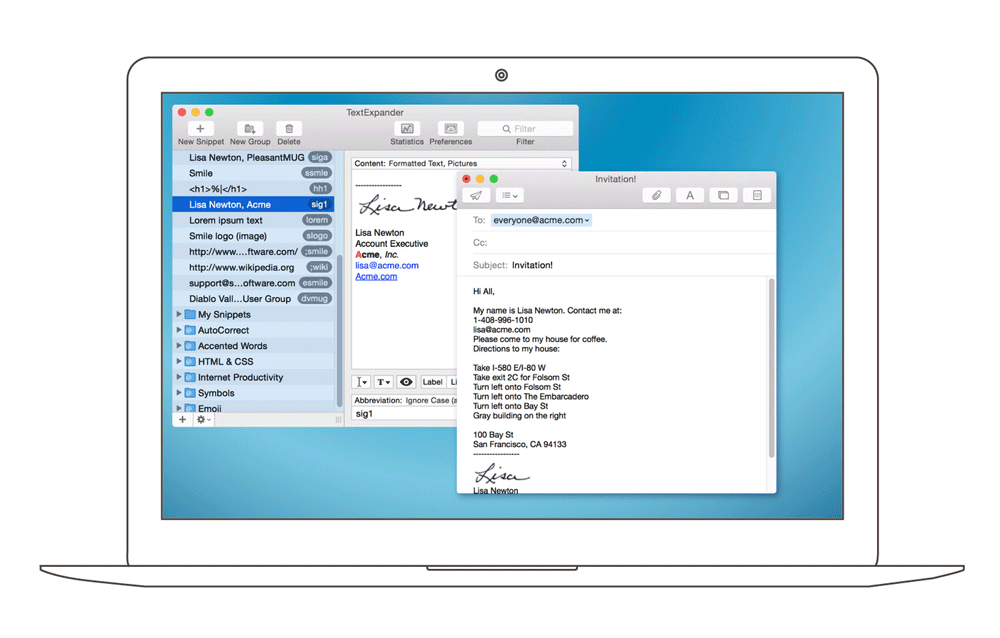
Figure 6: Text Expander.
TextExpander also lets you use special characters, which means it’s even easier to create triggers that won’t actually appear in your text. For instance, if you need to insert our previous example of Peritoneal Mesothelioma, you could assign it a shortcut of #PM. When using text-expanding shortcuts, I find that it helps my production to use a standard naming scheme. If I’m working on a medical brochure, I’d use the pound/hash sign (#) and maybe a 2- or 3-letter code for each medical term.
TextExpander is about more than just putting text snippets into your text. It also helps productivity by suggesting snippets, lets you put clipboard contents into a snippet, and inserts variables like date and time as you work.
On the Windows side, Breevy ($40; from 16 Software) is a solid choice for text expansion. Its main purpose is to provide an easy way to expand text where you need it, and to provide shortcuts for operations on your computer. Like TextExpander, Breevy comes with a built-in autocorrect dictionary, and lets you create your own collection of shortcuts (Figure 7).
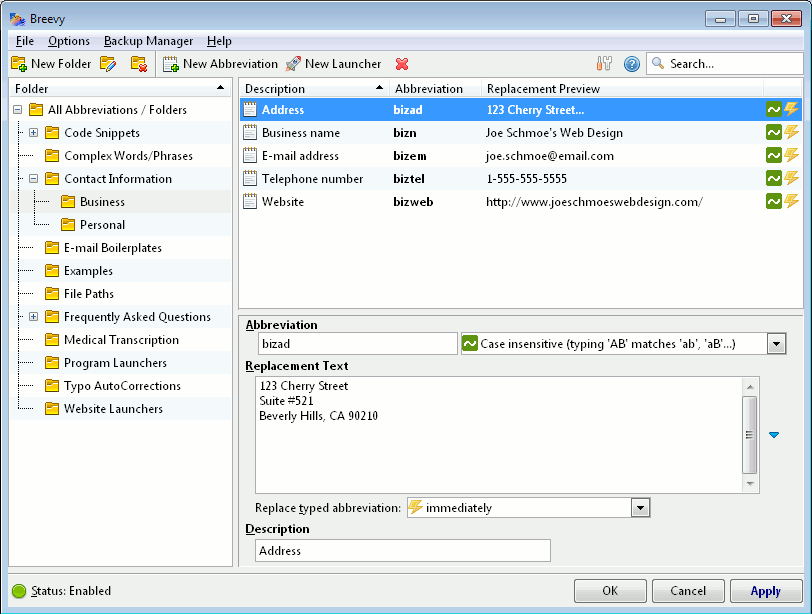
Figure 7: Breevy’s main control window.
Breevy integrates with Dropbox, allowing syncing in both directions, giving you access to your shortcuts, no matter what computer you’re using (so long as you have Breevy on each machine, of course). And because many people live in the Mac and Windows worlds simultaneously, Breevy even has the ability to import and sync your TextExpander snippets.
Automating Adding Items to InDesign Files
Of course, text isn’t the only thing that needs to be added to InDesign. We InDesign users spend a lot of our time bringing in assets from elsewhere. Using apps to speed up this process is a big plus to our workflow.
Clipboard managers
Clipboards on both Windows and Mac are great for picking up an item in one place and dropping it in another. The biggest limitation to that process is that the built-in clipboard can handle only one item at a time—and you have to remember what exactly it is that you last copied to it. If you do a lot of copying and pasting of text, images, and other items, you might really appreciate a standalone clipboard manager.
There are many options available for clipboard management on the Mac, all packed with features you may or may not need. Some simple ones are even built in to other apps I’ve talked about, such as LaunchBar and Keyboard Maestro. The top two standalone clipboard contenders are Paste ($10; Dmitry Obukhov) and Copy’em Paste ($15; from Apprywhere), both found on the Mac App Store.
Paste (Figure 8) features a beautiful visual interface, complete with color-coding and app icons for easy visual recognition. Once an item is copied—via normal copying methods—it lives in Paste’s clipboard history (which you can set from 10 items to unlimited).
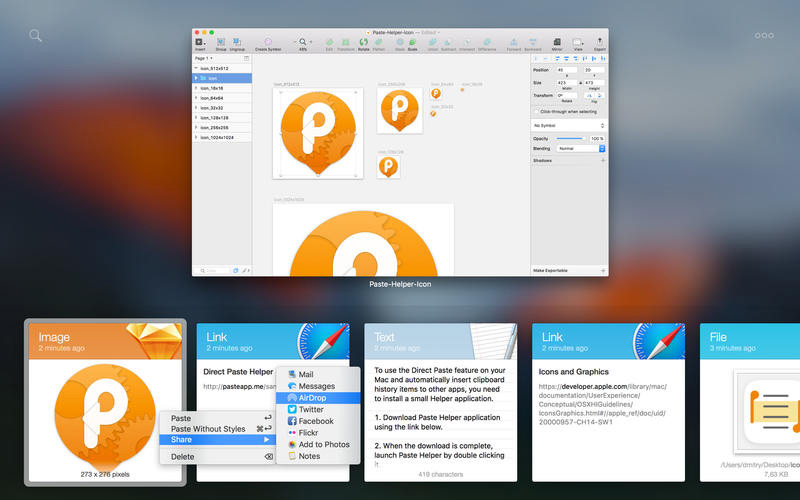
Figure 8: Paste manages clipboard items visually.
Retrieving an item is as easy as invoking your own custom keyboard shortcut or clicking the menu bar icon. You can then scroll through the items in reverse chronological order or do a text-based search. Paste ignores copied items from privacy-sensitive apps like Keychain and password managers, but you can always customize these rules to fit your requirements. Copy’em Paste (Figure 9) isn’t as visually appealing, but excels in both speed and access to copied items. After copying an item, you can assign it a name and a shortcut—as well as a Favorite status—for ease of retrieval.
Figure 9: Copy’em Paste’s list of recently copied items.
Ditto (free) is consistently ranked as the best clipboard manager on the Windows platform. Items copied are automatically saved to Ditto’s multi clipboard, whether they’re text, HTML, or images, with custom formatting being retained. Activated via a global hot key, Ditto (Figure 10) lets you search image thumbnails or by text, and to paste an item you can either click it or drag and drop it into the receiving app. Not only can Ditto work over a network, but multiple computers’ clipboards can be synced—great if you’re working on more than one machine.
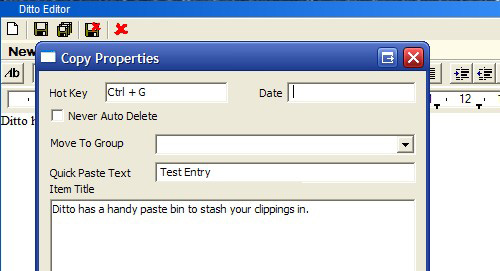
Figure 10: Ditto clipboard management utility for Windows.
One caveat: Many of the clipboard managers fall a bit short when it comes to copying objects out of InDesign. For example, Keyboard Maestro and Copy ‘Em Paste convert InDesign objects to PDF, while the Paste app simply ignores the command altogether. This may be due to the InDesign application architecture, as copying images and shapes from Word works as expected. When pasting an image into InDesign, it actually performs a Place command, creating a link. If the file gets moved, you’ll be left with a missing link, but the Paste app updates the location for all future paste actions. Remember, the goal here is saving time, so evaluate your copy/paste workflow needs before deciding on a clipboard manager.
Adobe Bridge
Adobe Bridge is a lot like SPAM (the meat product, not the messages in your inbox that seem to breed like rabbits): you either love it or hate it. Bridge—and InDesign’s built-in Mini Bridge—is Adobe’s digital asset management tool that comes as part of Creative Cloud/Creative Suite. While Bridge is often handy to photographers with its batch-editing, watermarking, and naming functions, it can be a vital part of an InDesign workflow as well. A big plus with Bridge (Figure 11) is its ability to visually sort through and select items to be placed within InDesign. This is especially helpful when dealing with EPS or AI files saved without a preview. Bridge will show you what the content looks like, saving you from having to place a file just to find out it wasn’t the file you were looking for.
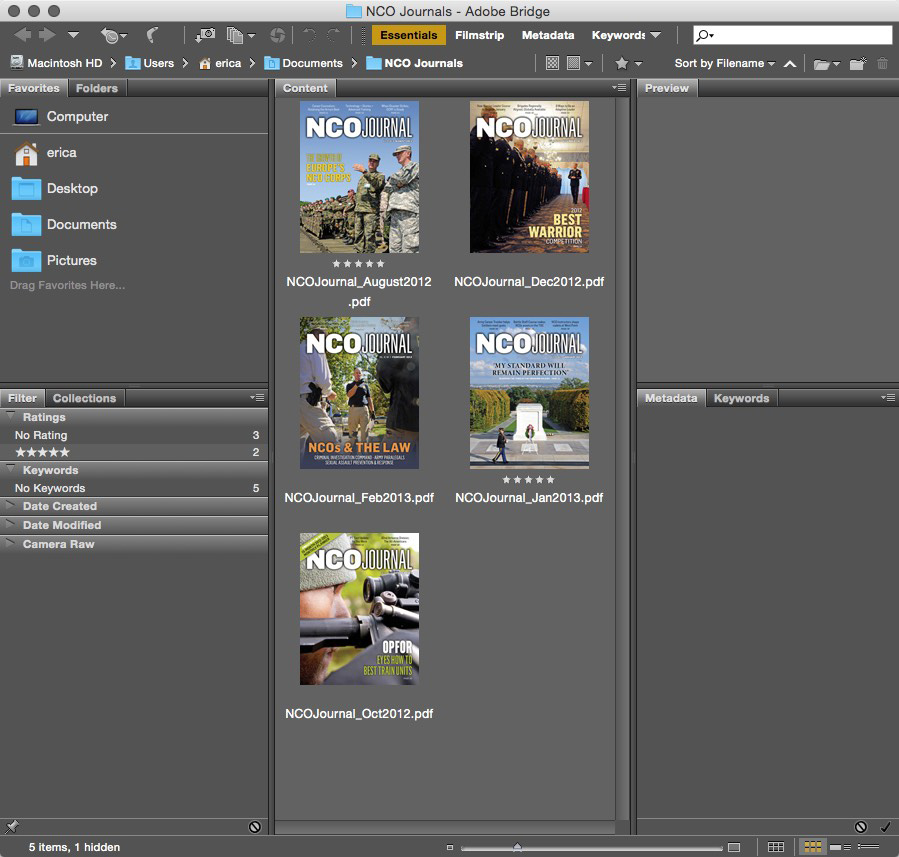
Figure 11: The Adobe Bridge window.
If you’ve launched Mini Bridge within InDesign (which still requires you to launch the full version of Bridge in the background, for reasons I can’t fathom), you can easily search for image files based on keywords. Also, if you’ve set up collections in Bridge, you can search those collections from within Mini Bridge. Bridge’s Smart Collections work a lot like a Smart Playlist in iTunes, in that you set criteria based on metadata, and the collection will be populated automatically. After setting the location parameter, which can be as inclusive as your entire computer, you define your collection based on color profiles, keywords, date created, and document type, among other data. Back in Mini Bridge, you can view your collections by name, search individual folders, or even search only in recently-accessed folders. I won’t tell you which side of the Bridge divide I’m camped in, but I will say that for those people with large amounts of assets, Bridge—and its little cousin Mini Bridge—makes it easier to work those assets into an InDesign workflow.
Automation Within InDesign
One of the greatest underlying features in InDesign is its arsenal of automation features. From text styles to data merge to GREP and XML, InDesign is brimming with features that do much of the gruntwork in the production process. Learning to leverage those automation assets will speed up your workflow and ensure consistency across your work. Much of the automation is just about getting each process done quicker, and that’s where the following features come in.
Shortcuts
If you aren’t using keyboard shortcuts, I can only ask, “WHY?!”. Seriously, shortcuts are your friends; they can save you from that repetitive stress injury you’re about to get by going to menus all day long. If you learn to use the shortcuts for those actions that you perform regularly—or that live nested deep within menus and submenus—you’re doing yourself a favor. Happily, InDesign lets each of us customize its keyboard shortcuts to our liking, adding ones where none existed and changing ones that make no sense to us.
To customize your shortcuts, go to the Edit menu, and choose Keyboard Shortcuts near the bottom. In the resulting dialog box (Figure 12), click the New Set button and give it a name (you can’t modify the Default set).

Figure 12: Editing InDesign’s keyboard shortcuts.
Then, to add or change an item’s shortcut, you’ll first need to choose from the list in the Product Area menu, and then select the item in the Commands list. Don’t know in which Product Area a particular feature lives? No problem: Click the Show Set button in the dialog box and up comes a text editor with a long list of every shortcut in InDesign, categorized into product areas for your convenience.
Finally, to apply a keystroke, in the New Shortcut field, simply key in the shortcut as you’ll use it (for example, press the F2 key, and not F and then 2). If that keyboard shortcut is assigned to another action, it will warn you. Clicking Assign will assign the shortcut (and strip it from the other item if previously assigned). If you’ve made any additions, you’ll have to save your new keyboard shortcut set before clicking OK.
Migrating Shortcuts
When you update to a new version of InDesign, your shortcuts will make the trip, too. Starting with InDesign CC 2015.2, settings are synced by default when updating. If you don’t want them to update, deselect Advanced Options > Import Previous Settings And Preferences after you’ve clicked Update in the Creative Cloud app. In prior versions of InDesign CC, click the Sync Settings buttons in the lower left corner of the application window, or manage what settings get synced in InDesign’s preferences.
Quick Apply
Not every item can—or should—have a shortcut. For starters, remembering all those key combos would be a chore in itself. That’s where InDesign’s Quick Apply feature steps onto the main stage. With a simple keystroke of Command+Return or Ctrl+Enter, the Quick Apply feature springs to life in the form of a floating panel. That panel may well have a very long list of items, which doesn’t seem like it would be a timesaver. That’s because by default, Quick Apply is displaying all of InDesign’s styles—paragraph, character, table, cell, and object—scripts, and menu commands. If you start typing a portion of the name of the item you’re searching for, the list will grow shorter as you type. But if you’re typing something as common as “text,” your list isn’t going to feel very short. You can narrow Quick Apply’s search criteria by clicking the downward-pointing triangle (Figure 13) to bring up the search menu, and then making sure only your desired categories are selected.

Figure 13: To make using Quick Apply even quicker, deselect any categories you don’t want to include.
So, now we’ve narrowed our search to, say, text, cell, and object styles: what’s next? Typing “text” now will bring up all styles with “text” in the name. Selecting the one you want is as easy as using your arrow keys to navigate to it, and then pressing Return or Enter. Being able to access all your styles at once from one panel is a huge timesaver over having four or five individual styles panels open and cluttering up your workspace.
However, turning off and on each category is not practical if you’re constantly jumping between searching for styles, then scripts, then menu commands. If you have all of the options enabled, you can still search within just one category by adding a shortcut prefix (shown in parentheses in Figure 13) to your search term. For instance, if I don’t want to scroll through my huge list of scripts in the Scripts panel (and I often can’t remember the specific name, anyway), I can input “s:break” to find my elusive BreakFrame.jsx script. I can never find that sucker in the Scripts panel! Selecting it in the Quick Apply list and pressing Return or Enter will run that script. Similarly, selecting a style in this way will apply that style. And this is really cool: pressing Command+Return or Ctrl+Enter on a style opens the Style Options dialog box for that style so you can edit it.
Winning the Race Against Time
I hope the timesavers I’ve described above provide solutions for your individual workflow issues—or at least spark a search for the tool that will meet your workflow needs. Once, I tried to estimate how much time I would save by using all of these productivity boosters. I took note of how often I opened a file or saved one, how much time I spent on repetitive tasks, and how much time I spent going to the menu for something I could have used a shortcut on. I divided, multiplied, carried the one… but eventually the math was too much for me and I gave up. I couldn’t stand the irony of spending so much time figuring out how much time I had saved! Suffice it to say that even using just a few of these items can give you the ability to speed up your workflow, which will save you time, frustration, and mistakes.
Commenting is easier and faster when you're logged in!

Recommended for you

Die-Cutting and Your Print Job
Professional Die-Cutting Die-cutting is a great finishing method that can help y...

American Airlines’ New Logo
Question to ponder: If your company is a) in bankruptcy b) negotiating a potenti...

InCopy CS5 Workflow White Paper Now Available
Have you been to the InCopy product page on Adobe.com lately? If so you’ll...