

The other day I was working in Adobe InDesign, trying to reproduce a 1970s-era wallpaper look for the background of a poster. I was after something op-arty in pink and orange, with a random pattern of fat yellow daisies. (I confess I had my teenage bedroom in mind. The daisies were stickers I bought from the local head shop — think Partridge Family school bus art — and my mom grounded for me for a week because I plastered fifty of them all around my bedroom walls.)
After too many frustrated attempts at drawing the curvy daisy shape I wanted with InDesign’s Pen tool — note to self, you still can’t draw — I realized I had a ton of solutions right under my nose. Literally under my nose in my computer, buried in the ready-to-use artwork assets of InDesign, Illustrator, and Photoshop. If you have any of these programs, follow along as I show you a few tricks for locating and liberating the artwork so you can use it in your own projects as is, or as inspiration.
Our Friend the Glyphs Panel
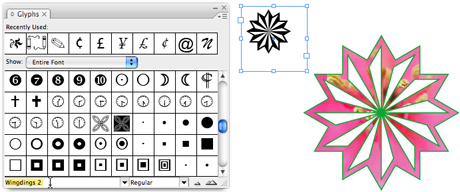
InDesign doesn’t come with any clip art (curses! why didn’t I become a CorelDraw trainer!), but you can whip up a library of simple outlined illustrations yourself with a combination of three things that are available: Your active fonts, the Glyphs panel, and the Type > Create Outlines command (Figure 1).
Figure 1. Use the font menu at the bottom of the Glyph panel to browse the character sets in your active typefaces (left). Double-click a glyph to enter the character at the Type cursor position (top right). After you select the character and choose Type > Create Outlines to turn it into an editable shape, you can edit the points on its path, scale it, fill or stroke it with a color, use it as a path for Text on a Path, even fill it with type or an image (bottom right).
With that triumvirate, you can convert any funky character in the Glyphs panel (essential for scrolling through entire character sets) into an editable vector shape. Surely, I thought, I must have a dingbat font with a daisy-ish flower. Alas, I didn’t find the flower I wanted, but if I ever need a pinwheel, I’ll know where to look.
Plumbing the Gold Mine that is Illustrator
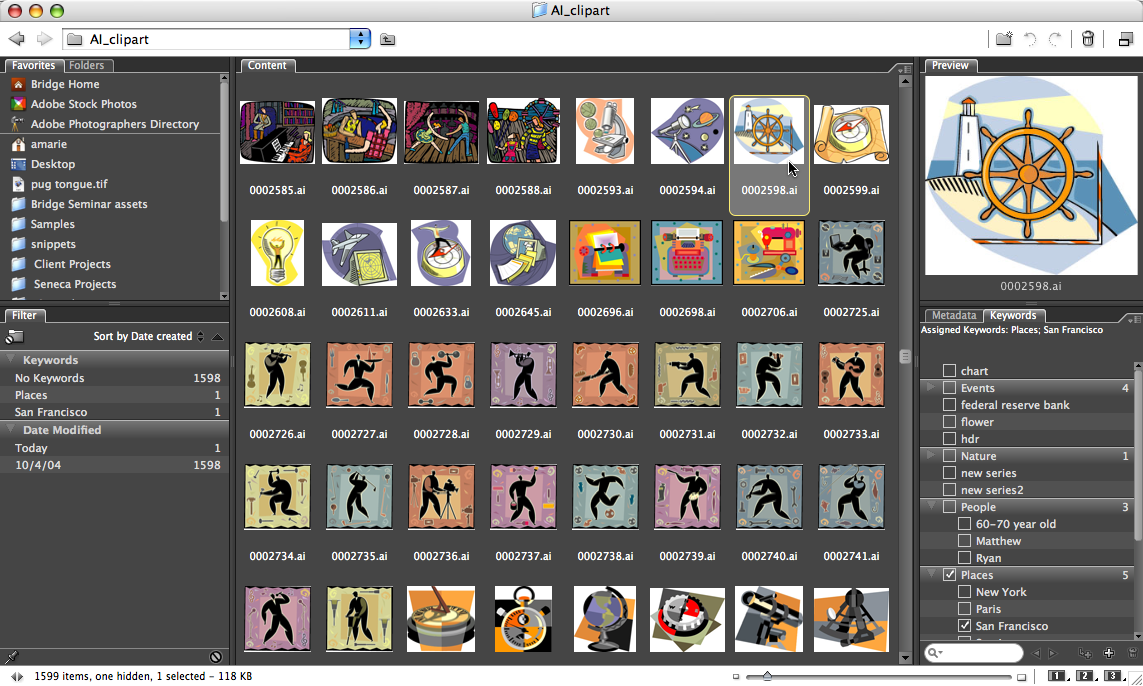
After adding “buy more dingbat fonts” to my to-do list, it was time to turn to the motherlode of reusable artwork: Adobe Illustrator. Not only does it come with thousands of royalty-free pieces of interesting vector clip art and templates (Figure 2) but its dozens of symbol, pattern and brush libraries can all be dissected into editable paths.
Figure 2. Unlike its templates and libraries, the clip art that comes with Illustrator CS (any version) doesn’t get installed by default. You have to manually copy the folder that contains them from the installation discs. For details, see an article I wrote a couple years ago. Once the assets are on your hard drive, add their folder to Adobe Bridge’s Favorites panel for a handy place to browse through them. Click on the image below to see a larger version.
My plan was this: After I found and isolated the perfect daisy (fingers crossed), I could import it into InDesign, or save it as an EPS to bring in to any page layout program. But since I was using InDesign, I planned on just copying and pasting the daisy itself, so I could edit the path in the layout. (More on this later on.).
Unfortunately, after spending fifteen minutes in Bridge flipping through the thumbnails of Illustrator clip art (Figure 2 above) and templates, I had to concede that the perfect daisy wasn’t part of any of them. Oh well — I did find some cool nautical images which might work for another project.
Time to investigate other Illustrator assets, the ones that are inside the program itself. I created a new Illustrator document and started searching for anything flower-like in its symbols, patterns, and brush libraries (Figure 3).
Figure 3. In Illustrator CS3, any panel that has additional libraries (swatches, symbols, etc.) has a convenient Libraries button in its lower-left corner (left). Click it to reveal the list of libraries (right) and select the one you want to open.
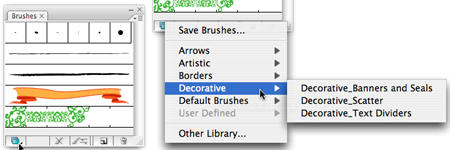
These three particular libraries (symbols, patterns, and brushes) contain literally hundreds of examples of artwork, some simple, some quite complex. While the individual elements are designed to be duplicated en masse — pattern tiles fill a shape, symbol art is sprayed on the artboard, brush designs scatter along a path — you can just as easily convert any individual library element to a stand-alone piece of editable vector art.
It’s very complicated. Ready? Drag the library item and drop it onto your Illustrator document. The end. Okay, time for a rest break. Seriously, you may want to scale it up to see it better, and sometimes you need to expand and/or ungroup elements, but otherwise that’s about all there is to it (Figures 4 and 5).
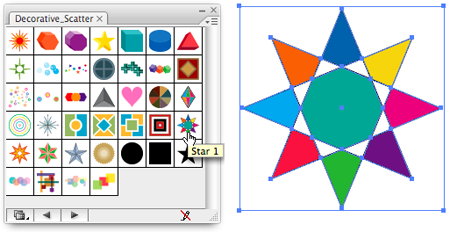
Figure 4. Lots of fun artwork here, but the star shape (left) by my cursor in the Decorative Scatter brushes library looks vaguely daisy-like, so I dragged it out of the library onto the artboard and then scaled it up (right) to get a better look. Hmm.. maybe.

Figure 5. To test it in my layout, I selected the star with the Selection tool, copied it to the clipboard, switched to InDesign, and pasted it into my document, where it came in as a grouped object. I didn’t even have to ungroup it (Object > Ungroup), I just jumpred right in with InDesign’s Direct Selection tool to start changing fill color and editing its points.
If copying and pasting isn’t working for you, turn on Copy as AICB in Illustrator’s Preferences > Clipboard area, and turn on Prefer PDF when Pasting in the same area of InDesign’s Preferences dialog box. I didn’t find either necessary in CS3, but I’m just quoting from the manual.
In the end, I decided the stylized star wasn’t going to cut it as a daisy, and I came up empty with the other libraries, too. Only a flower with fat curvy petals would do, just like those head shop stickers I saw clearly in my mind’s eye.
What to do? Go online and buy a subscription to a clip art library? Hire an illustrator? Give up on the daisies and use something else? Before I went down any of those paths (ouch), I thought I’d nose around the assets of one more Creative Suite program: Big Daddy Photoshop.
Photoshop Has Clip Art?
No, Photoshop doesn’t have clip art, but it does come with almost a hundred pieces of royalty-free stock photos (look in your Goodies folder on the installation disc). If I could find a picture of the perfect daisy, I could use Photoshop’s vector features to create an editable outline I could use in InDesign.
I couldn’t find a flower picture in any of the stock photos, but then I remembered (from using these so often during training) that there was a great image of a yellow sunflower in the Samples folder, which is installed automatically inside the Photoshop application folder on the hard drive.
Now, my plan was this: Create a clipping path around the flower’s petals, bring the photo into InDesign, and convert the clipping path into an editable vector shape (Object > Clipping Path > Convert Clipping Path to Frame). Then I’d delete the image from the frame, fill the shape with my daisy yellow color, and I’d be good to go.
Clipping paths are so easy to do in Photoshop these days. Just drag CS3’s new Quick Selection tool over the element in the image you want to isolate (the flower in this case), which takes about two seconds. Then click the button at the bottom of the Paths panel, Make Work Path from Selection. Name the path and you’re done! Both QuarkXPress and InDesign let you designate any named path as a clipping path.
But only InDesign lets you convert a clipping path into a shape frame that you can fill with a color, another image, or even with text, which is why I use the technique so often to add interest to my layouts (silhouettes of people, famous buildings — anything with a recognizable outline works well). Did it work for this project? You tell me (Figure 6).
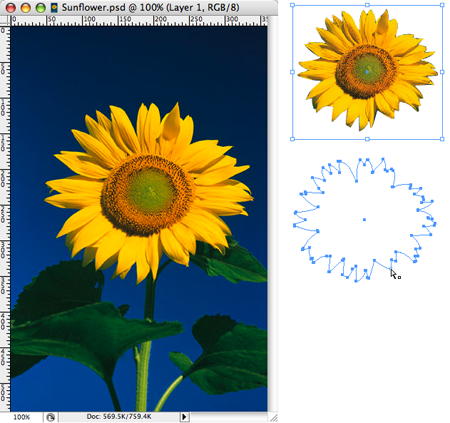
Figure 6. Left: The original Sunflower.psd image from Photoshop’s Samples folder. Middle top: Same image, after creating a clipping path around the flower and placing it into InDesign. Middle bottom: The clipping path converted to a standalone frame in InDesign (via Object > Clipping Path > Convert Clipping Path to Frame).
Okay, not even close to a daisy — you can stop laughing now. On the other hand, if I ever need a shape that looks like something I scraped off my shoe, I’d be good to go.
Still thinking about paths in Photoshop, I remembered that it actually does have something like clip-arty: Custom Shape libraries (Figure 7). Could there be a daisy-shaped custom shape lurking in there?
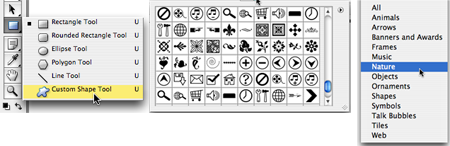
Figure 7. To access the Custom Shape libraries in Photoshop, you need to first select the Custom Shape tool: the blobby one that’s revealed when you press and hold on the default Rectangle tool (left). Now you’ll see a menu icon labeled “Shape:” in the Options bar. Click it to reveal the library of custom shapes (middle) that you can choose from. To see more shapes, select a collection from the library’s fly-out menu (at right, a portion of this menu).
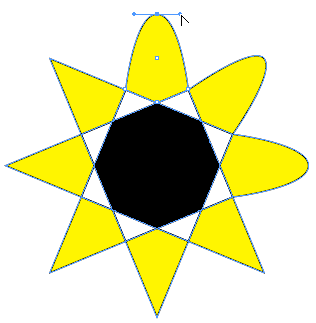
And there, ladies and gentleman, is the daisy shape I’d been looking for! Can you spot it? It’s the last one in the third row of custom shapes in the screen shot above. I selected it and dragged a nice big one across my empty Photoshop file (Figure 8).
Figure 8. Dragging out a custom shape creates a Work Path of that shape by default. To select it, use the Path Selection tool (the arrow above the shape tools) and click anywhere on the path.
Adobe hasn’t gotten around to letting us copy and paste paths from Photoshop to InDesign yet (you’ll get a weird but harmless error if you try). No biggie; just copy and paste it into an Illustrator document (which works fine, go figure), and from there, copy it with the Selection tool and paste into InDesign, just as we did earlier with the star paths.
Ta-da! A field of editable, vector daisies in InDesign lets me jazz up my poster background (Figure 9) using assets from the other Creative Suite programs. Hey, I paid for them, might as well use them, right?
Figure 9. A portion of the poster.

I can’t wait to show it to my mom!
This article was last modified on July 11, 2023
This article was first published on May 5, 2008
Commenting is easier and faster when you're logged in!

Recommended for you

Dotphoton Review
Every serious photographer knows that capturing RAW images has significant advan...

Using Perspective Warp in Photoshop CC
The big news in the latest Photoshop CC update is 3D printing—at least, that’s t...

Using the Blend Tool in Adobe Illustrator
Illustrator provides many useful methods to create color blends including the Gr...