

Easier Masking
One of the benefits of Adjustment layers is that they include a built-in mask you can use to constrain their effects. In previous versions of Photoshop, you controlled layer masks through the Layers panel, painting directly into the masks to constrain an Adjustment layer. This behavior is the same in CS4, but now Photoshop also has a Masks panel that gives you shortcuts to the Color Range and mask edge controls.
To use the Masks panel, first select an Adjustment layer you want to apply a mask to. Click the Mask panel’s Color Range button to bring up Photoshop’s standard Color Range dialog box. Color Range has been slightly upgraded, with additional options for controlling the boundaries of the color selection range. With the new features, you can now create more subtle transitions in color range selection.
After configuring Color Range, Photoshop automatically creates a mask and attaches it to the selected Adjustment layer. A feather slider lets you soften the edges of all boundaries within the mask, while the Density slider lowers the mask’s opacity.
Figure 5. The new Masks panel is a one-stop shop for all of your selective color Layer Masking needs.

If you prefer to work with vector masks, you can click on the Pen tool in the Masks panel to access Photoshop’s normal vector-masking functionality.
Aside from the improvements to Color Range (which is also accessible from the Select menu), the Masks panel doesn’t add any functionality. Rather, it consolidates many automatic masking operations you might normally use into a single panel. If you prefer to paint masks by hand, you’ll still use the old method.
To b honest, I didn’t even look at the masking panel until weeks after I’d started using the CS4 beta, because I can access my preferred masking functions as I did in CS3. While I doubt I’ll become a Masks panel devotee, it’s good for casual maskers and beginning maskers who want to start using Adjustment layer masks but aren’t sure how.
Improved Features
Many of Photoshop’s older features have received a new shine in CS4.
The Auto-Align and Auto-Blend features (released in CS3) are better. Where most users will notice the difference is in the Photomerge script, which stitches multiple images into a seamless panorama. While the CS3 stitching was excellent, the new version has smoother color transitions from one image to another. CS4 also does a much better job of correcting vignetting and barrel or pincushion distortion, further reducing color discrepancies across individual images.
The addition of depth-of-field stacking has improved Auto-Blend layers. You can shoot multiple frames that are each focused at a different distance, and Photoshop will merge all of the images, pulling the in-focus areas from each one, to create an image with very deep depth of field.
For this feature to work well, you must invest time and effort in set-up. A tripod is a must, and a moving subject won’t work. Even landscapes with very deep depth of field may not be practical, as blowing trees or moving clouds will ruin the results. For macro shooters, though, depth-of-field stacking is a great addition.
How Do They Do That?!
Perhaps the most impressive new feature is Content-Aware Scaling, which changes the proportions of an image without altering the subject matter.
Consider this original image (click it to see a larger version):

To place this image in a layout that required a different aspect ratio — say, a square – I could scale it horizontally, but then the motorcycles would be distorted:

Click above to see a larger version.
With the new Content-Aware Scaling command, I can resize the image to a square, yet Photoshop doesn’t scale the motorcycles. Once I choose Content-Aware Scaling from the Edit menu, handles appear on the edges of my image, as if I were using the Transform command. I drag these to resize the image and Photoshop does the rest. There’s no need to tell it what subject matter to leave as is. The software figures that out on its own, as you see here (click for a larger version):

You can also use Content-Aware Scaling to scale up. While the results are still impressive, you’ll probably see a little more distortion of your subject matter.
This incredible technology, one of the most remarkable Adobe has ever produced, will be very useful for creative professionals of all stripes.
More Bits and Other Enhancements
In an upgrade this substantial, it’s impossible to include every addition and tweak, but here are a few more worth mentioning.
Windows Vista users can run the program in 64-bit. It doesn’t boost performance, but it lets you take advantage of colossal amounts of RAM. That’s handy when you work on images greater than 4GB in size. While Mac OS X 10.5 (Leopard) supports 64-bit processing, Apple decided not to make the promised infrastructure changes necessary for Adobe to port Photoshop, so Adobe can’t be blamed for this omission.
Smart Objects (Photoshop’s mechanism for working non-destructively with raw files) have jumped a few IQ points. You can now apply scaling and geometric transformations to them, still in a completely non-destructive manner.
The Print dialog now shows out-of-gamut colors, and if you’re a Mac user, Photoshop now supports 16-bit printing. (Whether sixteen-bit printing is actually useful is another story, and one I hope to cover soon.)
Missing in Action
A few features have fallen by the wayside in CS4. The Extract filter is gone, as are the Picture Package, Contact Sheets, and PDF Presentations features. I never found the Extract feature especially useful as a masking tool, and as for the others, the Output module in Bridge CS4 can perform similar functions. However, it only outputs PDF, whereas Picture Package and Contact Sheets could create Photoshop documents. These are unfortunate omissions, and I hope Adobe sets things right in a future update.
In the meantime, you can use the old Picture Package and Contact Sheet plug-ins with the new version.
Also missing is any kind of local help system. Instead, Help is only on the Web, which means you must have an Internet connection to use it. I’m often away from an Internet connection, or limited to a slow connection, and I hate to think that means I can’t get answers when I need them.
Worth Every Penny
Buying Photoshop CS4 new costs $699. Owners of Photoshop CS, CS2, and CS3 can upgrade for $199, a great price for the new features. The upgrade costs $599 when you move from Photoshop 5 or 6, but you’ll also get the features added in CS, CS2, and CS3, and you’ll open the door to an entirely new workflow in Bridge.
Photoshop CS4 is a very impressive upgrade. Adobe has improved the interface without making the transition uncomfortable (and while preserving your ability to remained with the old interface), and has added important new features and updates.
Photoshop is not perfect. There’s still no easy-to-use straighten tool; there’s no way to tell why some features go in the Automate menu and some in the Scripts menu, which can make it difficult to remember where you found a feature; Bridge still lacks a histogram display; and there are other minor annoyances here and there.
But make no doubt about it: Photoshop CS4 is far and away the best image-editing tool around, whether you’re talking about ease of workflow or editing and adjustment power.
This article was last modified on January 18, 2023
This article was first published on October 23, 2008
Commenting is easier and faster when you're logged in!

Recommended for you

iStockphoto Releases a Plug-in for the Creative Suite
iStockphoto has released a plug-in that allows Creative Suite users to browse, p...
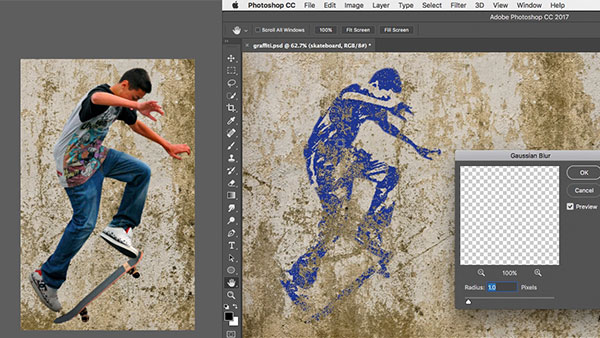
How to Turn a Photo into Graffiti with Photoshop
You can turn any photograph into a piece of graffiti artwork in Photoshop, witho...

Scanning Around with Gene: Getting That New Bike Down the Chimney
Vintage images and memories from when a shiny new bike was the ultimate Christma...