Putting Headings in Rounded Rectangle Background “Frames”
You want a heading in a rounded-corner rectangle, but you don't want them in a separate frame. Can do!

S.G. wrote:
The mission: devise a way to make a heading appear in a filled rounded bar or rectangle without creating a separate text box.
Well, there’s good news and bad news, S.G. First, the good news: it can be done. You already know the trick of making a headline behind a paragraph using paragraph rules (just use a really thick Rule Below and change the Offset value). And you may even know how to create a cool highlighter effect or how to create a background color or tint behind a whole paragraph using a custom underline or anchored frame.
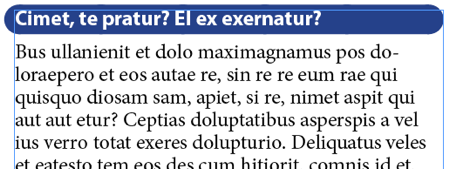
But here’s how to kind of mix it all up and get the effect you want: Create a Rule Above or a Rule Below that is thick, with a negative offset, and — if you want it to hang out in the margin a little — uses a negative Left Indent. Most importantly, you choose one of the dot stroke styles from the Type popup menu and choose the same color for the stroke and gap.

Here’s what it looks like when you apply this to your heading:

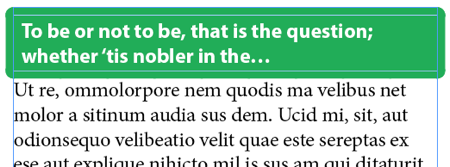
So that’s a great step forward. But here’s the bad news: It will only work when the heading is a single line. If your heading is two or more lines, then this trick won’t work very well because the ends are rounded, not really rounded rectangles.
On the other hand, if you can finagle those headings into a single-celled table, you might be able to use this trick to create rounded corners on the table. The table cell can grow to any size:

Other ideas?
This article was last modified on December 21, 2021
This article was first published on October 1, 2011


?????,??????????,?????????????????????????,????????????:????????????????????,?????????,??????,??????,??????????????????,???????????????????????????
Use the type tool to draw a text frame. Fill the text frame with text. With the frame selected, go to Object > Text Frame Options. In the Inset Spacing field, enter a value ( like 10 pt). With the Direct Selection tool selected, select the text frame, assign a color, then go to Object > Corner Options.
To me, this is a much better solution.
(My previous comment had a couple of typos, here is the revised comment)