




Maha wrote: In the paragraph style, how to create bullets before and after the text.
Well, InDesign’s automatic bullets feature (which you would use for a list) only places bullet characters at the beginning of a paragraph. You can kind of fake it, putting the bullet at the end, which Bart Van de Wiele described in Issue 56 of InDesign Magazine, and which I modified for numbering in this article.
But that technique won’t let you put a bullet on both sides of a heading.
There is one way to do it, though… it’s kind of a hack, but it works, as long as the heading is only a single line.
Here’s the result:
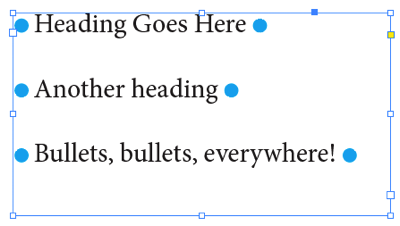
And here’s how it’s done: Use a Rule Above and a Rule Below.
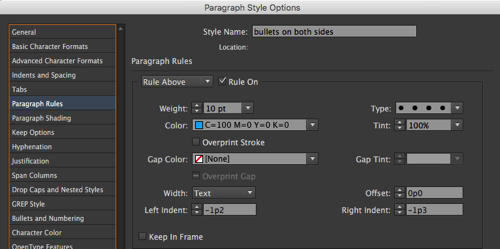
The Rule Above is a dotted, very thick rule that extends past the end of the text:
The Rule Below is a solid, even thicker white (Paper) stroke that covers up the blue dots:
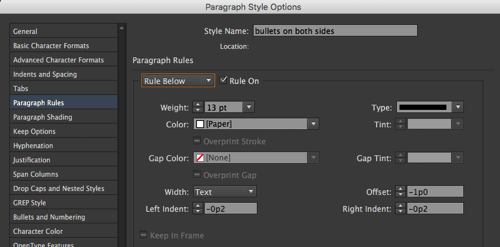
Oh, and to keep the whole thing inside the text frame, I also increased the Left Indent a bit.
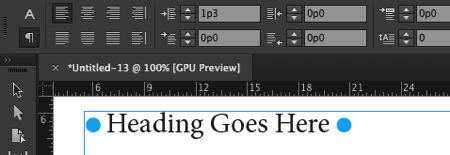
So, however long the line of text, the strokes extend a little farther on the left and right. The “dot” size and color is based on the Rule Above.
It takes a little experimentation to get right, but once you have it, it’s a paragraph style, so it’s easy to apply over and over again.
This article was last modified on July 25, 2019
This article was first published on August 31, 2016
Commenting is easier and faster when you're logged in!

Recommended for you
How to Add Paragraph Rules in PowerPoint
This clever workaround creates InDesign-like paragraph rules in PowerPoint.

Free Webinar: Super Simple PowerPoint Slides
Learn how to quickly create simple, professional slides that connect with your a...

Vertical Rules (Pre-CC2017)
You can define horizontal rules (one before, one after) in InDesign's paragraphs...