
Alicia Buelow is one of those Photoshop artists whose unique style helps her produce memorable images. Once you’ve seen her work, it can be difficult to get the images out of your head.
In a tutorial written by Buelow and in a follow-up interview with her, you’ll learn how this illustrator and designer uses Photoshop to create her signature style.
Photoshop How-To
by Alicia Buelow
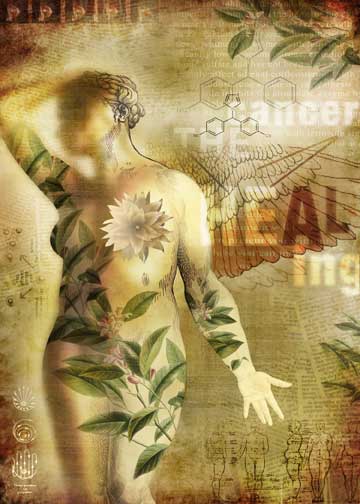
I was asked to create a poster for a pharmaceutical company to illustrate the experience of healing from cancer. I approached the subject from the aspect of growth and nurturing (Figure 1).

Figure 1. For the final image seen here, I wanted to create a single woman with a unique feeling and emotion. Click on the image above for a full-sized view.
I created the final illustration by merging images of two different women (Figure 2) in Photoshop, then using Paths to create a shape from the combined images. By using Paths rather than the Selection tools only, I was able to create a much smoother outline of the bodies.
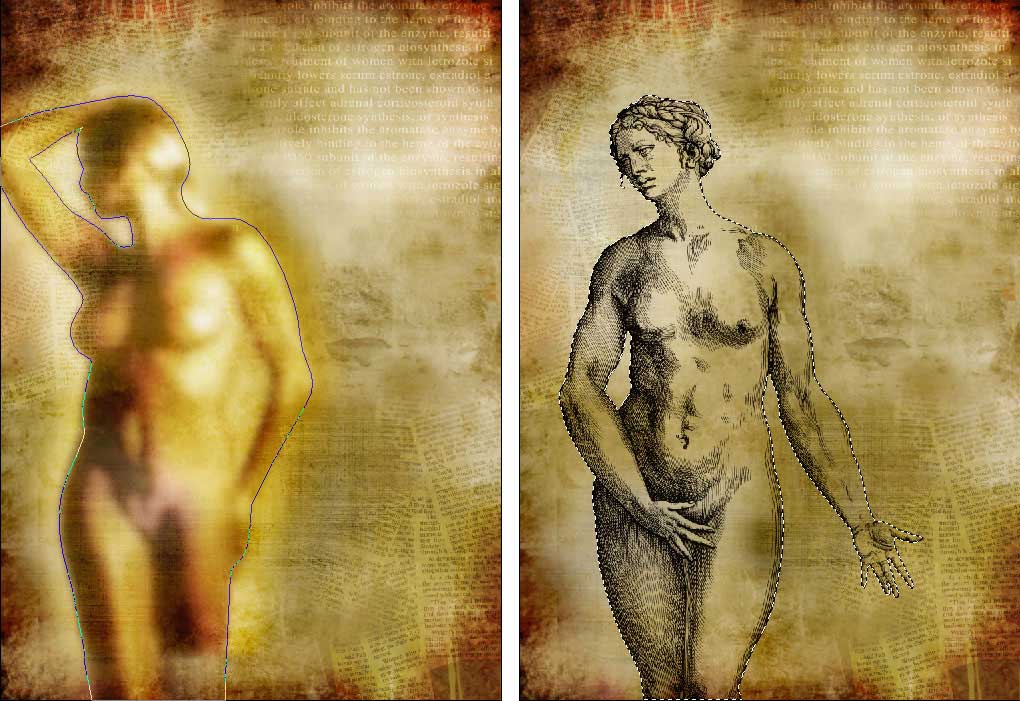
Figure 2. I started with these two images. Click on the image above for a full-sized view.
Using the Pen tool, I drew a path around the first woman. The path for the second woman was easier. Using the Magic Wand Selection tool, I simply selected the background of the woman layer and then chose Select> Inverse. I then used Photoshop’s Path palette to quickly create a path from the selection. To create a path from the selection, I clicked on the Paths palette tab, then I clicked on “Make work path from selection” (the fourth icon from the left at the bottom of the palette) (Figure 3). I then had two paths.
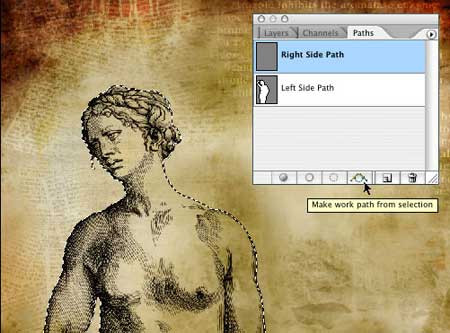
Figure 3. Making a path from a selection is easy.
Using a guide, I marked the center of each of the paths (Figure 4). Then I deleted the half of the path not needed from each of the paths so I had two half paths.

Figure 4. I cut each path down the center. Click on the image above for a full-sized view.
To easily load a selection of the first path, I held down the Command key (Mac) and clicked on the path thumbnail. Then I added to the selection by holding the Command key + SHIFT key and clicked on the second path. I then had a combined selection of the two women (Figure 5).

Figure 5. The two selections combined. Click on the image above for a full-sized view.
With the selection still active, I opened a new image containing an image of leaf foliage. I selected the entire image, copied it, then chose the menu command Edit > Paste Into. Photoshop automatically created a Layer Mask of the selection and the leaves were masked accordingly (Figure 6).

Figure 6. Photoshop automatically masked these leaves when I pasted them into the image of the composite woman. Click on the image above for a full-sized view.
I chose the Layer blending mode Multiply to allow the original body images to show through (Figure 7).
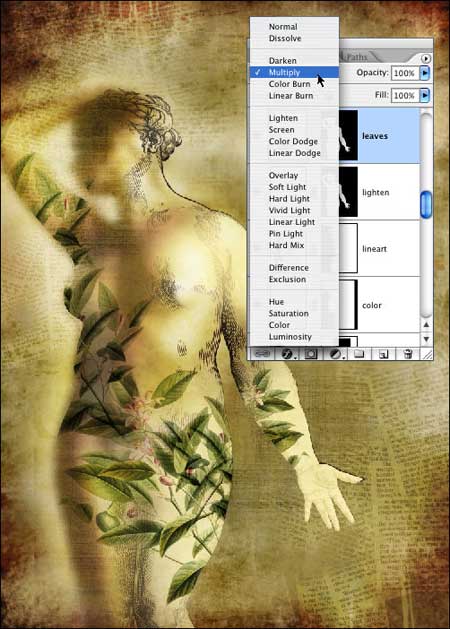
Figure 7. By choosing the Layer blending Mode Multiply, I let the body image show through.
Finally, I added the supporting elements to the background to finalize the poster image (Figure 8).

Figure 8. The final image incorporates everything: two bodies merged into one, leaves, and supplementary figures and words that relate to the theme of healing from cancer. Click on the image above for a full-sized view.
For Buelow’s take on merging technology and the personal, see page 2.
This article was last modified on December 14, 2022
This article was first published on November 30, 2005
Commenting is easier and faster when you're logged in!

Recommended for you

Using Color Fonts in Photoshop with Fontself
Color fonts have been touted as the Next Big Thing. They aren’t universall...

Create Patterns With Adobe Capture CC
How do you create beauty? There’s the old fashioned way: First, create the...
Knowing Your Camera: The First Step for Getting Better Results in Photoshop
Understanding the abilities of your camera and Photoshop can help you produce be...