
PageMaker How-To: Creating a Graphics Portfolio

Copying the Two-Page Spread Setup to New Pages
Before you add the graphics and information to the two-page spread, it’s a good idea to copy the setup to two new pages. This allows you to easily expand your portfolio as you continue to create more designs. To do this, choose Layout > Insert Pages to display the Insert Pages dialog box. Enter 2 in the Insert x Page(s) text box, as shown in Figure 10, and click Insert. PageMaker advances you to pages 4 and 5.

Figure 10: Before you fill in the frames, add a new two-page spread onto which you can paste a copy of your frame setup.
Now click on the Page 2 icon to return to the previous spread. Simultaneously select all of the frames with the Pointer tool. Press [command]C ([Ctrl]C in Windows) and then click on the Page 4 icon. Power-paste the frames in place on the new spread by pressing [command][option]V ([Ctrl][Alt]V in Windows). Leave the frames grouped until you’re ready to add new designs to this spread. This way you can easily copy them to pages 6 and 7 first, and so on.
Placing Graphics and Text on the Inside Pages
Now that your two-page spread has been copied for future use, you can add 10 images with their respective descriptive text to pages 2 and 3. (To include all 15 images you’ll have to use the frames you just added to page 4.) You can organize the images any way you want, such as by design type, application used, client, etc.
To begin, click on the Page 2 icon to return to that spread. Then simultaneously select each row and press [command][shift]G ([Ctrl][Shift]G in Windows) to ungroup the frames. Click on the first frame in the first row and place the first image, as described earlier. (Click off to the side first to deselect the frames if needed.) Now in the following two frames that were threaded together, place or type the text that describes the name of the design, the originating application, and information about how you created it or solved any problems. Because you’re working with narrow columns, be sure to watch for poor hyphenation. Also, make sure to use the Spelling command and proofread your document.
For our portfolio, we used the last frame to include the tools and commands that we used to create the design, as shown in Figure 11. You might also find it helpful to use styles for the title, application, and body text. Repeat this process for the remainder of the images in order to complete your portfolio.
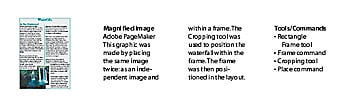
Figure 11: Each thumbnail image is explained in the adjacent frames.
Final Output
When you’ve completed your portfolio, print it to a color laser printer or have it printed at a copy center-the better the printer, the more professional it will look. Then fasten the pages together or insert them in a binder or whatever method you choose. Or, if you plan to attach the portfolio as part of an email message, choose File > Export > Adobe PDF to create a PDF file.
As a designer, you have your work cut out for you. You’re expected to be creative at all times and technologically up-to-date in the graphics arena. With all that responsibility, not much time is left to keep your portfolio up-to-date. But setting up a graphics portfolio like the one we’ve shown here will make your job (or getting one) just a little easier.
This story is taken from “Inside PageMaker” (Element K Journals).

Creativepro.com readers can subscribe to Element K Journals at a discount. Click here to learn more.
This article was last modified on January 3, 2023
This article was first published on August 16, 2002
Commenting is easier and faster when you're logged in!

Recommended for you

New Solid Converter PDF v3.1 Makes PDF Conversion Easier than Ever
Solid Documents, a leading provider of document utility products, today announce...
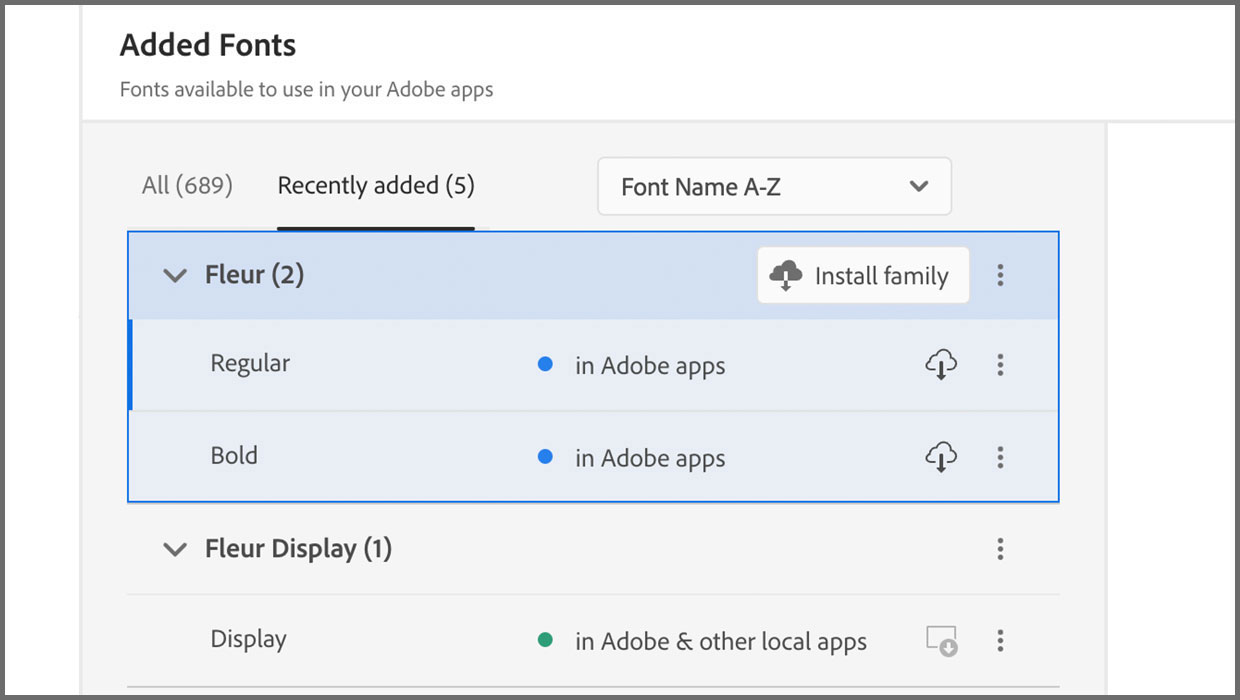
Added Fonts: The Confusing New Change in Adobe Fonts
Learn about Added Fonts in Creative Cloud, which can only be used in Adobe apps...

Mohawk Introduces FSC Certified and Carbon Neutral Beckett Cambric: A Sustainable Linen Paper
Mohawk Fine Papers Inc. announces the relaunch of their premium linen paper grad...