


Figure 5 shows the High Pass filter, and the resulting image. It’s a little crunchy in the skin tones (I’ll fix this next) but it’s a much sharper image now, and I haven’t touched the pixels in the background layer. I can vary the strength of the sharpening globally, by adjusting the opacity of the duplicate layer, but a much more powerful technique is to add a Layer Mask to the layer, then edit the layer mask.
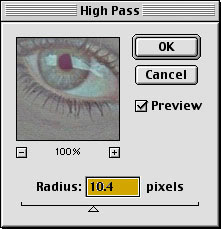
Figure 5a: The Photoshop High Pass filter

Figure 5b: Sharpened
It’s largely a matter of preference whether you choose to add a Layer Mask using Reveal All or Hide All. Use Reveal All if you’d rather paint in smoothing, and use Hide All if you’d rather paint in sharpening. In Figure 6, I used a Hide All layer mask, then used a soft-edged brush to paint in sharpening on the eyes, lips, hair, hat and scarf, while leaving the skin texture soft. Bear in mind that you can vary the opacity of the paint for further fine control over the sharpening.

Figure 6: Sharpened by using a High All layer mask and painting in sharpening with a soft-edged brush
As with Unsharp Mask, the critical parameter in this technique is the Radius setting, this time with the High Pass filter. Again, low-frequency images — those with close subjects and soft detail — generally require a higher Radius setting than high-frequency images with lots of fine detail. Figure 7 shows an unsharpened high-frequency image, the High Pass filter settings, and the resulting sharpened image.

Figure 7a: Unsharpened
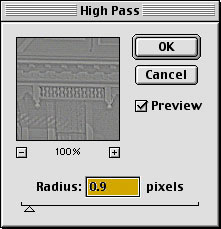
Figure 7b: High Pass filter settings

Figure 7c: Sharpened
You can stack multiple sharpening layers to address different parts of an image. The sharpening applied in Figure 7 looks quite good, but the distant buildings are still a little soft. Adding a second duplicate layer, filtered using a higher Radius in High Pass, makes the background a little sharper, but doesn’t do much for the foreground. Adding a Layer Mask set to Hide All lets me paint the additional sharpening into the background without making the foreground crunchy, as shown in Figure 8.
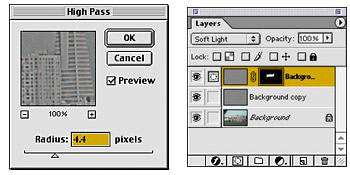
Figure 8a: To sharpen the background, we increased the Radius in the High Pass filter and created a Layer Mask, so we could paint additional sharpening into the background.

Figure 8b: Sharpened
You can, of course, combine the use of Unsharp Mask with sharpening layers, applying modest unsharp masking, then using layers to pump up the sharpness in critical areas. The third alternative, which we’ll examine next time, is to create a mask, load it as a selection, then apply the Unsharp Mask filter to the selection. It’s really the only way to sharpen high-bit images ideally, but it can also be useful for 8-bit creations.
The bottom line is that sharpening is a very subtle business. No single technique is likely to do justice to every image. The more sharpening techniques you have at your disposal, the better your images will be where it counts, on final output, whether it’s to screen, to a desktop printer, or to a press.
This article was last modified on January 3, 2023
This article was first published on January 25, 2001
Commenting is easier and faster when you're logged in!

Recommended for you

Creating Editable Extruded Text in Photoshop
Extruded text is a popular effect, and it’s not difficult to create...

PhotoSpin Expands Their Lifestyle Collection With New Images By Yuri Arcurs
PhotoSpin, www.photospin.com, a leading royalty free stock subscription company...

Integrating 3D Text into Images with Photoshop
This is a technique you’ll have seen in countless films and TV shows, from...