

When a person’s image is well-known, it can be recognized even under severely limited conditions. We can turn this to our advantage by creating a portrait made entirely of words. Here, we’ll build a portrait of Abraham Lincoln composed entirely of his first speech to congress.

Step 1: Choose your image
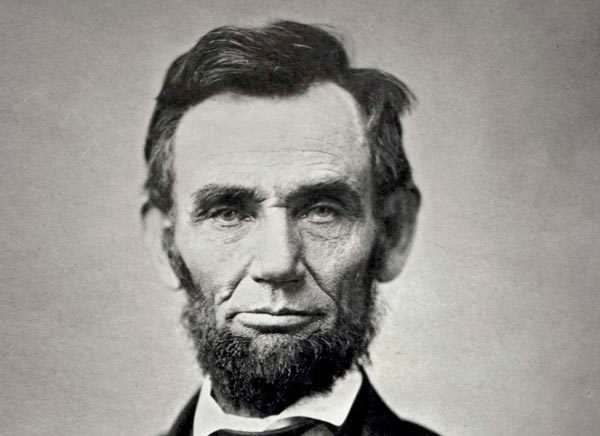
To produce this impressive technique you need a portrait that’s clear, recognizable and with a lot of contrast. This image of Lincoln works well: those striking features and beard are instantly recognizable to just about everyone on the planet.
Step 2: Add your text
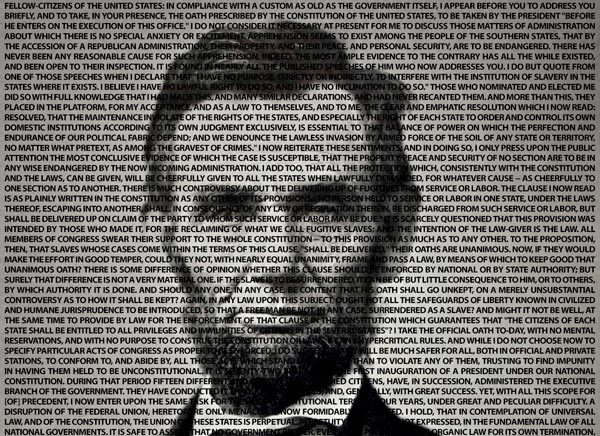
Draw a text box and fill it with the text you want to use. This technique works best with small text, set in bold so that it has weight on the page. Set the text to Full Justify, which will also space out the last line, and tighten the leading so there’s only minimal space between the lines.
Step 3: Duplicate and blur
You’re going to use the Displace filter to make the text run over the contours of the image. But if you just use the raw image the detail will make the text ragged. Instead, duplicate the image of Lincoln, and use Filter > Gaussian Blur so that all the fine detail is hidden, leaving just the light and shade. Then Save the image.

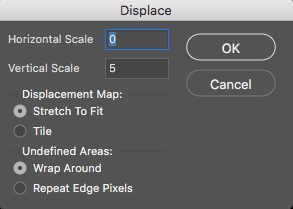
Step 4: The Displace Filter
Duplicate the Text layer – you might need it again later – and choose Layer > Rasterize > Type. This will turn the text into a regular pixel layer. Then choose Filter > Distort > Displace, and set the Horizontal Scale to 0 and the Vertical Scale to around 5 (otherwise it will displace too much). When you click OK you’ll be presented with a standard Open dialog: choose the file you just saved.
Step 5: The displaced text
Here’s the result of the Displace action on the text: you can see how it rolls over the contours of Lincoln’s face. Note that here I’ve hidden the blurred Lincoln layer, revealing the original beneath it.

Step 6: Load up the text
Load the rasterized text layer as a selection by holding Command/Ctrl and clicking on its thumbnail in the Layers Panel. Then hide the rasterized text layer. Then switch to the original Lincoln layer, and use Command/Ctrl J to make a new layer from that selection. Add a new layer beneath the text, and fill it with black.

Step 7: Lighten up
Because some of the Lincoln layer was pure black, the text made from that area is invisible against the black background. If your image is like this, open Adjustments > Levels and drag the black slider under Output Levels to the right, to brighten the pure black of the text and make it legible.

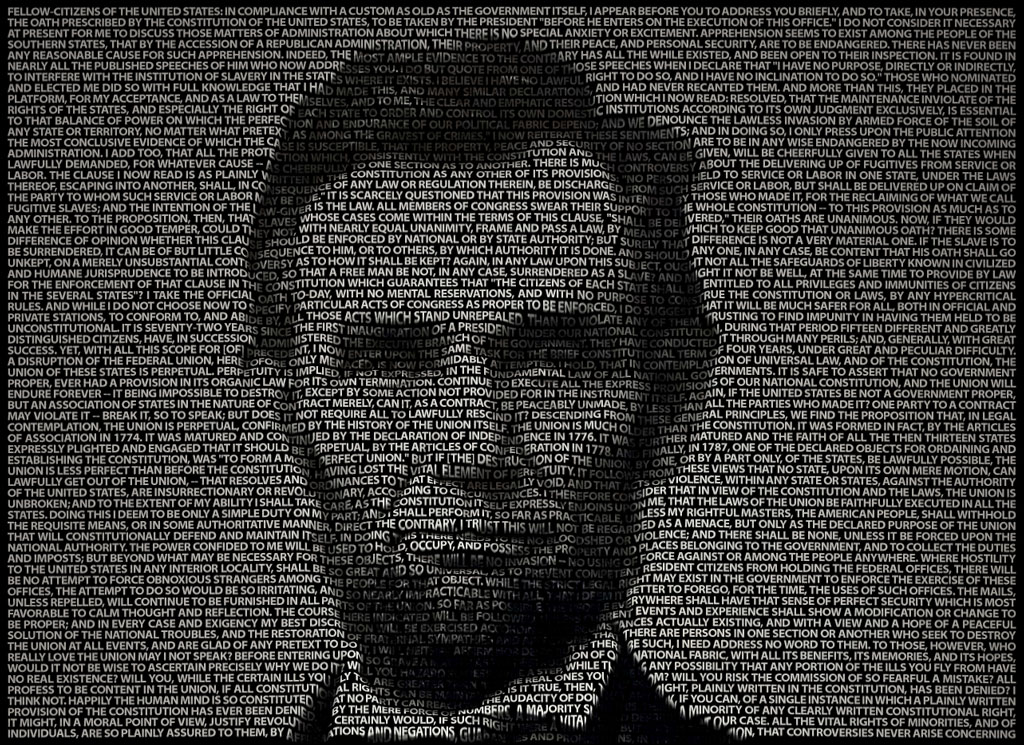
Step 8: The finished result
Here’s the finished image. Although it looks as if there’s a photo behind the text, there isn’t; the image is made of type that’s darkened to match the original photograph. The fact that the text appears to roll over the contours adds a 3D effect that makes the end result much more striking.
You can click here to see a larger version of this image.
Here’s a video showing the technique!
This article was last modified on June 13, 2018
This article was first published on June 13, 2018
Commenting is easier and faster when you're logged in!

Recommended for you

How to Adjust Colors in Photoshop Using Hue and Saturation
Learn how to manipulate an image’s colors using Photoshop’s Hue and Saturation s...

The Excuse Moose
Some creative blöks are easily side-stepped or avoided, such as the Perfection F...
Photoshop Automation
A basic introduction using actions, scripts, and data driven graphics to make yo...