
The April 2025 release of Adobe Photoshop is all about selections, both within Camera Raw and inside the main interface. There are some groundbreaking new features in Photoshop that make this a seriously worthwhile upgrade.
Selecting People
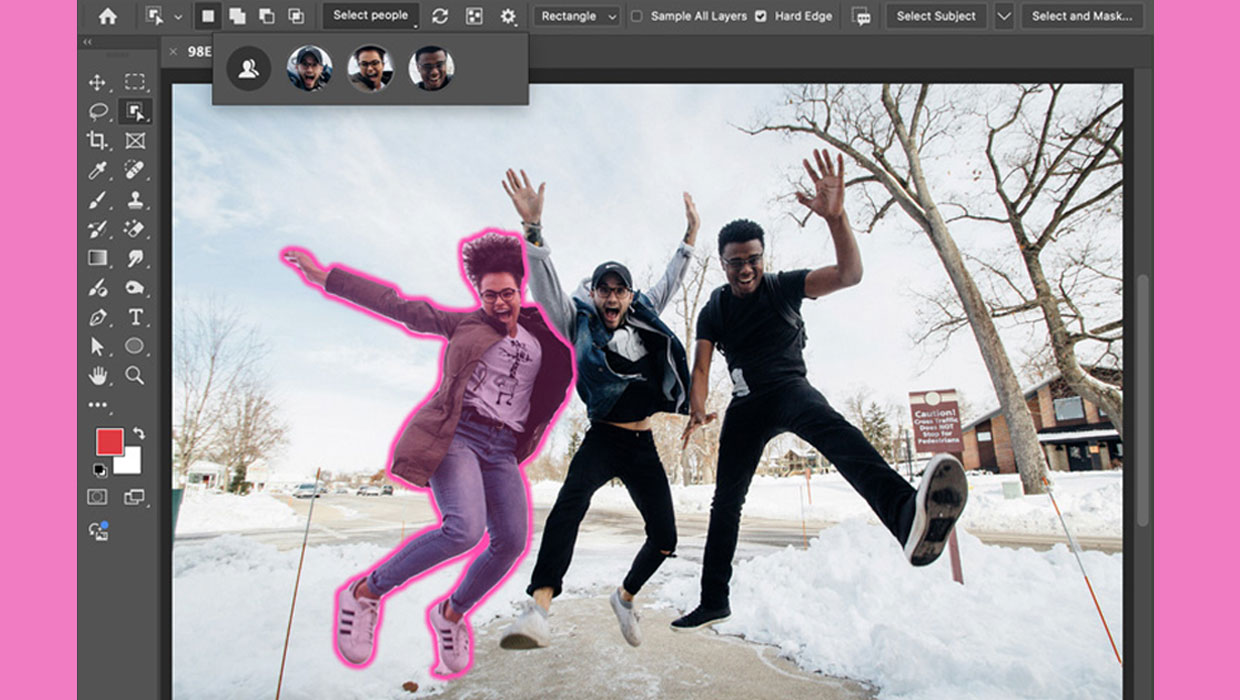
Open an image with several people in it, and switch to the Object Selection tool (if you can’t see it, it’s nested behind the Magic Wand tool). Photoshop will take a couple of seconds to examine the image, and will then show head shots of all the people it finds beneath the Select People button in the Options Bar. Rolling over each of these faces will highlight the entire person.

Automatic Body Parts
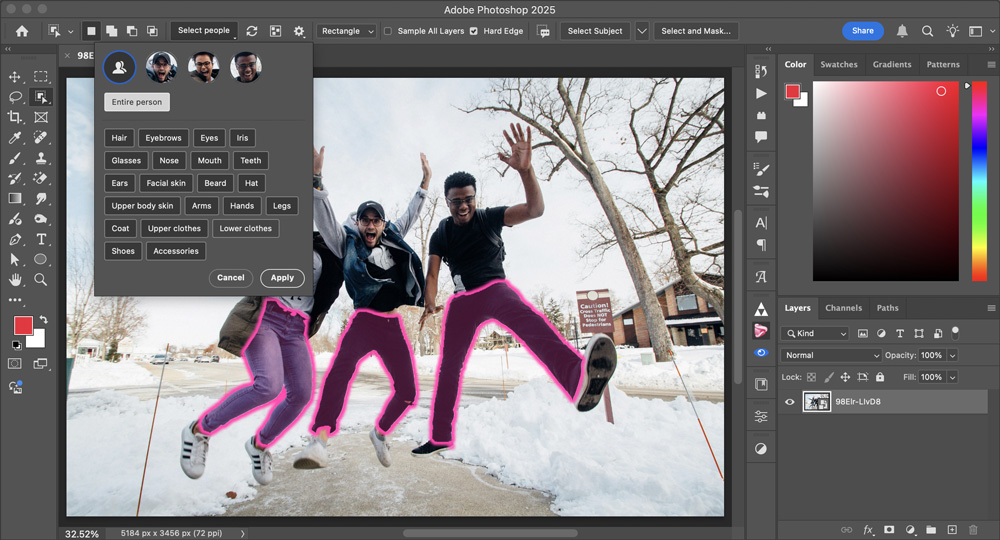
Click the People icon to the left of the faces, and a pop-up will appear showing all the person elements Photoshop can find. These include body parts such as Arms and Legs, as well as Upper and Lower Clothes, Shoes and Coat; there’s even a button to select Accessories, which will find watches and jewelry.
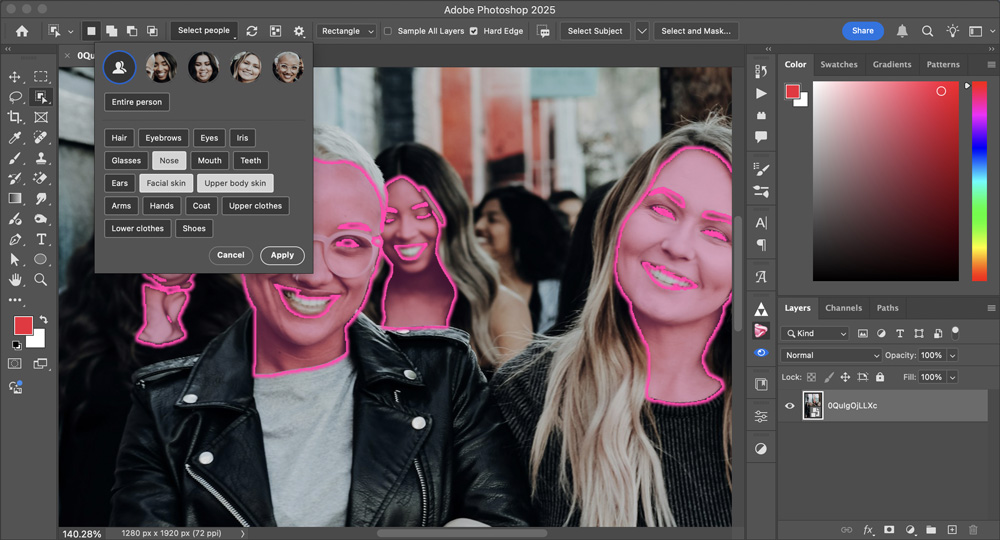
Facial Elements
As well as body parts, Photoshop can isolate individual features on multiple faces. There are buttons to select Hair, Eyebrows, Eyes, Irises, Glasses, Nose, Mouth, Teeth and Ears – as well as Facial Skin and Upper Body Skin. You can click multiple buttons to add to your selection; here, clicking Nose, Facial Skin and Upper Body Skin highlights each of these areas on all the bodies in the image. Click the Apply button to activate the selection. This is great for changing the saturation or color of all the skin in your image at once.
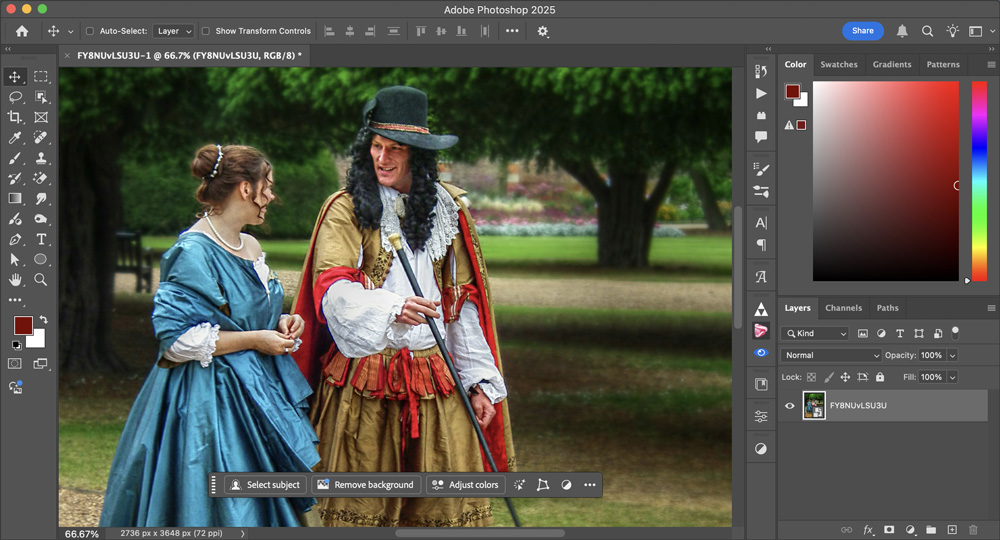
Select by Color
You can use the selections made in the previous step as the basis for an Adjustment Layer to enable non-destructive editing of individual features. But there’s now another way: the floating Task Bar now includes an Adjust Colors button.
Automatic Color Interpretation
Clicking the Adjust Colors button creates a new Hue/Saturation Adjustment Layer, and looks through the image to find all the most prominent colors in the image. These are added as swatches, and clicking one of the swatches brings up the standard Hue/Saturation controls. So here, it was easy to change the color of the woman’s dress.
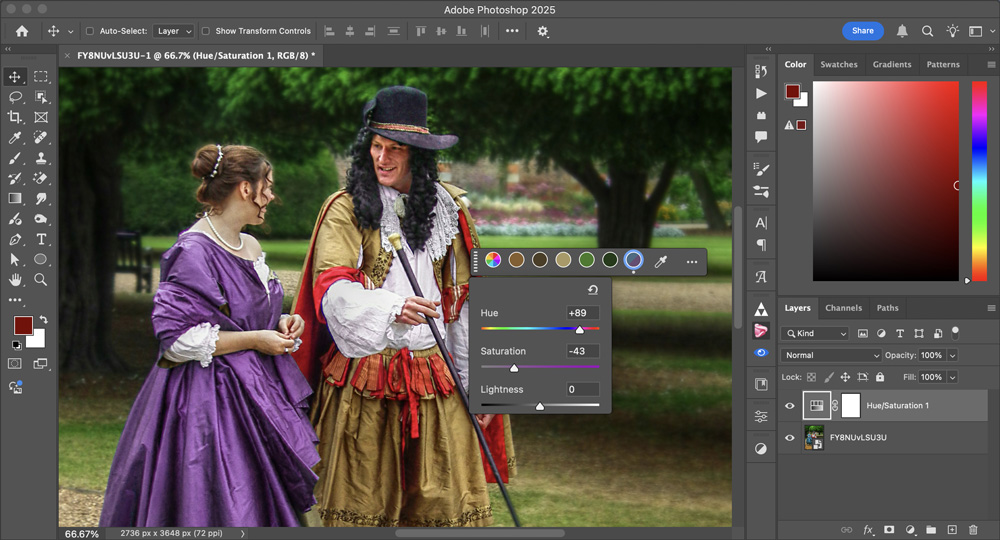
Add Your Own Colors
Photoshop only finds the most prevalent colors automatically, so in the above image it didn’t find the red flashes in the man’s clothing. But if you select one of the other colors, you can use the Eyedropper tool to the right of the color selection. You can now adjust just that color within the image.

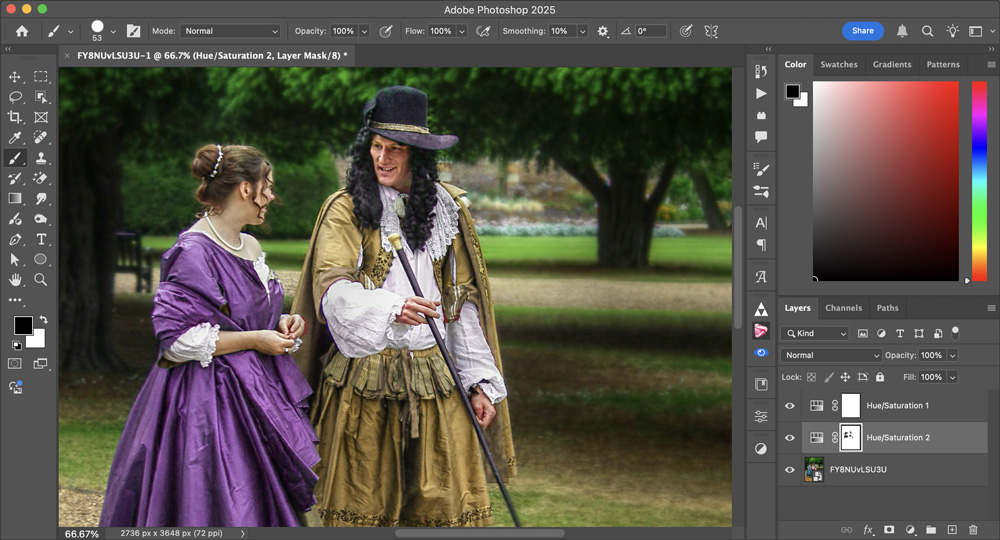
Edit the Color Adjustment
In the above case, changing the hue and saturation of the red flashes to match the rest of the man’s clothing also changed the color of the skin tones. But because each color change appears on a separate Adjustment Layer, it’s easy to paint in black on the accompanying mask to paint out those areas where you don’t want the color change to take effect.
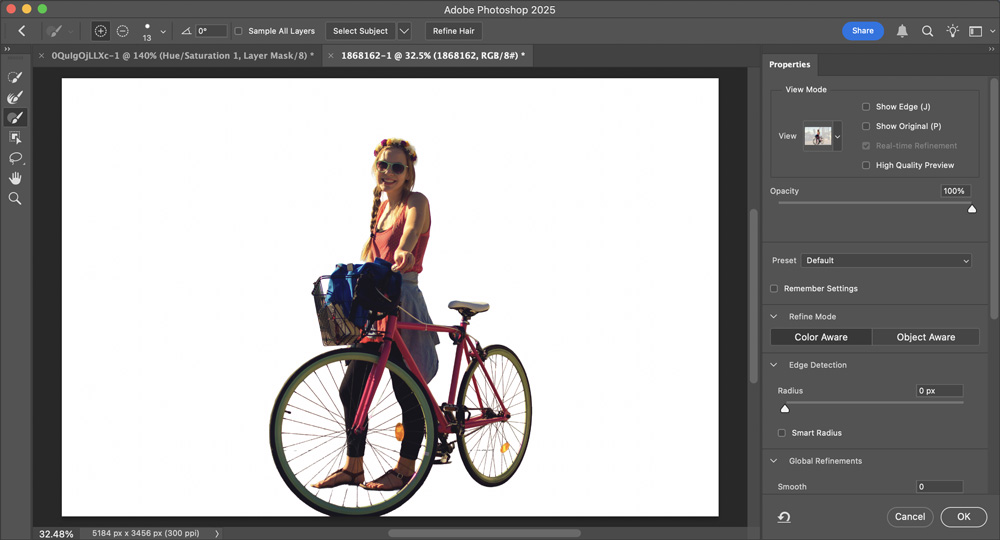
Intricate Selections
The automatic selection technology has undergone a huge quality improvement in this release, with the ability to select previously impossible objects. Here’s a woman with a bicycle, a combination what would previously have caused Photoshop to produce very inaccurate results.
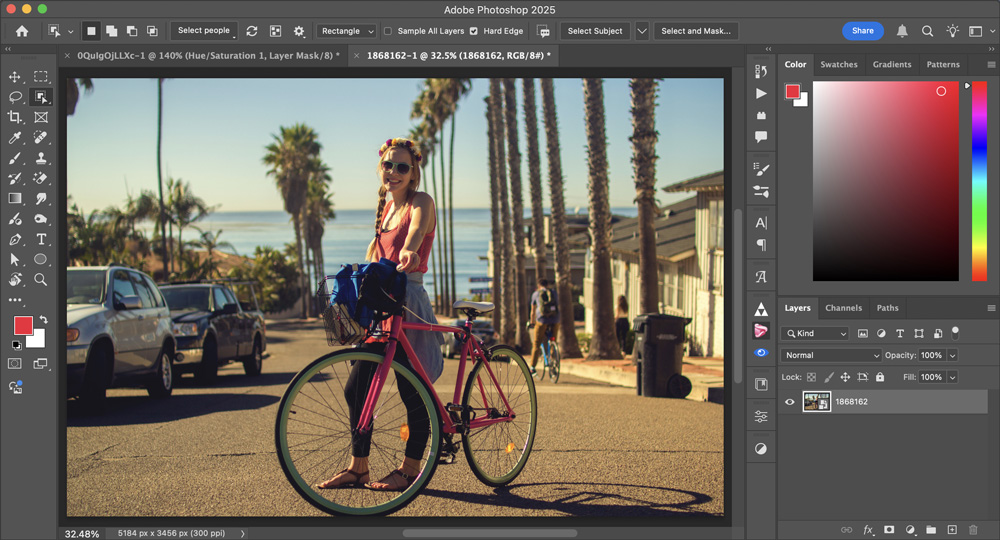
One-Click Selection
Choosing Select Subject, in this instance, correctly selects the woman and the bicycle. But look closer: those ‘marching ants’ aren’t just around the perimeter, but within the structure of the bicycle itself.
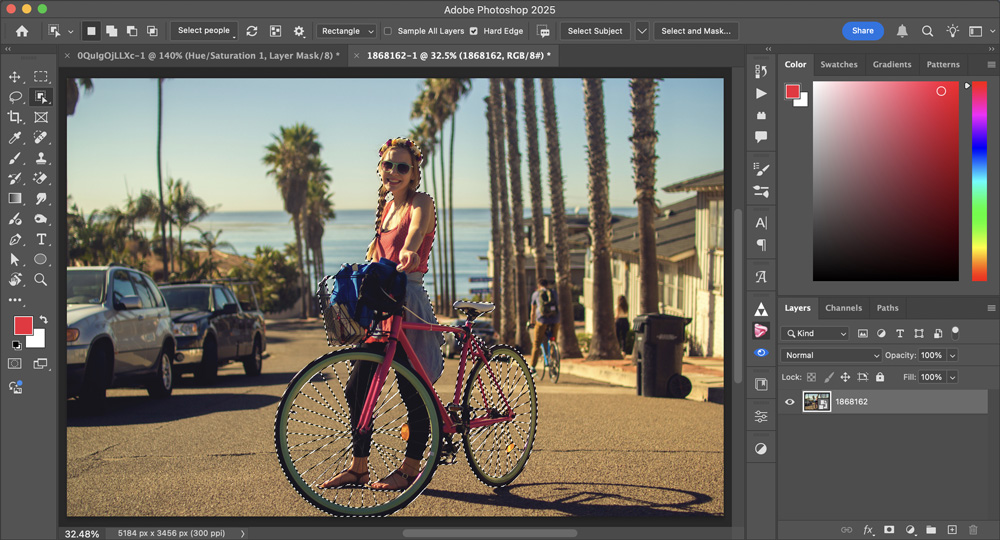
A Closer Look
Choosing Select and Mask from the Options Bar lets you examine the selection in more detail. Notice how the individual spokes within the bicycle wheel are perfectly selected. Not only would this previously have been an impossible task to automate, it would have been a major challenge for even the most adept Photoshop expert to select these spokes manually.
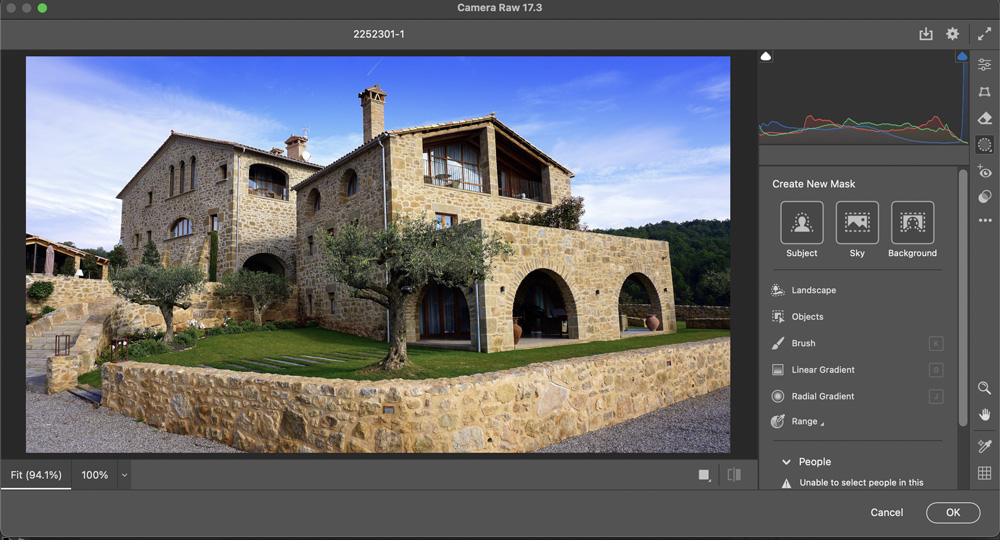
Camera Raw Improvements
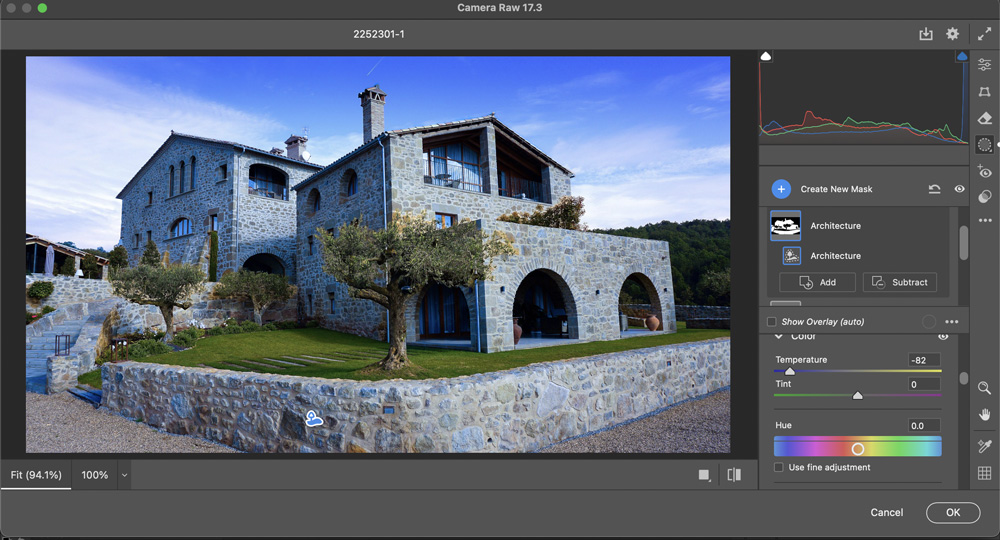
Open a landscape image in the new Camera Raw dialog, and click the Mask icon. As well as being able to select the Subject, Sky and Background, there’s a Landscape button which hides a major new feature.
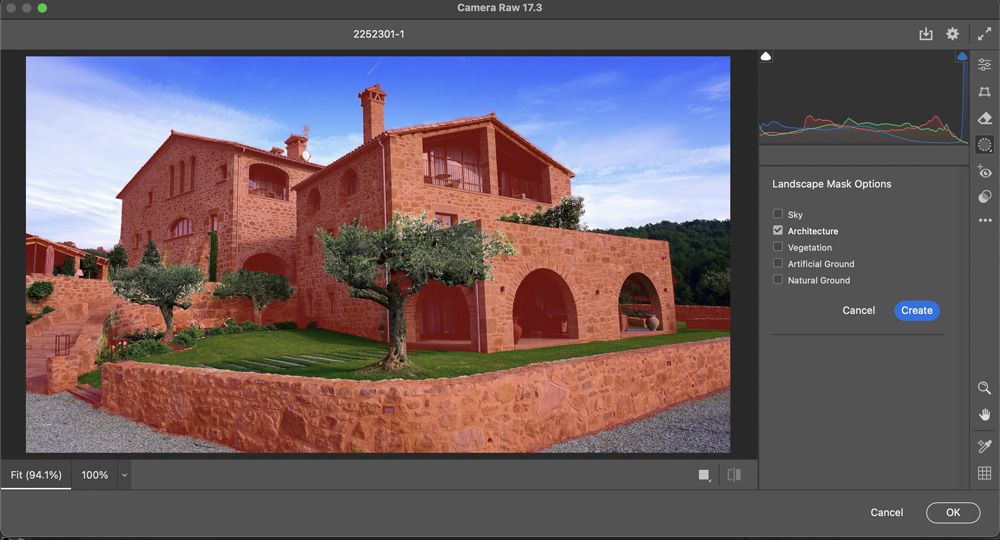
Interpreting the Landscape
Click the Landscape button and options will appear for you to select the Sky, Architecture, Vegetation, Artificial Ground and Natural Ground, creating a mask for each one. The red overlay here shows the Architecture highlighted, and it’s remarkable how accurately Photoshop has separated it from the foliage and the grass – even though the building’s composition isn’t contiguous.
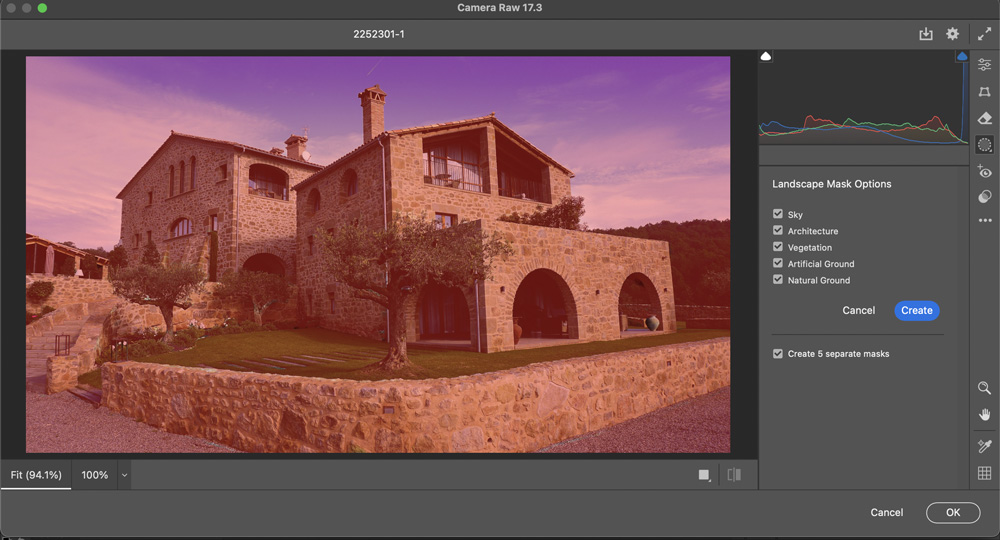
Mask Them All
You can select more than one of the landscape elements – all of them, if you wish – and Camera Raw can then create separate masks for each of them.
Individual Control
Being able to adjust each of the landscape elements is of great benefit. Here, it was easy to change the color temperature of just the building stone, without affecting any of the other elements of the image.
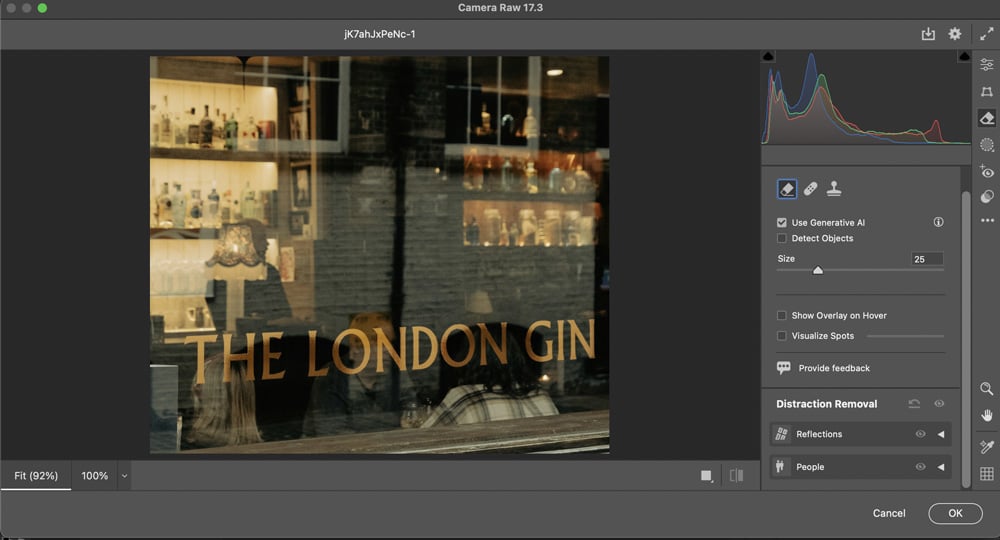
Reflect on This
A major issue when photographing outdoors is reflections in windows. Camera Raw now has the uncanny ability to remove just those unwanted areas, rebuilding the image behind them. (Note that to use this feature, you’ll first need to click the Gear icon in the upper right corner of the Camera Raw dialog, select the Technology Previews pane, and check New AI Features and Settings Panel.) Now, when you click the Eraser tool in the Camera Raw toolbar, a Distraction Removal section will appear.
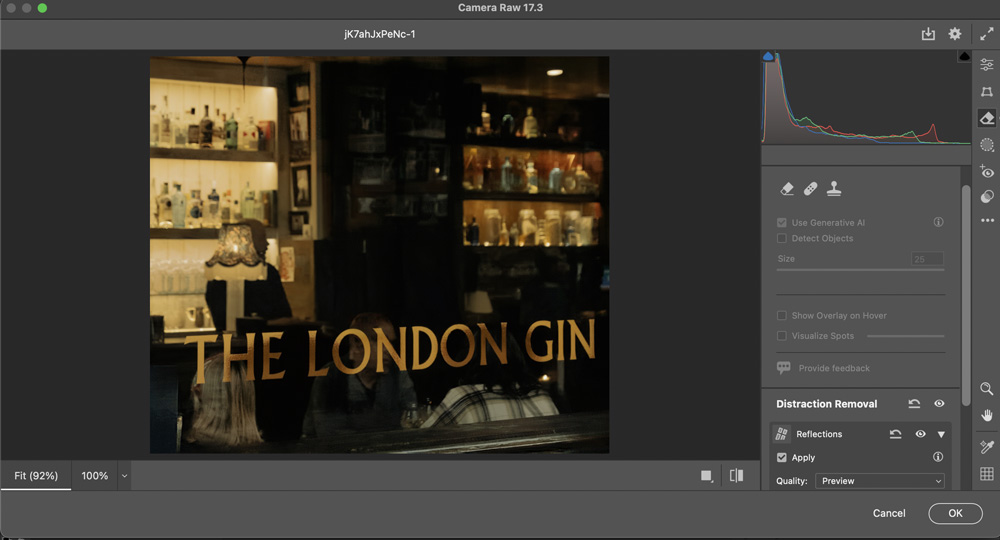
One-Click Fix
Choosing Reflections takes a few seconds, after which Photoshop performs a seemingly impossible task – removing the reflections entirely. Choose between Preview, Standard and Best quality from the pop-up.
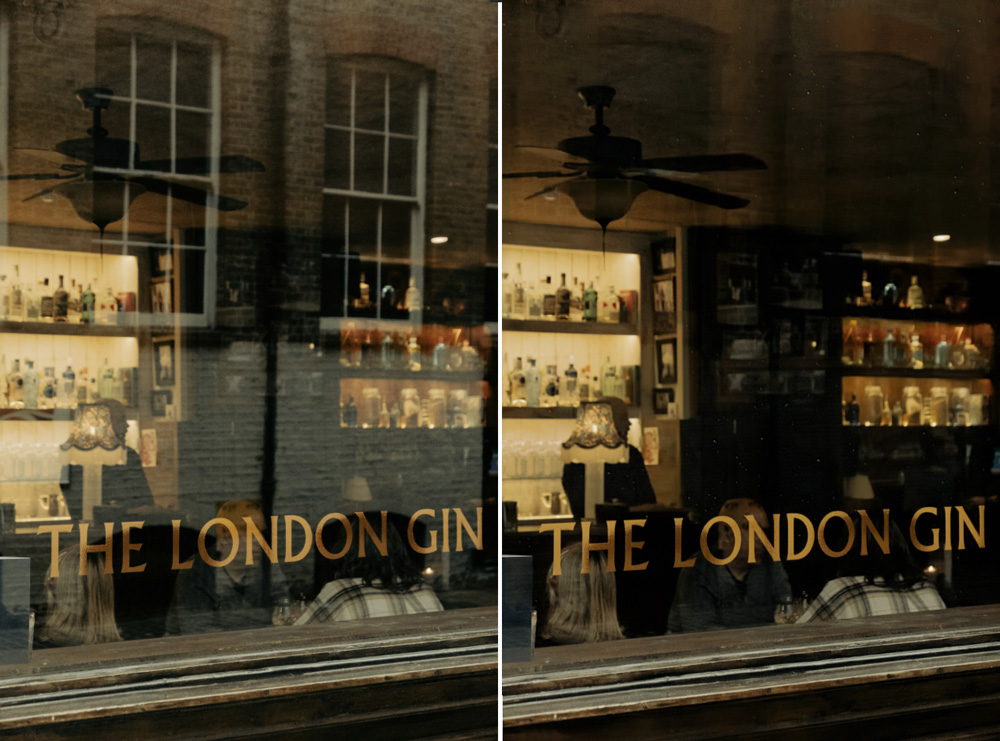
The Reflections Result
Here’s that window image, before and after. This feature isn’t just a time-saver, it performs a task that would otherwise be literally impossible.
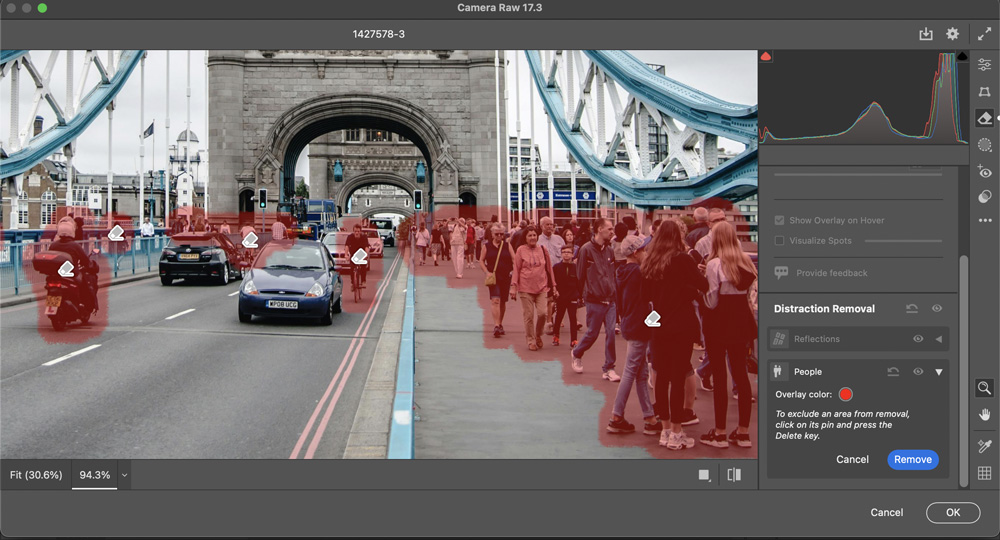
Removing People
Photoshop has had the ability for some time to select and remove people from an image. Now an enhanced version of that technology is available inside Camera Raw: click the Eraser tool, and choose People in the Distraction Removal section.

Check Before Removing
All the people Photoshop finds in the image are highlighted, and you can click the button on each highlight to exclude that person from the removal process.
The Removal Result
Here’s the result of taking out all the distracting people. The railings and sidewalk have been rebuilt; but the motorbike has been replaced with a curious low cart. This is why reflections and people removal is still part of the Technology Preview. Still, it does get you 90% of the way there.

The new features in this upgrade represent a serious benefit to all Photoshop users, from beginners to experts. The ability to remove reflections and to isolate objects such as bicycles is truly astonishing: Photoshop is now more powerful than ever.
This article was last modified on May 3, 2025
This article was first published on May 3, 2025
Commenting is easier and faster when you're logged in!

Recommended for you

How Resolution Affects Image Proxy Quality
When working with images into your InDesign layouts, did you ever notice how som...

CreativePro Video: Creating a Spin Effect in Photoshop
See how to easily add a spin effect to add movement to a static photo in Photosh...
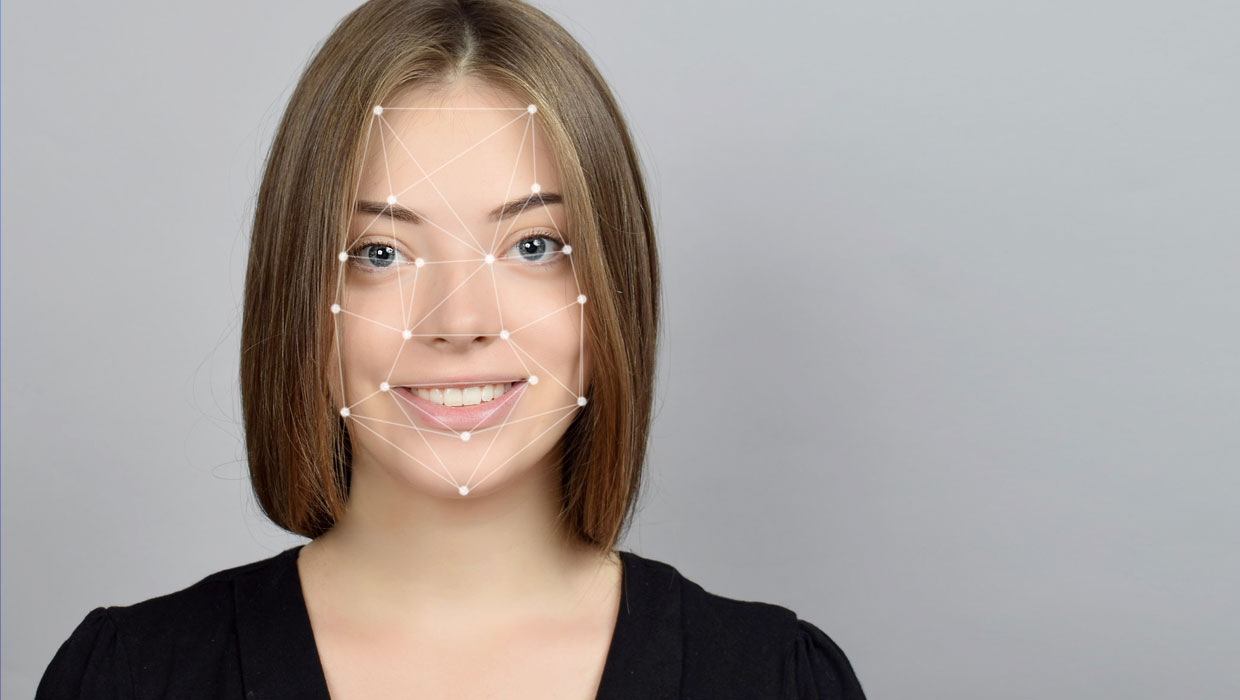
Faster and Easier: How Face Recognition Tools Are Evolving
People masking in Camera Raw and Lightroom, improved portrait modes, and advance...