

Artboards are like pages in an Illustrator document. You can use them to contain, organize, and output multiple pieces of artwork from one file. Illustrator has an Artboard Tool for creating, selecting, and modifying artboards, as well as an Artboards panel for managing them.
Here are some handy tips for managing artboards in Illustrator.
Right-Click with the Artboard Tool for Efficiency
When you have one or more artboards selected with the Artboard tool, you can right-click to access lots of useful commands.

Locking Artboards
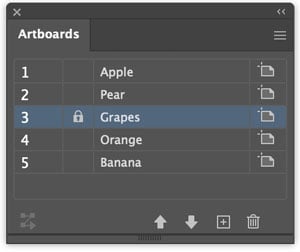
If you want to protect an artboard and the content on it from being selected, moved, or edited, you can lock that artboard. Locate the artboard you want to lock in the Artboards panel and click in the lock column next to the artboard name. Click the same spot to unlock the artboard.
Or, right-click on the artboard on the canvas and choose Lock Artboards. You can choose Lock Selected, Lock All Except Selected, or Lock All.

Tip: You can tell at a glance if an artboard is locked and unlock it on the canvas by going to Selection & Anchor Display preferences and turning on Select and Unlock Objects and Artboards On Canvas. Clicking the lock icon on the canvas will unlock the artboard.
–>
Renaming Artboards
To rename an artboard simply double-click on the name above it on the canvas (or, use the Artboards panel).
If you find it distracting to have artboard names on the canvas, you can turn them off in Selection & Anchor Display preferences.

Note: When an artboard is locked, you can’t rename it on the canvas but you can rename it in the panel.
Tip: You can rename multiple artboards at the same time by selecting them in the panel or by Shift-clicking them with the Artboard tool, then right-clicking and choosing Rename.
Changing the Fill Color of an Artboard
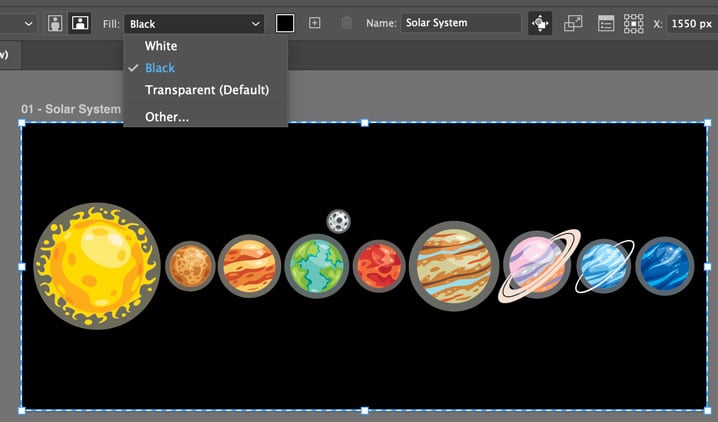
By default, artboards are transparent in output, but you can apply a fill color that will appear in output. To set the fill color of an artboard, select it and choose Fill in the Control panel or Properties panel. You can choose Black, White, or Other and use the Color Picker.
Tip: If you want to use a swatch, have the Swatches panel open before choosing Other in the Control panel or Properties panel. Then, you can use the Color Picker tool at the top of the dialog box to sample a swatch.
Rearranging Artboards
Made a mess of your artboards by dragging them around? Select one or more of them with the Artboard tool, then right-click and choose Rearrange. Or, choose that command from the Artboards panel menu or the Contextual Task Bar. In the dialog box, you can set the artboard layout, direction and spacing.


Note: Locked artboards won’t move when you use Rearrange.
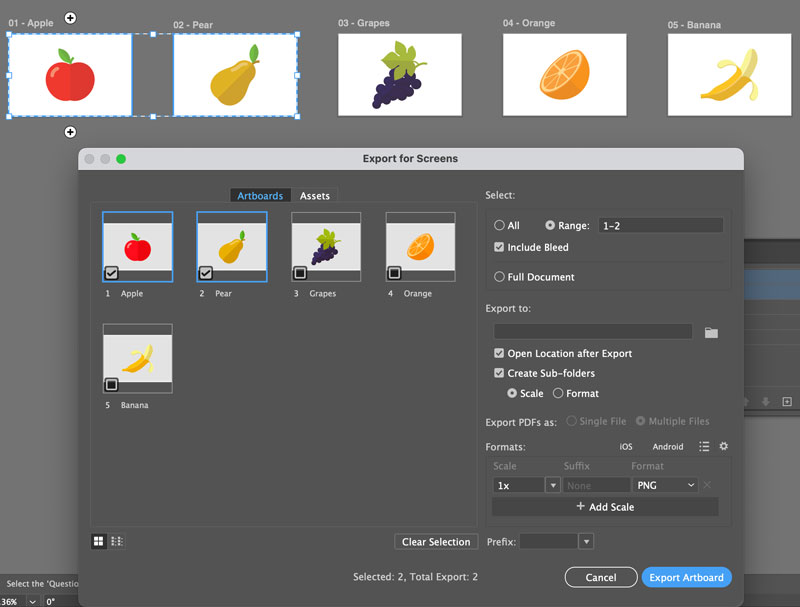
Exporting Specific Artboards
You can export the artwork on specific artboards by selecting those artboards on the canvas or in the Artboards panel and then right-clicking one of them on the canvas and choosing Export, or clicking the Export button on the Contextual Task Bar. In the dialog that opens, the selected artboards will be preselected for export.
Command/Ctrl+D for Do It Again
When you use the Artboard tool to move, scale, or duplicate artboards, pressing Command/Ctrl+D will repeat the action.
Copy and Paste From One Artboard to Another
Copy an object, then select the artboard where you want the object to go and choose Edit > Paste in Front, Paste in Back, Paste in Place, or Paste on All Artboards.
Commenting is easier and faster when you're logged in!

Recommended for you

CreativePro Conference Speaker Spotlight: Sharon Steuer, the Zen Artist
Welcome to our new series of posts called Speaker Spotlight, designed to highlig...

CreativePro Video: Sizing Outlined Text in Illustrator
In this week’s CreativePro video, Von Glitschka shares how to size outlined text...

Classic Concert Posters Reimagined
With the tools in your design toolbox, and some inspiration from iconic artists,...