
Making a Mini-Book
All you need is one sheet of paper and a little inspiration to make a mini-book in InDesign.


This article appears in Issue 92 of InDesign Magazine.
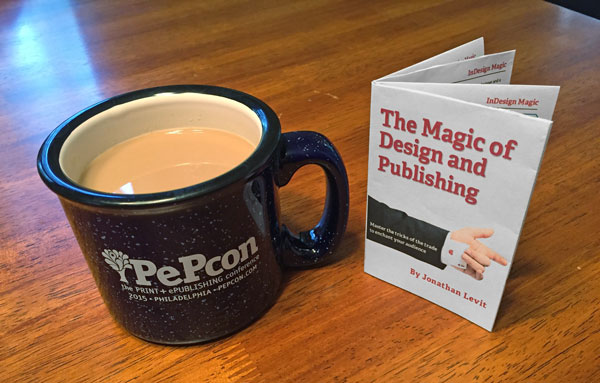
It’s the holiday season, and as they say, good things come in small packages. Good things can also come in small pages, as you’ll see with this fun and simple project to create a miniature book. It only takes a few minutes to make a one-of-a-kind a gift for friends and family members of all ages. You can start with an existing InDesign layout or create something new from scratch. You don’t have to be artistically talented or crafty to make something great. Just grab some paper and scissors and follow along!
1. Download the templates and create your design
The first step is to grab the two templates for this project and use them to create your mini-book design. You can download the templates from InDesignSecrets by clicking here.

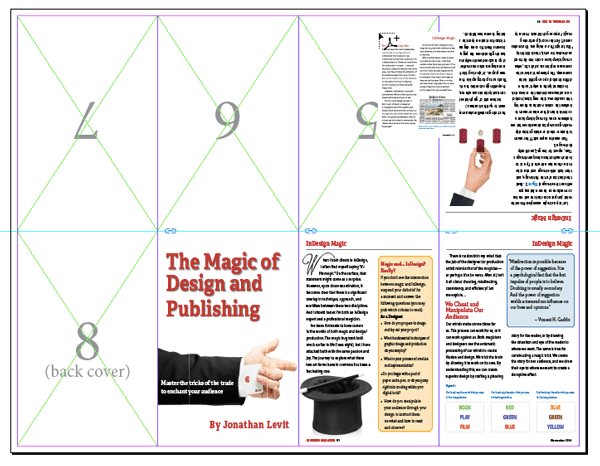
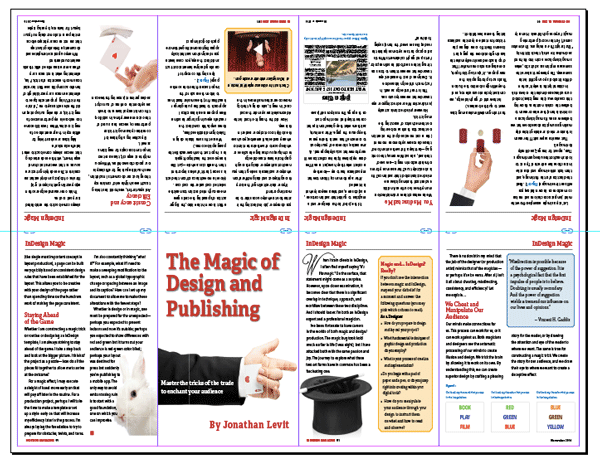
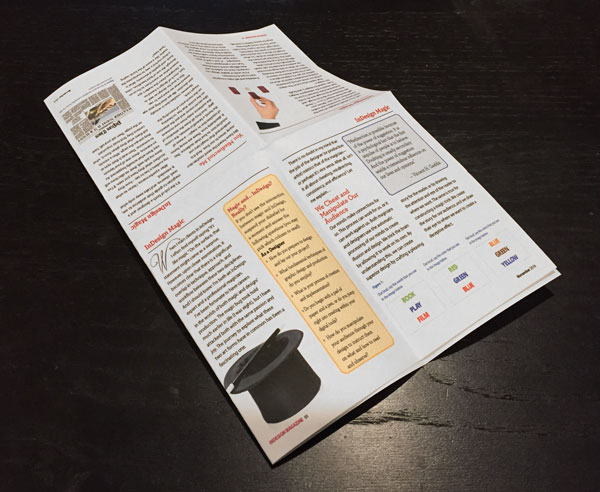
The Mini-Book_Source file is a full-size (7 1/6 × 11-inch), eight-page document that you’ll use to design the pages for your project. Once you’re done laying out the pages in that document, you’ll be placing them into the Mini-Book_Print template before you print out your mini-book.
2. Choose to bleed or not to bleed
Once you’ve used the Mini-Book_Source template to create your 8-page layout, open the Mini-Book_Print IDML file with InDesign CS4 or later. Notice the file has three layers.

At the bottom is a non-printing Guides layer. This will help you place the pages of your layout in the right positions. The topmost layer is called Page Frames No Bleed; below that is a layer called Full Bleed
Page Frames. It’s up to you to choose which of these two layers is right for your project. Most desktop printers can’t print all the way to the edge of the page. Mike’s Epson leaves an eighth-inch of blank paper all around, so he uses the No Bleed layer in the template. However, if you do have a printer that can print full bleeds, use the Full Bleed layer in the template, and hide the No Bleed layer.
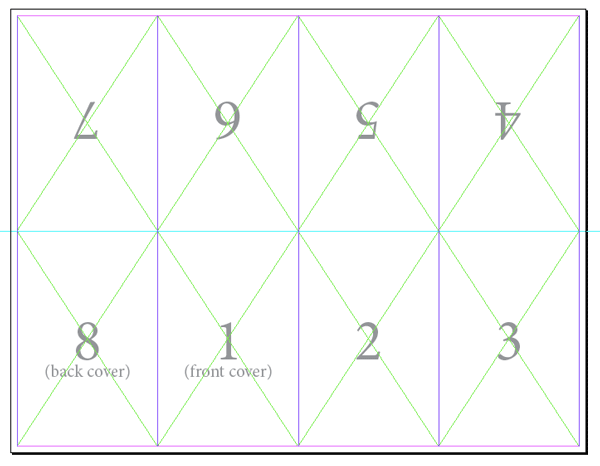
The mini-book template with the No Bleed and Guides layers visible.
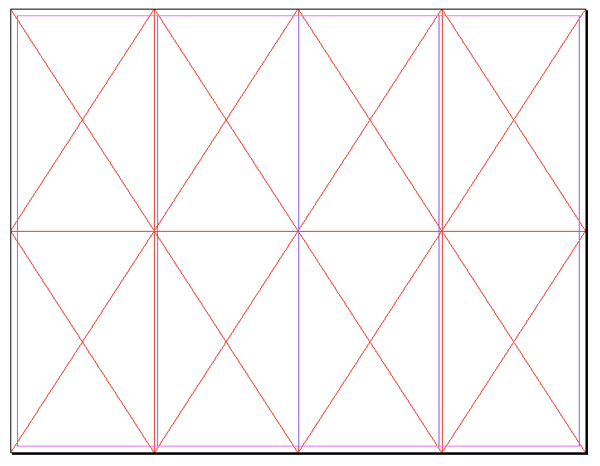
The template with the Full Bleed layer visible, and the Guides layer turned off.
3. Choose a file format for your layout pages
Decide if you want to place the pages of your layout as PDFs or INDD pages. Using INDD pages saves the step of exporting to PDF, but it’s not as foolproof, since only PDFs are self-contained and will never have issues with missing fonts and images. If you decide to use PDFs, then export the eight pages of your layout as a single PDF file.
4. Place the layout pages and print
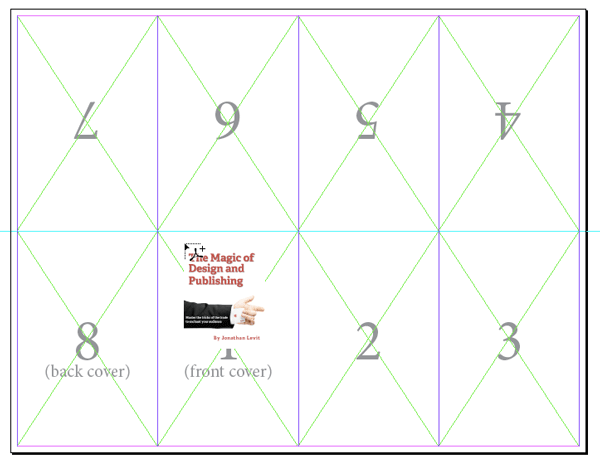
With the correct layer active in the Mini-Book_Print file, you can place the native INDD file or the exported PDF pages into the template. Choose File > Place, and navigate to your PDF or INDD file. Select it, and hold the Shift key while clicking Open in the dialog box—that forces InDesign to display the Import Options dialog box. Select the range of pages you want to place, and the desired cropping option, and click OK.

With your loaded cursor, place the eight PDF or INDD pages into the template frames, using the page numbers on the Guides layer to determine which page should go where. The frame-fitting options in the template will force the pages to fit the frames.
Finally, when all eight pages are in place, print the document. Do not use Scale to Fit or any other scaling in the Print dialog box!
5. Fold lengthwise from portrait orientation
Now it’s time to start folding! First, hold the page upright (in the portrait orientation), and fold it in half lengthwise.
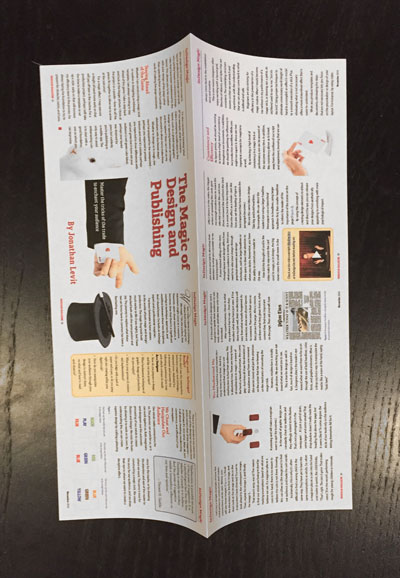
6. Fold lengthwise twice from landscape orientation
Next, turn the page to landscape orientation, and fold lengthwise twice. If you’ve done it correctly, it will look like the image to the right.

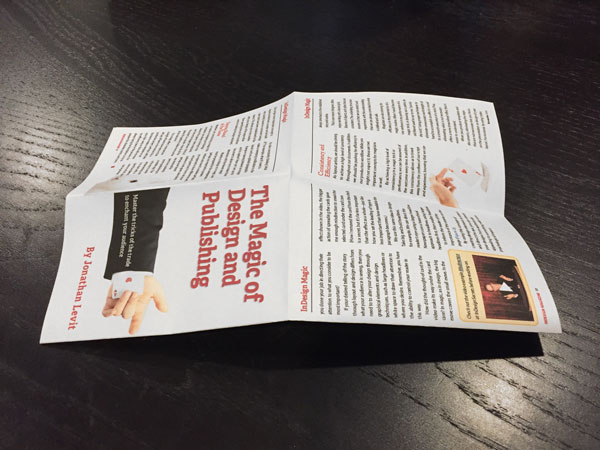
7. Unfold the page and re-fold it widthwise
Unfold the page and re-fold it widthwise (halfway through the long direction), so the printed side is showing.
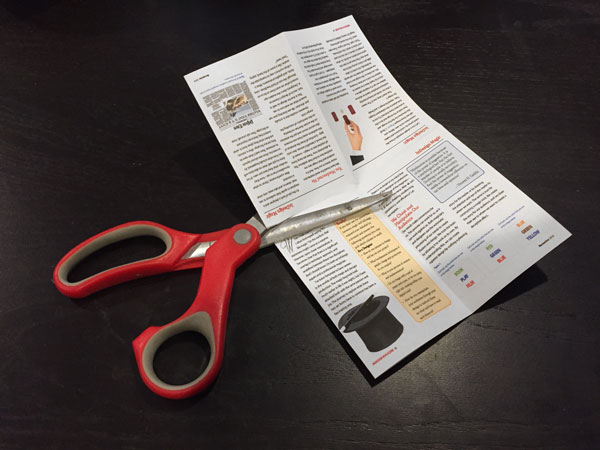
8. Cut at the middle of the fold
With your scissors, carefully cut at the middle of the fold, halfway to the other edge. If you’ve done it right, the tops of the middle four pages will be separated, and the outer pages will still be connected at the tops.
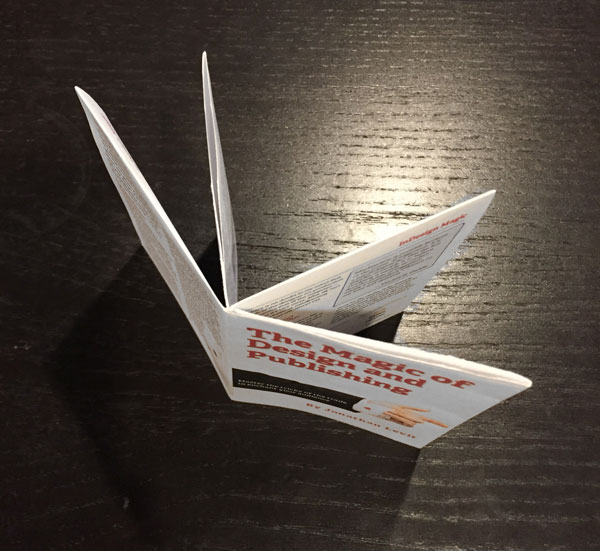
9. Fold lengthwise
Unfold the paper, and then re-fold it again lengthwise.
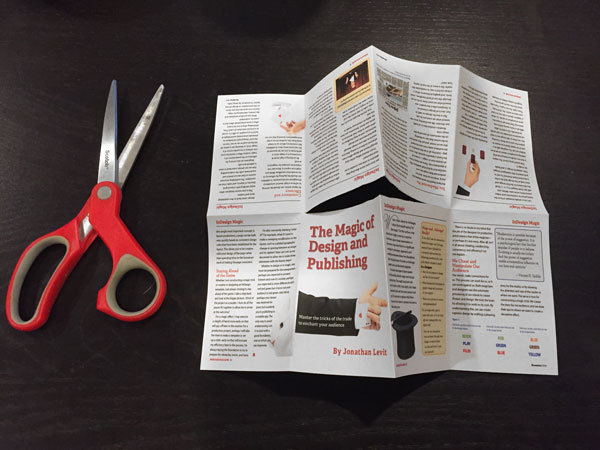
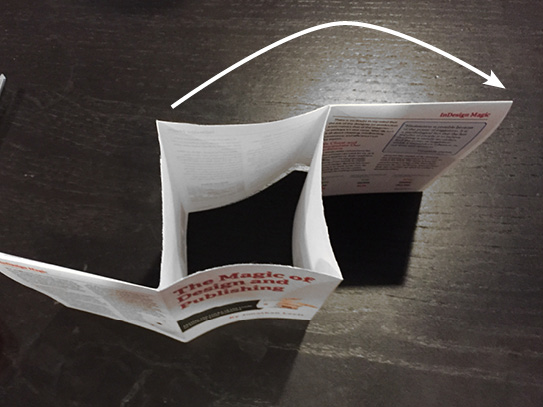
10. Push the ends in and fold
Hold the ends of the sheet and push inwards, so a diamond-shaped gap appears where you cut the paper. Continue pushing in so the gap is closed, and fold all the pages to the right to complete the book shape.
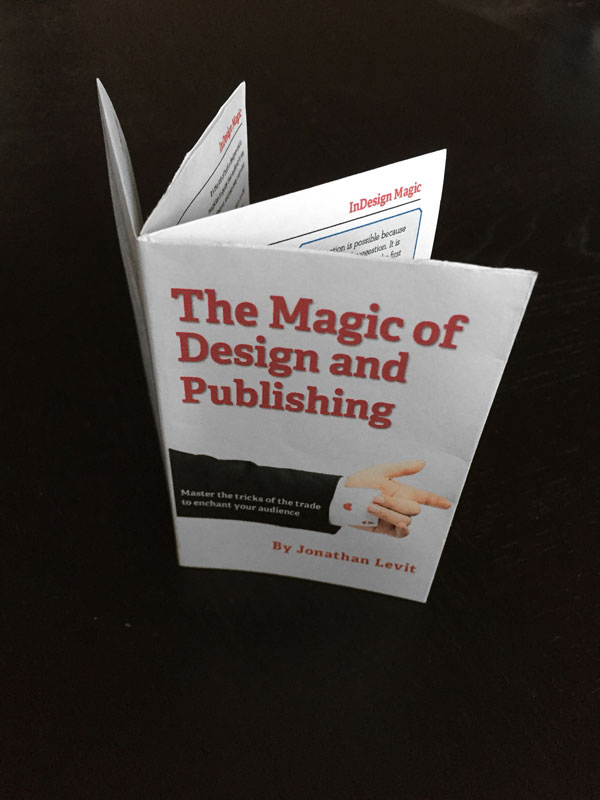
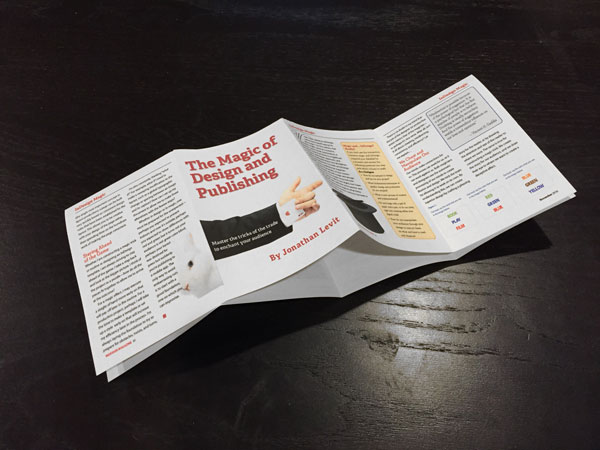
You may want to add a little glue or tape to hold loose pages together. Happy Hobbit-sized holidays to one and all!
Commenting is easier and faster when you're logged in!

Recommended for you

InReview: in5
Keith Gilbert reviews in5, a powerful plug-in for exporting digital documents fr...
5 Ways to Get Pie Charts into InDesign
In an analytical world, pie charts can help to serve up your data in a tasty way...
Spiderweb FX
Just in time for Halloween: here’s a web that’s easy to weave, with the help of...