
InStep: Optimizing Photos for the Web in InDesign
Chad Chelius details a surprising use for InDesign: cropping and sizing photos for a website.


This article appears in Issue 80 of InDesign Magazine.
InDesign may seem like an unlikely tool to optimize images for the web, but in some cases, it’s ideal.
Adobe has provided us with numerous tools for optimizing images for the web. Both Photoshop and Illustrator have a Save For Web command, and the Asset Generator in Photoshop gives designers amazing power for generating web assets from existing artwork. How many more ways do we need to generate web assets, right?
I was recently consulting with a client who produces a PDF newsletter every month with InDesign. As part of her role at her company, she needs to produce HTML from the newsletter that she then supplies to the web team to update the website with the content of that newsletter. We had already configured InDesign to generate the HTML in a way that could easily be used to update the website, including the proper tags and even classes that made the process very fluid for all parties involved.
The newsletter that she creates each month contains a lot of headshots of various people in each issue. The design of the website requires that all of these headshots be supplied at a size of 100 × 125 px. This, by the way, is not the dimensions—or the aspect ratio, for that matter—of the headshots as they appear in the newsletter.
Although she was happy with the overall process, she explained to me that the time required to produce the headshot images for the web team each month was considerable, and she wished that there was a better way. Her current workflow involved opening each image in Photoshop, cropping the images to the desired size, and saving them as JPEG files.
In looking for a better solution, I started thinking about how I could produce
an action in Photoshop, or possibly make use of the image processor to make the task easier. The problem is that cropping can be subjective, and in order to crop each headshot in the same way, you would need the ability to detect the bounds of a person’s face and then crop outward from there—a feature that doesn’t exist in Photoshop at this time.
When it comes to cropping, one size does not fit all.
Manually cropping in Photoshop gives you a lot of control, but can be challenging when you’re trying to crop each photo in the same way. After thinking a little while longer, I realized that InDesign actually has all the tools to get the job done in a much faster and more intuitive way. Below I’ve outlined the steps that I came up with to create web-ready images to supply to the web team.
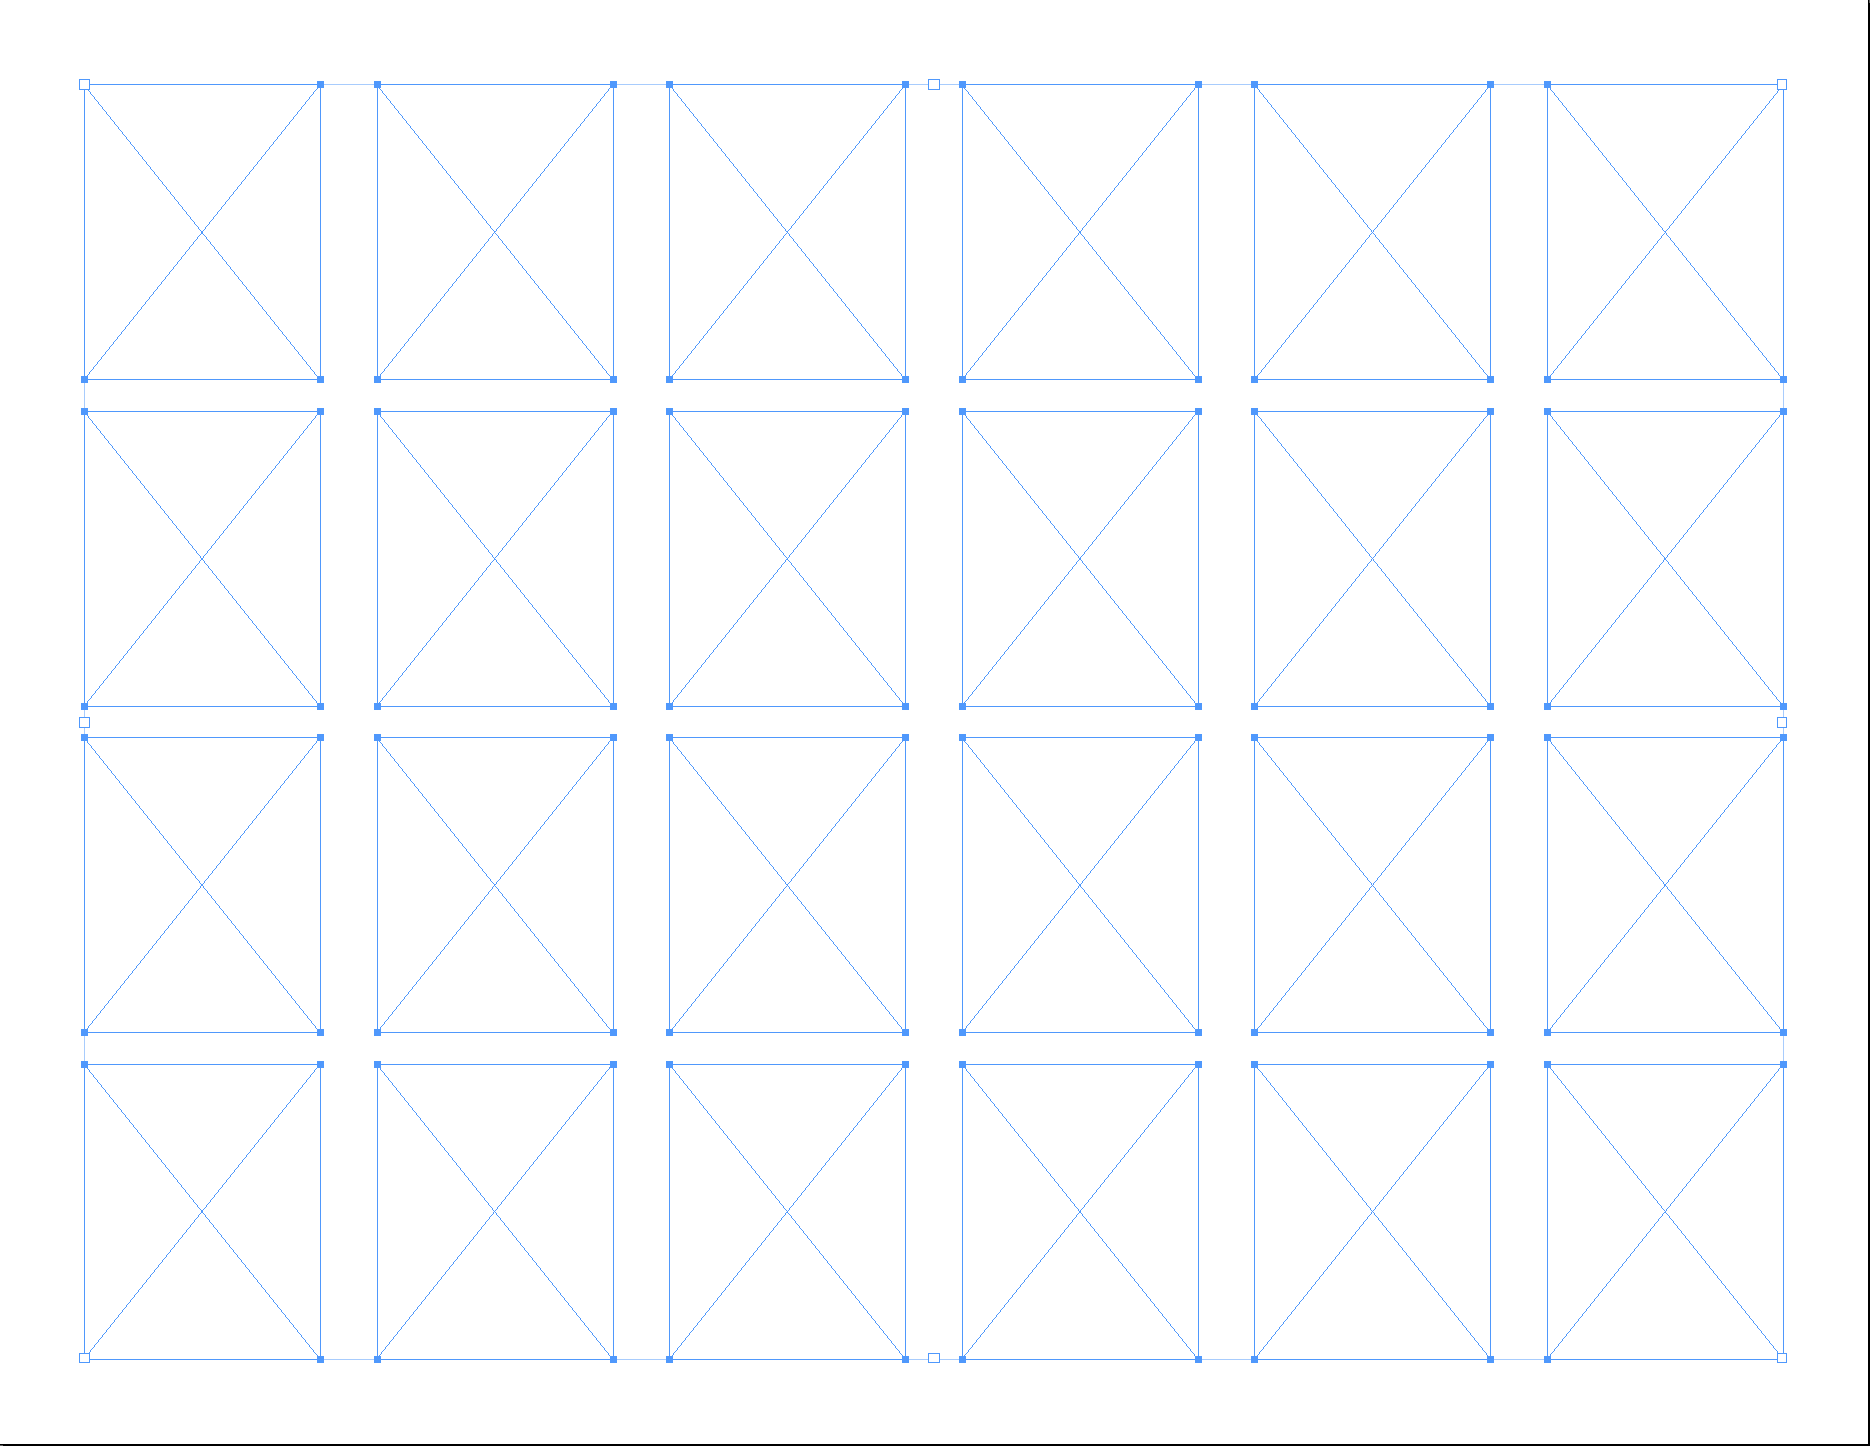
1. Create an InDesign template
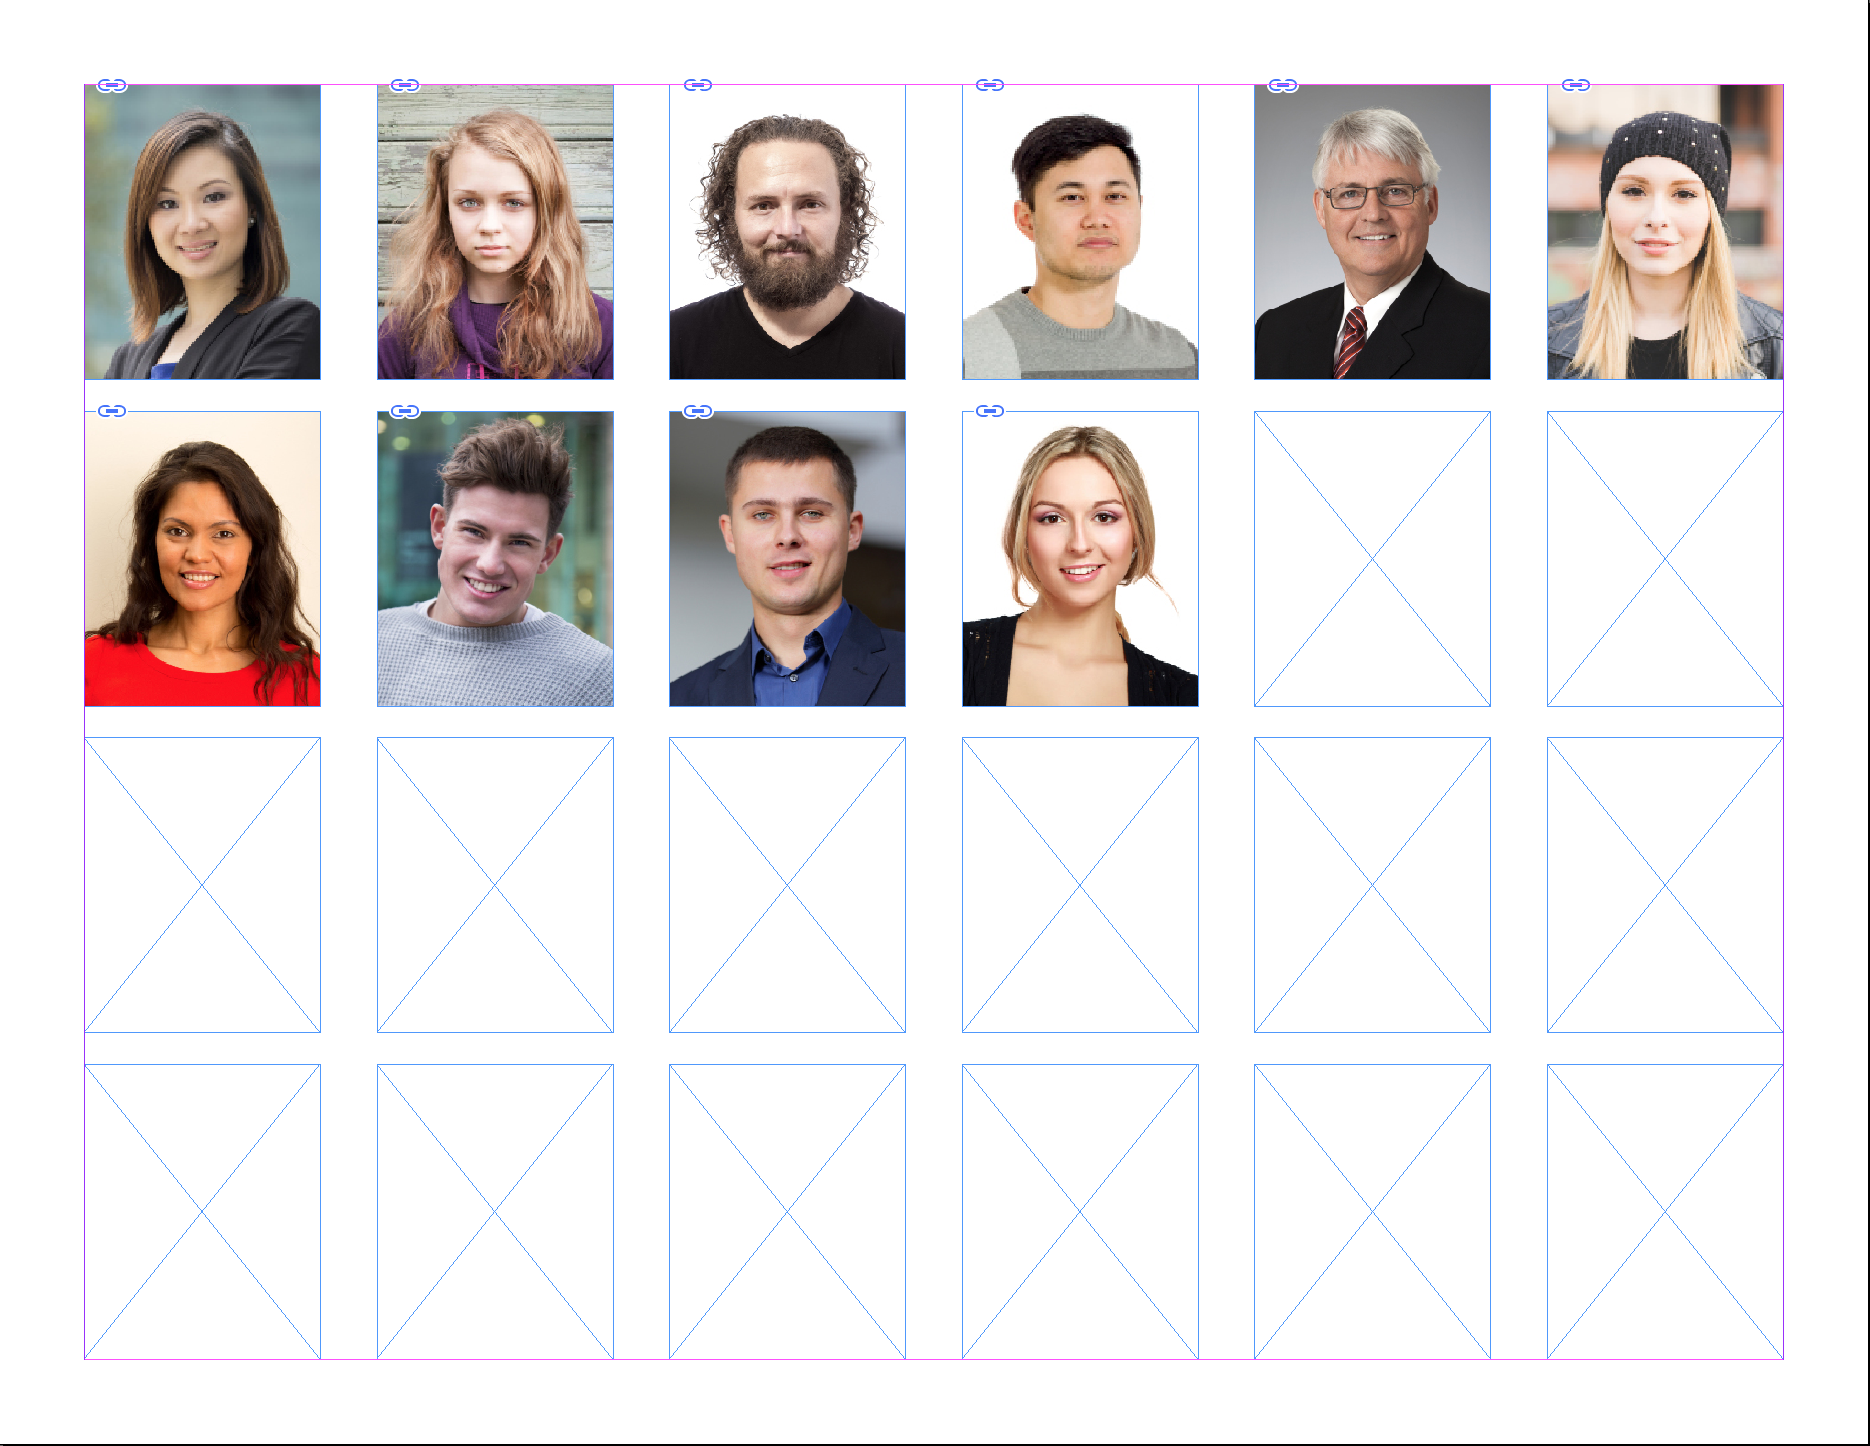
One of the challenges we were facing was that the images as they appeared in the newsletter were not the size or aspect ratio that were needed by the web team. So I created an InDesign template which consisted of a document with several empty graphic frames at the desired dimension of 100 × 125 pixels (your template could contain graphic frames of any size that you wish). I also defined frame-fitting options for the frames on the template that centered the image in the frame automatically. You could also define how you want the photos to fit, but in this situation we chose not to, because the photos varied considerably from one to the other and always needed to be custom cropped. I then saved the file as an InDesign Template file (.indt) so that each month the user can create a new untitled document based on that template and place the required photos into each graphic frame. One of the benefits of this solution is that you can see all of the headshots next to one another at the same time, allowing you to crop each one in a similar fashion.
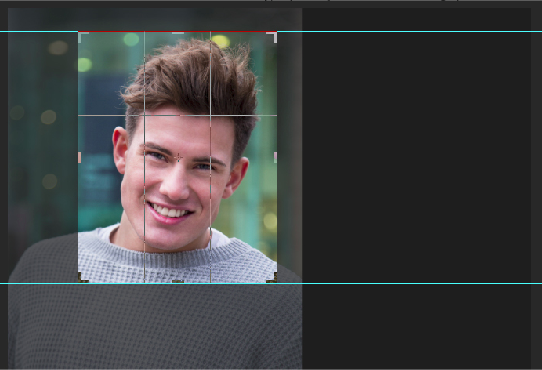
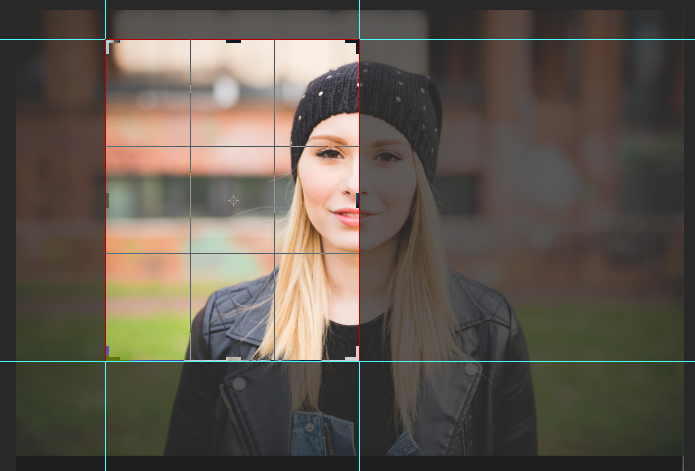
2. Place images and crop as needed
With the template created, open it to create an untitled copy of the template to use for the current issue. Place each headshot into a graphic frame, and crop as desired. Again, the benefit here is that the graphic frame defines the size of the final image, and you can crop each image in a similar fashion because you can see each photo next to one another.
3. Name your images
When we generate the final images, InDesign will use the name of the graphic file as the name for the exported images. If name is of no concern in your workflow, skip to step 4. If naming is important, however, you’ll want to make sure to name your files appropriately so that the final files have the desired name applied. If you’re realizing this after you’ve already placed the images, you can use a tool such as tomaxxiLINKrename to rename the files from within InDesign. As of this writing, the tomaxxi website was unavailable, but hopefully it will be back up and running some day! Ideally, you’ll want to build this into your workflow so you can avoid this step.
4. Export the images
With the template populated, you’re now ready to export the images. Choose File > Export, choose HTML from the Format drop-down menu, and click OK. This will display the HTML Export Options dialog box. InDesign is going to generate an HTML page of all of our images. Now of course that’s not really our goal, but the side benefit of generating the HTML file is that all of the images will also be rendered based on the settings that we choose. It would be quite possible to create an HTML page of all of our headshots, should we need to do so at a later date.
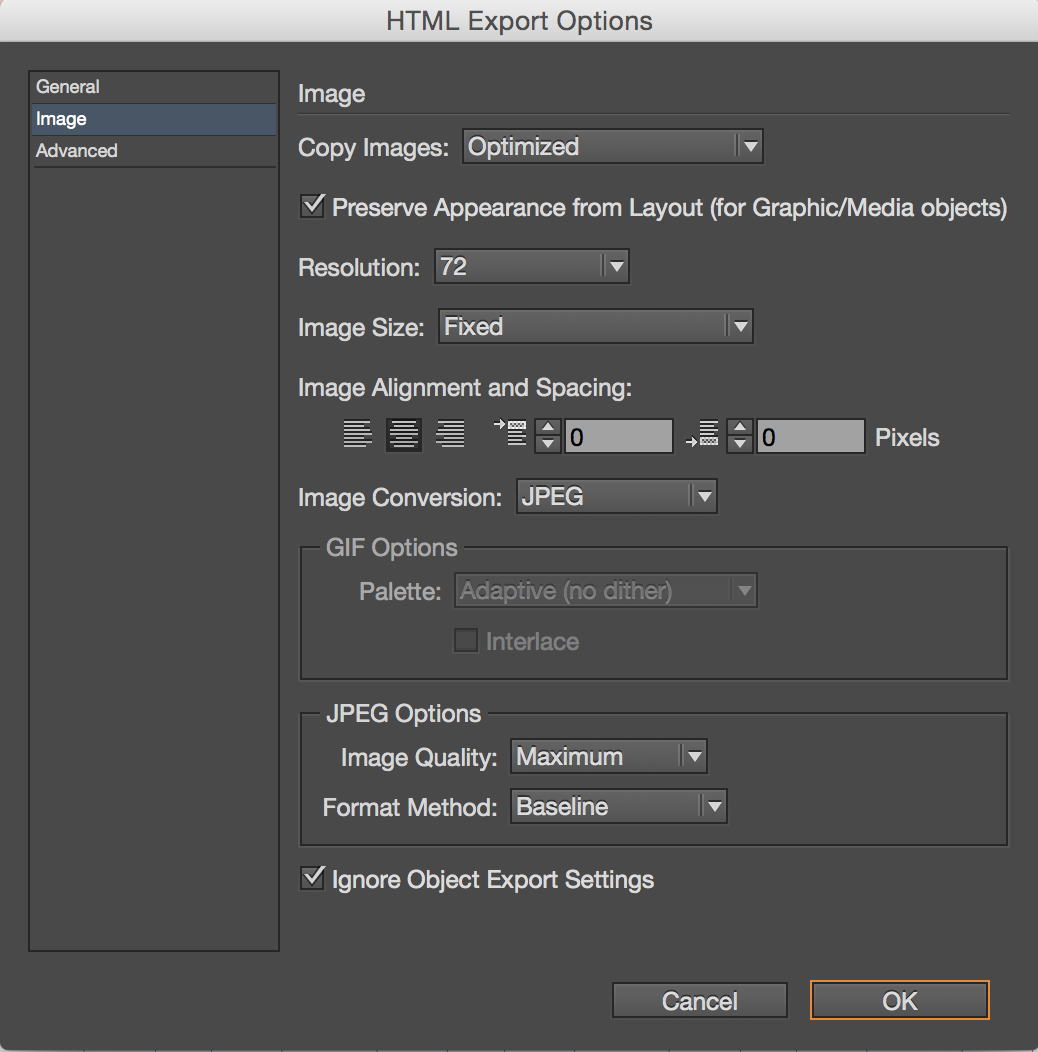
The area of this dialog box that we’re concerned with is the Images section, located along the left side. This is where we define the properties of the images that we want to generate. In the Copy Images drop-down menu, choose Optimized. This will create the optimized version of your images. Choose the resolution of the images that will be generated in the Resolution drop-down menu. We chose 72 ppi. Choose Fixed from the Image Size drop-down menu, and then choose the destination format for your images in the Image Conversion drop-down menu. Your choices are GIF, JPEG, and PNG. Finally, if you choose JPEG from the Image Conversion drop-down menu, the JPEG Options area at the bottom of the dialog box will be available, where you can choose the image quality as well as the format method for the JPEG images. We also enabled the Ignore Object Export Settings option as a precaution, but if you’ve created your template from scratch, there should be no concern for any Object Export Options applied to any of the images. Click OK, and InDesign will generate an HTML file and possibly a CSS file, as well as an Image folder that will be located in the web-resources folder that was generated during export.
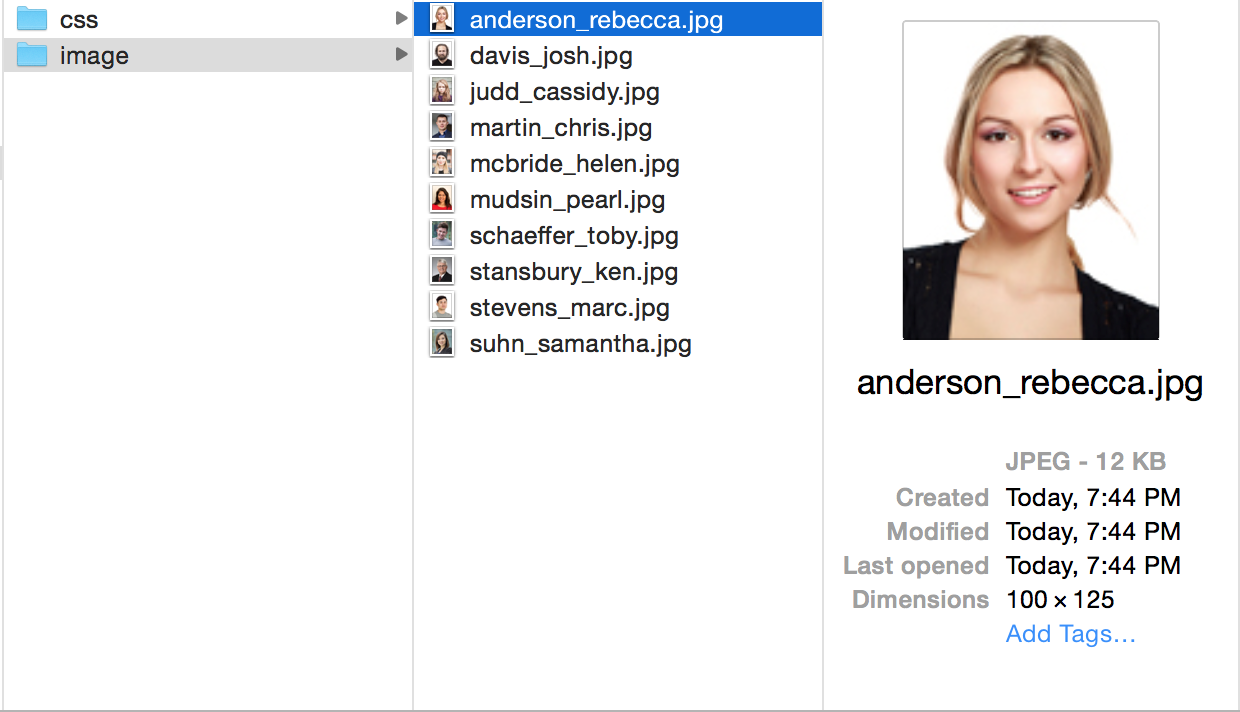
When you open the Image folder, you should see every image that was placed in the InDesign layout, and the dimensions of each image should be exactly the same as the graphic frame size from the InDesign document. All of the other files that were generated from the HTML export process, including the HTML file and the CSS folder, can be deleted. The images are fully processed and ready to be passed on to the web team.
5. Evaluate the images
This technique utilizes the HTML export feature, which is an often overlooked feature in InDesign. You can take this process a step further to actually generate HTML out of InDesign in various ways, but processing a page full of images is one side benefit to the HTML export feature that has made one client’s workflow a lot faster and so much easier. Hopefully you can adapt this technique to your workflow as well!
6. Enjoy the side benefit
This technique utilizes the HTML export feature, which is an often overlooked feature in InDesign. You can take this process a step further to actually generate HTML out of InDesign in various ways, but processing a page full of images is one side benefit to the HTML export feature that has made one client’s workflow a lot faster and so much easier. Hopefully you can adapt this technique to your workflow as well!
Commenting is easier and faster when you're logged in!

Recommended for you

Taking Another Look at the Content Grabber
Not everyone is a fan of the content grabber, but it does have a hidden feature...

InReview: Footwork
Footwork by Bookraft Solutions is powerful alternative to InDesign’s automatic f...
Mystery of the Missing Image Contest Answer and Winner!
Last week I posted a challenge for folks to explain this strange looking screens...