
InStep: Highlighting Tables
Diane Burns shares a creative technique for drawing attention to important tabular data in InDesign.

This article appears in Issue 101 of InDesign Magazine.
Tables can contain lots of information that is sometimes—dare we say—not so interesting. And yet, it is our job to communicate that information effectively. Of course, you may also be tasked with emphasizing some particular part of your table, perhaps for sales or marketing reasons. In these cases, you often need to get creative, using color and strokes in ways that make the rows and columns more engaging.

Sure, it’s easy to just to draw a frame around part of a table, give it a wide stroke, and slap it in place for emphasis. But that’s not very appealing, really, and there are other (and better) ways to catch your reader’s eye. In this article, I’ll show you how to really make a table “pop” by highlighting parts of it in a way that is both visually pleasing and effective.
1. Create your table
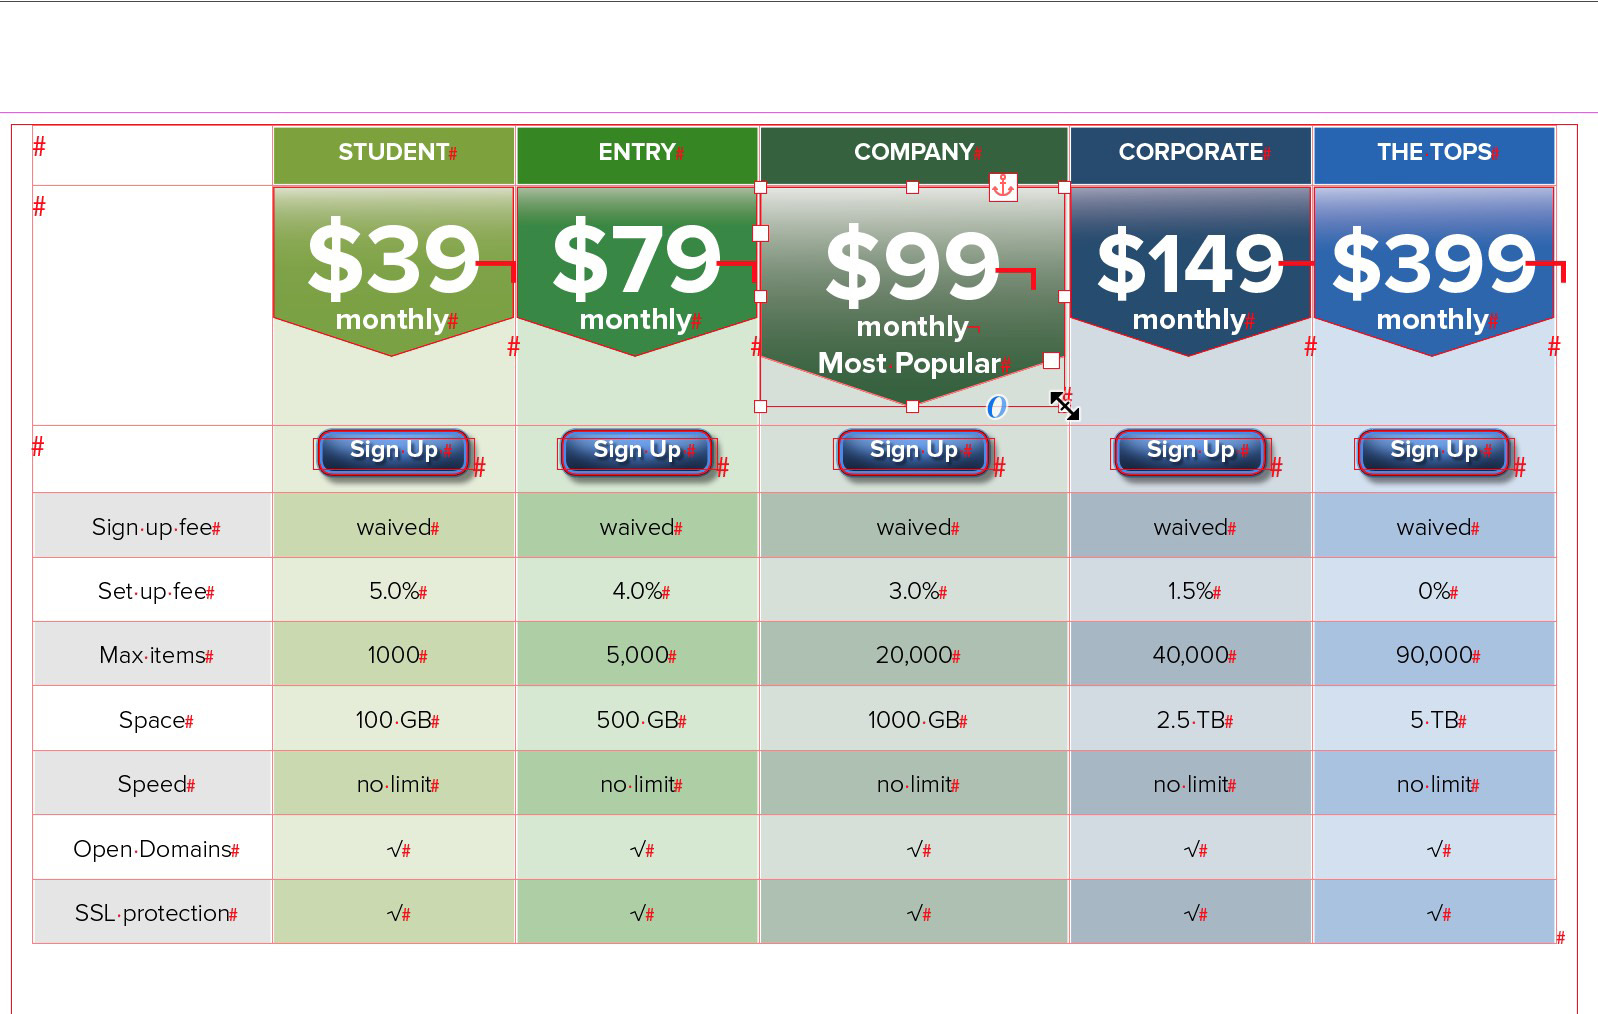
The first step is to create your table. Our example has some unique elements that are worth mentioning, such as the “arrow” shaped frames.
To create the text frames containing the pricing, use the Add Anchor Point tool to add a point to the bottom path of the frame. Next, use the Direct Selection tool to drag the point down, forming the “arrow” side of the frame.

Create this shape by adding an extra point to the bottom path, and then using the Direct Selection tool to move the point down.
Finally, add a gradient to give the frame more depth and dimension. Anchor these frames in the table by selecting each one with the Selection tool, and then use Copy or Cut and Paste them into the
appropriate cell.
Our example also includes buttons that link to a website. Create buttons as you normally would, and then Copy or Cut and Paste to anchor them into the table cells. Buttons in a table function as they normally would, whether in an interactive PDF, fixed-layout EPUB, or Publish Online document.
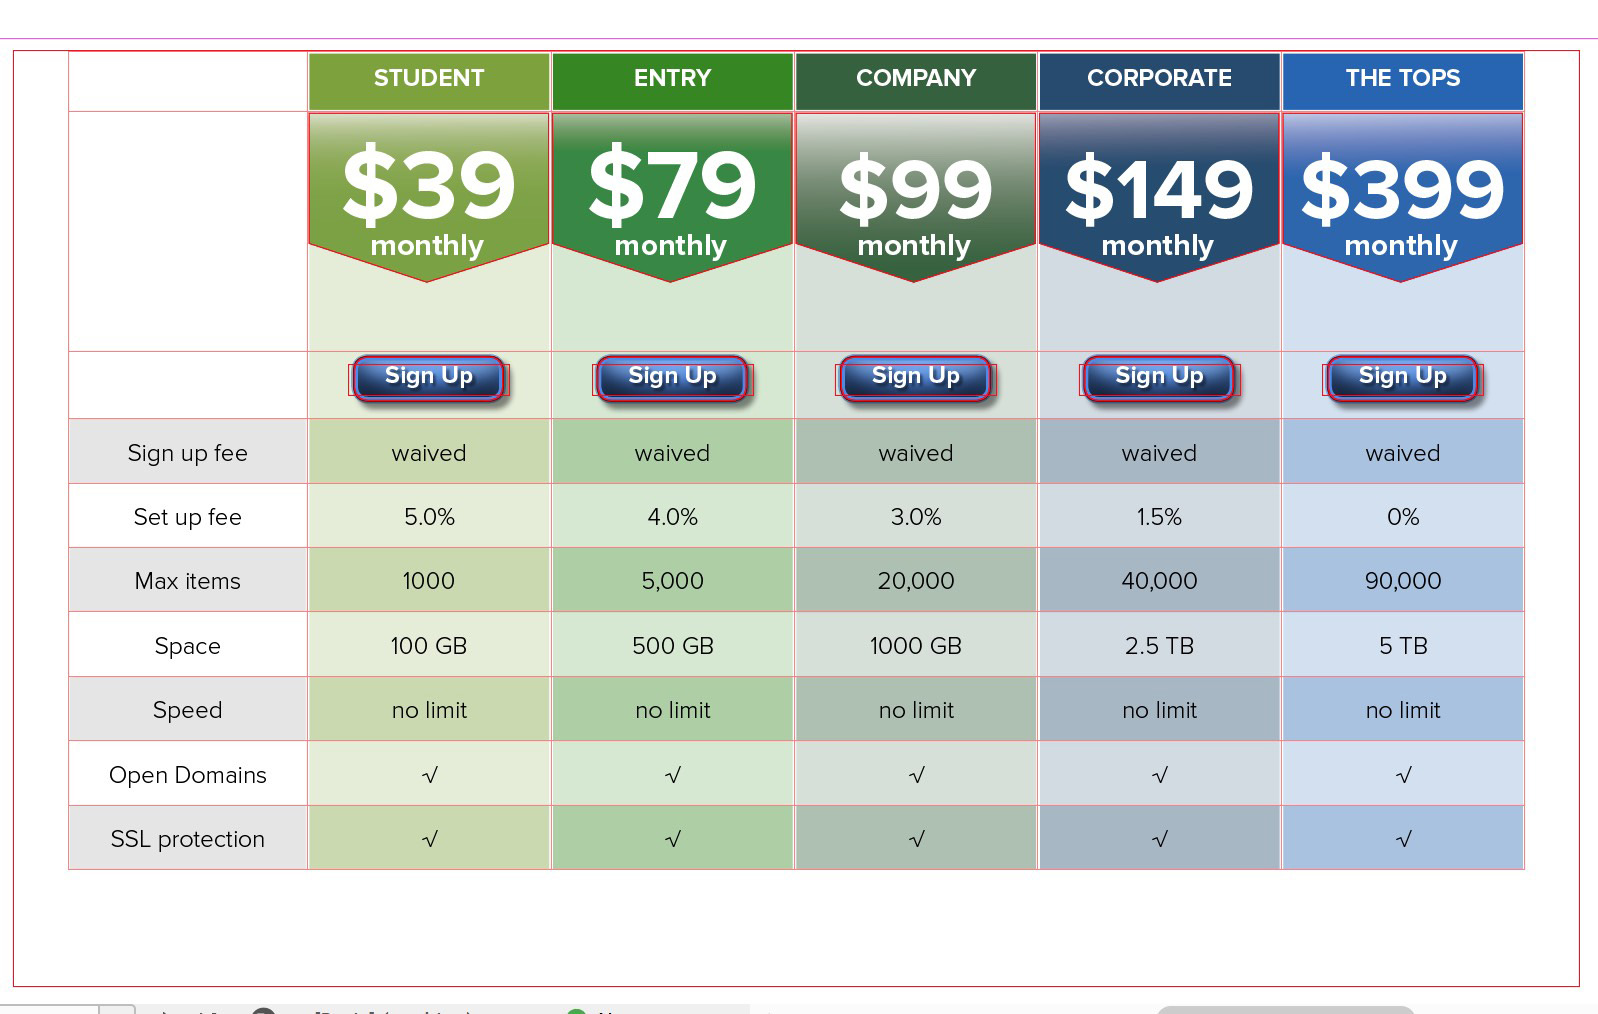
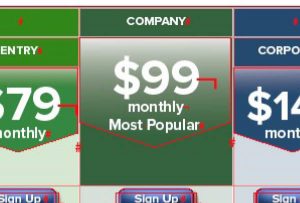
Create your basic table using color, strokes, and interesting shapes to enhance its appeal.
2. Set up the column to be highlighted
If you’re highlighting a column or columns, you’ll usually want to make them a little bit wider (or taller, if highlighting rows). Simply position your cursor over the right side of the column until you see a double-headed arrow, and then click and drag to the desired width. Alternatively, you can increase the column width numerically by setting the appropriate value in the column width field in the Table panel or in the Tables > Cell Options > Rows and Columns dialog box.

Using your cursor or by increasing the numeric value for the column width, adjust the width of the column to be highlighted.
In our example, we also have an anchored text frame with the price that also needs to be made larger. With any frame anchored in a table cell, simply grab the bottom corner, and resize as needed.
Adjust the width of any objects anchored in the cell.
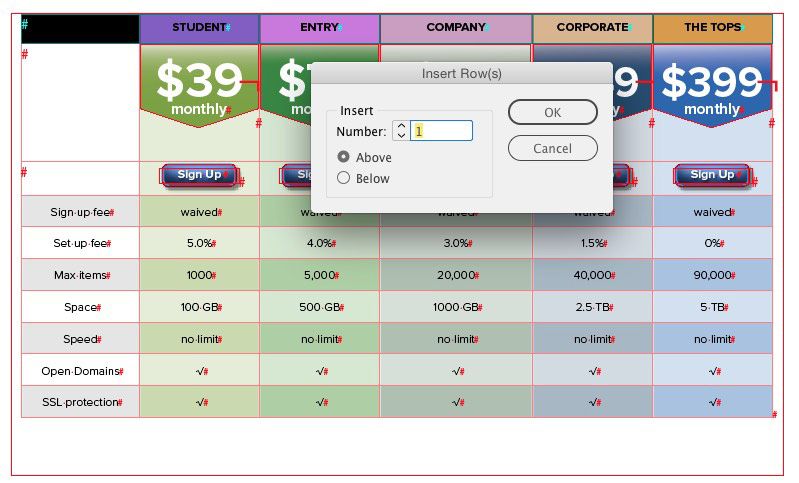
3. Insert a new row at the top of the table
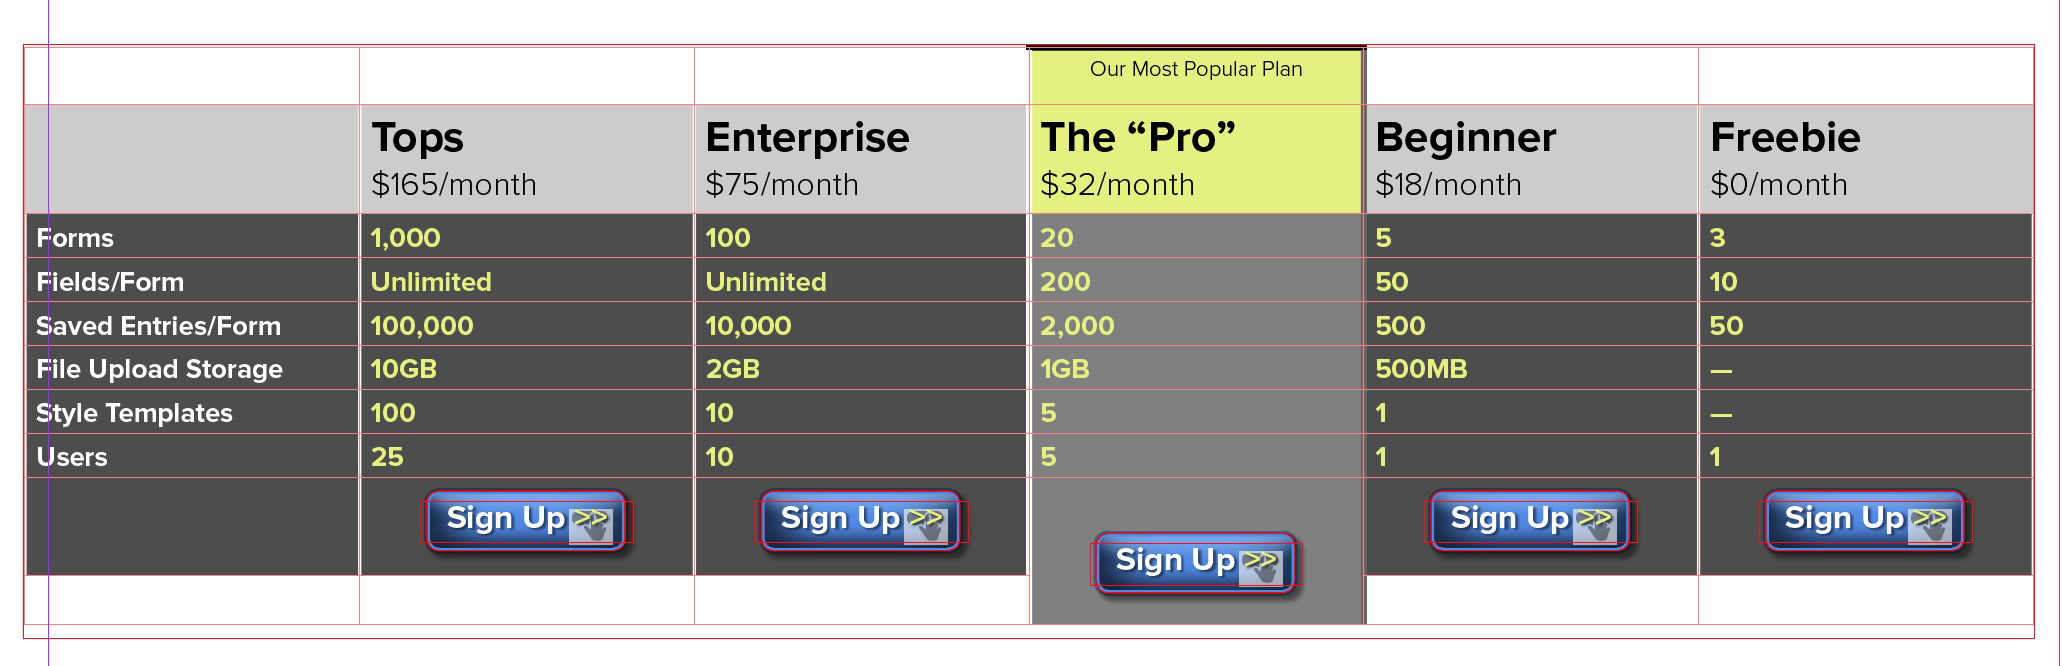
Now the trickery begins. To highlight a column, insert a row of cells above the top row of the table, using the contextual menu or Table > Insert > Row. Make sure the Insert Row(s) dialog box is set to Number = 1 and Above. Note that the new row cells take on the attributes of the cells below them.

Insert a row at the top of the table.
Cut and paste the heading for the highlighted column into the cell in the new row.

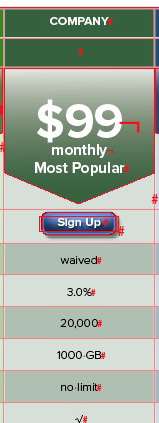
4. Merge cells in the highlighted column
Next, we’ll merge the two cells under the heading to make the cell look taller than all the adjacent ones. Select the cells, and then use the contextual menu or choose Table > Merge Cells. When you merge cells, the new cell will take on the attributes of the top cell (or the leftmost cell, if you’ve selected horizontally). In our example, that means the new cell is set to align text to the center, and the fill is 100% dark green. Select the newly enlarged cell, adjust the alignment so the anchored frame with pricing is aligned to the top, and set the fill color to a tint of 20%, so it matches the original appearance of the cell background.


After merging cells, the new cell takes on the attributes of the top cell; in our case, we need to adjust the vertical alignment back to the top.
The new cell also has the fill color from the top cell, so adjust to match as needed.

5. Fill adjacent cells with None
At last, we’re ready for the final step of our trick. Select all the cells in the top row, except the cell containing the heading for the highlighted column. Use the Swatches panel or choose Table > Cell Options > Strokes and Fills to set the fill color to None. (Since you can’t select noncontiguous cells, you may have to select cells on either side of the highlighted column separately, as in our example.)
Now, when the table is viewed in Preview mode, in print, as a PDF, fixed-layout EPUB, or using Publish Online, it will appear that the highlighted column is taller than all the other columns in the table!

Fill all the cells in the new row, except the highlighted column, with None.
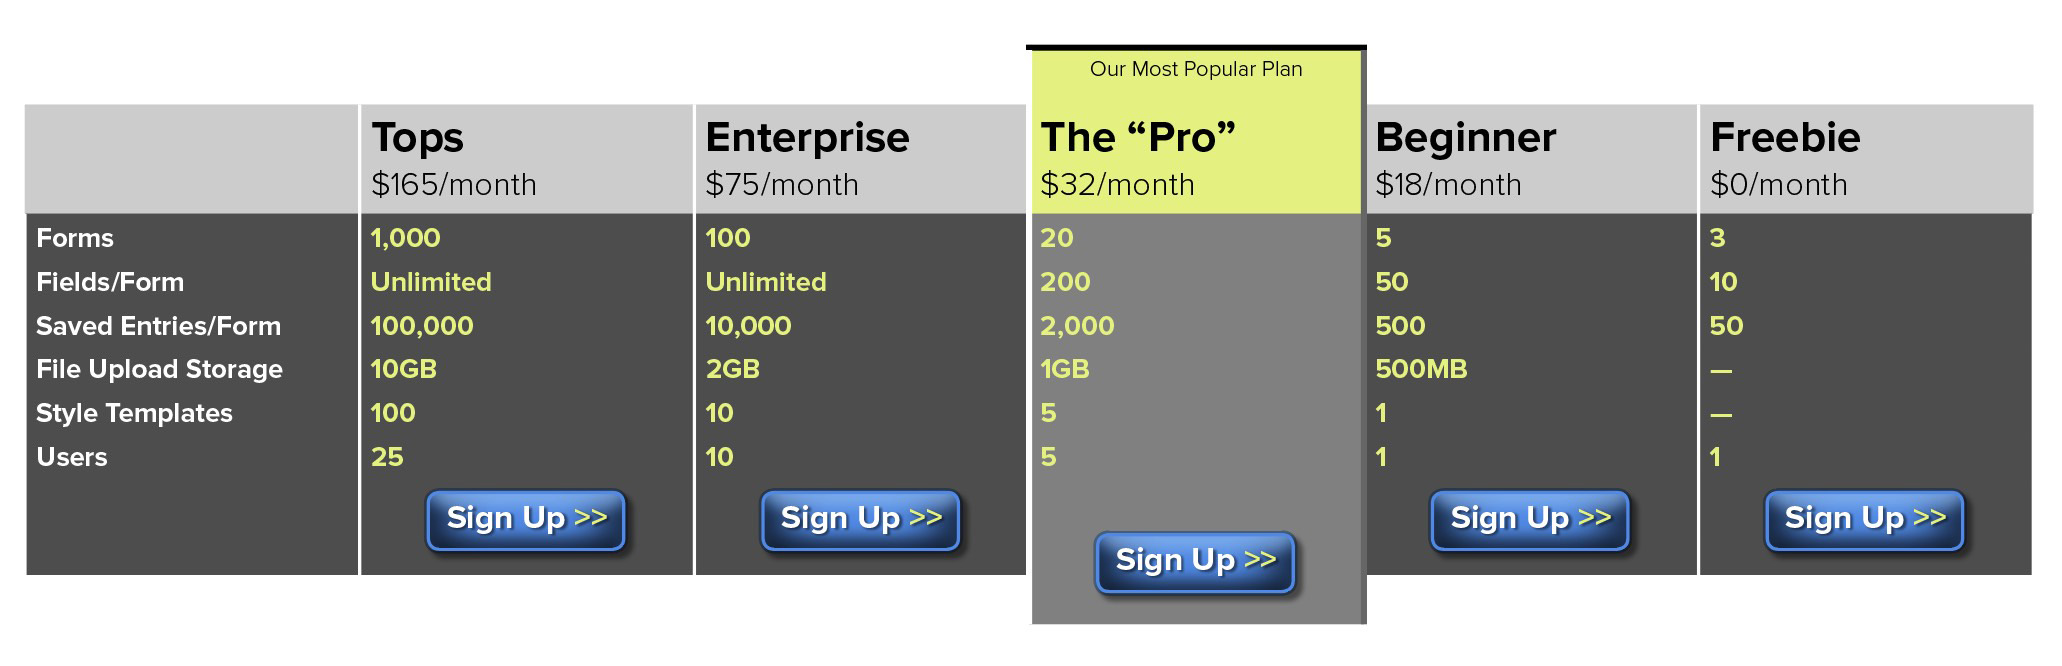
You can use this basic technique in many different ways. Here’s another example where I added rows both above and below the table to make this column really stand out. No need to draw a boring box around parts of your table to bring attention to important data. Have more fun and highlight the most important stuff!
Commenting is easier and faster when you're logged in!

Recommended for you


Typography Tips From the Pros
David Blatner asked eight type titans to disclose their dos and don’ts.

Helping Photoshop and InDesign Play Nice
Chad Chelius and David Blatner offer advice on how to make these two software si...