

This article appears in Issue 103 of InDesign Magazine.
Q: I’d like to place an image into my layout and have it look as though it’s being viewed through a grid. I know I can just draw a bunch of lines but I’m looking for something easier. Surely, you’ve got a solution for me.
A: I sure do! In fact, I have two solutions.
The first method involves creating a compound path. Start by drawing a frame on the page using the Rectangle tool. Make it stand out a bit by giving it an 8-point stroke. I’ll use 50% gray, but feel free to use any color you’d like. Don’t worry about being too precise about this, since it can be adjusted later (Figure 1).
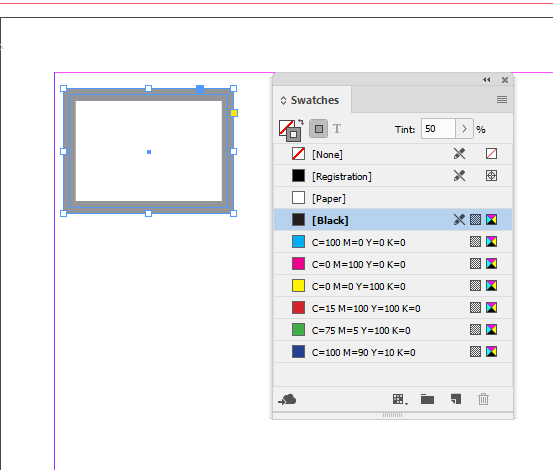
Figure 1: Draw a rectangle, set the stroke width, and apply a color to the stroke.
There are any number of ways to copy this frame and create our grid, but my favorite is Step and Repeat. With the frame selected, choose Edit > Step and Repeat. Enable Create As a Grid by clicking the check box and, if it’s not already selected, enable Preview as well.
You can use the offset settings I’ve chosen or just experiment until it looks the way you’d like (Figure 2).
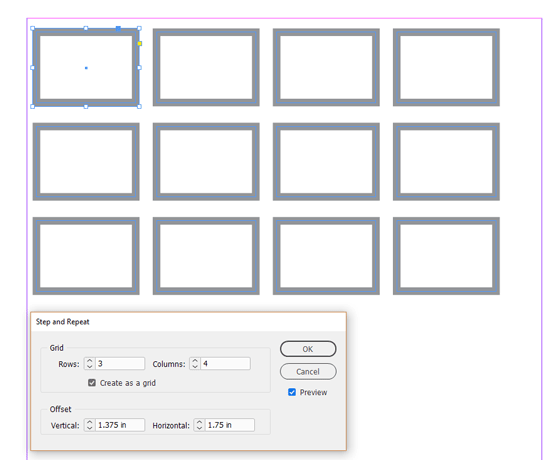
Figure 2: Use Step and Repeat to make a grid of frames.
Click OK to create the pieces for your grid.
At this point, you still have a bunch of individual frames, so you need to take an extra step to turn them into a single frame you can place your image into.
Select all the frames you’ve created with Step and Repeat. Then, from the Object
menu, choose Paths > Make Compound Path, or use the keyboard shortcut Ctrl+8 (Windows) or Command+8 (Mac) (Figure 3).

Figure 3: Use the Make Compound Path command to create a single frame.
Voilà! You now have a single frame. Now it’s time to place an image in there. Choose File > Place, browse an image you’d like to use, hover your cursor over the frame you’ve built, and click. Beautiful! (Figure 4)
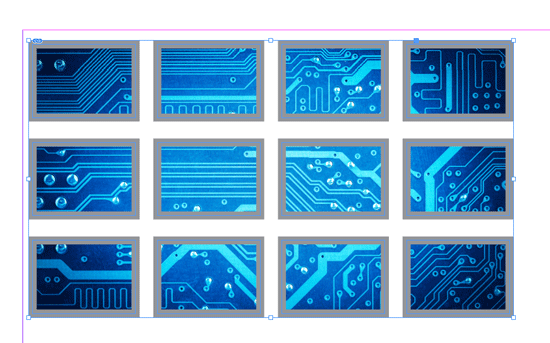
Figure 4: Place an image in the newly created frame.
Another option is to use the MakeGrid script that comes with InDesign. You’ll find it in the Samples folder in the Scripts panel. With your image selected, run the script and use the diallog box to set the desired number of rows and columns, spacing, and other options (Figure 12).
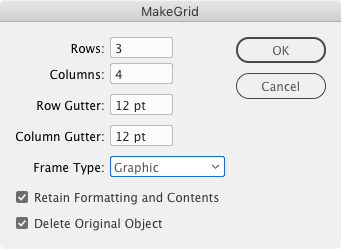
Figure 5: The MakeGrid dialog box
Click OK and you’re done. Just be aware that this method does not use a compound path, so multiple independent copies of the image will appear in the layout and in the Links panel.
Commenting is easier and faster when you're logged in!

Recommended for you

Fun with the MakeGrid script
Keith wastes way too much time playing with the handy MakeGrid script that's inc...

Before&After: Use a Simple Grid With Endless Variety
Snap-together modules make this format for ads and promotions easy—but get the s...

100 Great InDesign Tips
We scoured every past issue of InDesign Magazine to bring you the best of the be...