
Q: I’ve been tasked with laying out a document that uses side heads. I’ve figured out how to anchor them, but positioning and resizing them over and over is a pain. Is there a method that can help me speed this up?
A: Well, there’s no disputing that side heads are a bit of a pain. I can’t eliminate it, but let’s see if I can at least give you a bit of relief.
The good news is that you’re on the right track by using anchored objects. We just need to go down the road a bit further by taking advantage of some options for anchored objects and then combining them with the magic of object styles.
Like you, many of the folks I’ve seen working with anchored objects just manually drag the frame into position, resize, and move on to the next one (the lather-rinse- repeat workflow) without exploring the available options. Allow me to show you how to start automating some of that.
Figure 1 shows a typical layout for this sort of thing—a 3-column page with the left column for the heads and the main body text spanning the center and right columns. The gutters are set to .25 inches. With the layout set, draw a text frame, add the text for the side head, and then apply a paragraph style to it.

Figure 1: A typical 3-column layout, where side heads will be placed in the left column.
Before anchoring the frame, drag it into position, and size it so its width fits the first column. Set the height to fit the maximum number of lines that you think the titles will take up, or use Text
Frame Options to apply Auto-Sizing: Height Only. Finally, change the proxy reference point in the Control panel to the upper right corner.
Now it’s time to anchor the frame to the main body text. Switch to the Selection tool, grab the to-be-anchored frame adornment (the little blue box), and drag it to the beginning of the first line of the main body text.
Next, make sure that the anchored frame settings are correct. Alt+click/Option+click the anchored frame adornment to open the Anchored Object Options dialog box (Figure 2).

Figure 2: The frame adornment (top) is a handy shortcut for opening the Anchored Object Options dialog box (bottom)
Most of the settings will already be the way you want them. The right reference point is already selected. To keep your text nicely spaced from the body text, go with .25 inch X-offset relative to the column edge (which matches the gutter width). And to make the text to align vertically, choose zero for the Y-offset, and click OK.
Now you’re ready to create the object style. With the anchored frame still selected, open the Object Styles panel (Window > Styles > Object Styles), and choose New Object Style from the panel menu.
With the New Object Styles dialog box open, give the style a name, and enable Preview and Apply Style to Selection (Figure 3).

Figure 3: Name your object style, and enable the Apply Style to Selection and Preview options.
By default, object styles ignore paragraph styles, but in this case, you want to format the text when the object style is applied, so select the Paragraph Styles pane (Figure 4), and choose your paragraph style.
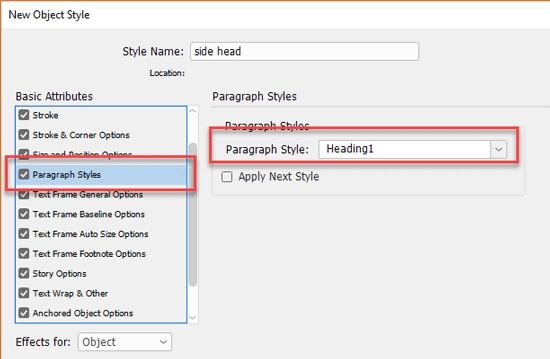
Figure 4: Choose the paragraph style for your side head.
Since you’re using an anchored object, you need to also make sure its settings are correct. Click on Anchored Object Options (you may need to scroll down to see it). As expected, it all looks fine, because it’s based on the current selection (Figure 5).

Figure 5: Verify that anchored object options are correct.
Finally, click on Size and Position Options. This is a new feature in CC 2018 (you can read more in Steve Werner’s article). The position is taken care of by the anchored object options, and you can now save the size of the object within the object style (Figure 6). Hurray!
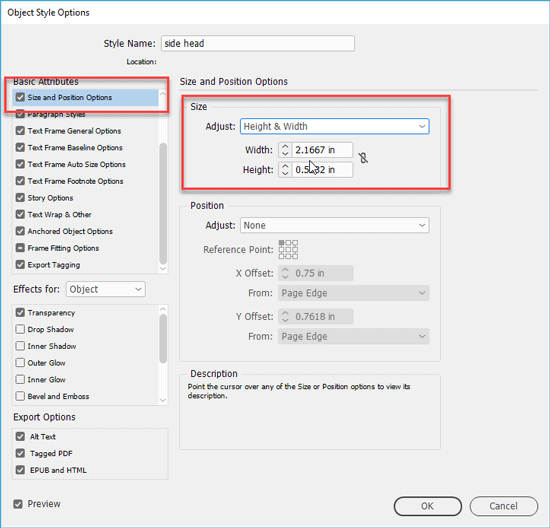
Figure 6: Enable Size settings, and verify that they match the text frame size.
Having previously sized the frame appropriately, the setting should match what you’ve set up already. Click OK.
Now it’s time to check if everything works as intended by creating another side head.
Draw a frame, and enter some text. Don’t worry about size or style—just anchor it to the body text and apply the object style (Figure 7).
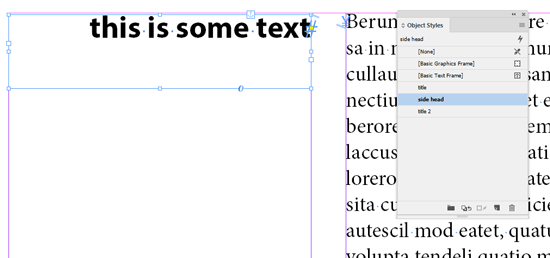
Figure 7: Apply the object style to an anchored text frame and watch in amazement.
See? It’s magic! Note that it’s important to anchor the frame before applying the style so that the anchored object options are applied. I know it’s not as easy as having a dedicated side-head feature, but the object style eliminates a lot of pain points, especially with CC 2018.
Commenting is easier and faster when you're logged in!

Recommended for you
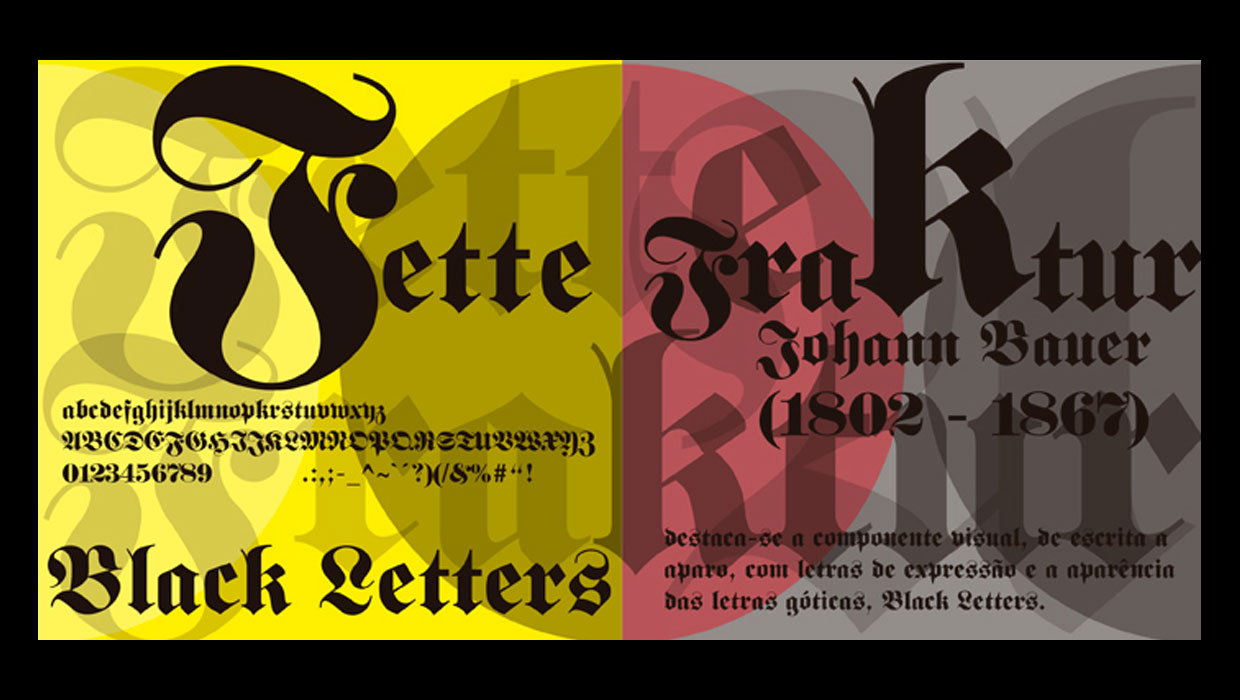
13 Fonts From the Dark Side
Don’t be afraid of the dark! Use these fonts for creating distinctive, impactful...


An interesting use for Style Groups
Style Groups, introduced in InDesign CS3, are sometimes used to keep Styles pane...