
InDesign How To: Using Paragraph Rules
Paragraph rules are a wonderfully useful feature for enhancing type. Nigel French describes the basics plus several advanced techniques for combining rules.


This article appears in Issue 48 of InDesign Magazine.
Remember when you first discovered paragraph rules? That beautiful realization that you didn’t have to draw separate lines and laboriously reposition them every time your text reflowed? If you’ve never used paragraph rules before, you’re in for a treat; and if you have, hopefully this article will give you some ideas for how you can use them in new ways.
The simple premise of a paragraph rule, be it above or below your text, is that it moves relative to the text. As a paragraph level format, a rule is associated with the paragraph type and will follow it faithfully regardless of what edits are applied to the text. You might think of the rule as the original anchored object. And, of course, rules can be incorporated into paragraph styles. One click is all you need to apply a rule and, potentially change the appearance of your text dramatically.
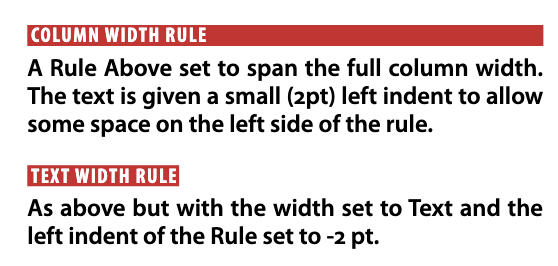
At their most basic, Paragraph Rules are a great way to differentiate blocks of information without needing to resort to changing point size, which might result in a mish-mash of different type sizes on your page. In addition to the weight, style, and color of a rule, you can also set its width: either the width of the column or the width of the line of type itself. Where rules really come into their own, is in giving you the ability to have type reversed out of a solid rule. This can be tricky to set up first time around, but once you’ve done so, you can create a paragraph style based on the text (Figure 1).


Whether it’s a Rule Above or a Rule Below, the rule starts out positioned on the baseline of the type. For a Rule Above a positive offset moves the rule up; for a Rule Below a positive offset moves it down. But don’t worry about trying to memorize that: just make sure Preview is checked, put your cursor in the Offset field and press the Up or Down arrows to dial in the amount of offset you want. Make sure you’ve specified a color for the rule other than (Text Color). Otherwise, if your type is set to Paper, your rule will be invisible. For best results, set the weight of the rule to the size of your type, or possibly a point or two less, depending on how tightly you want the rule fitted around your text. When reversing text out of a paragraph rule I prefer to use all caps so that the spacing above and below the type is optically even. I’ll also favor a bold or semibold sans serif—fine serifs or small counters won’t take kindly to reversing out of a solid color at small type sizes.
Using paragraph rules isn’t an either/or proposition, you can have both a rule above and a rule below:
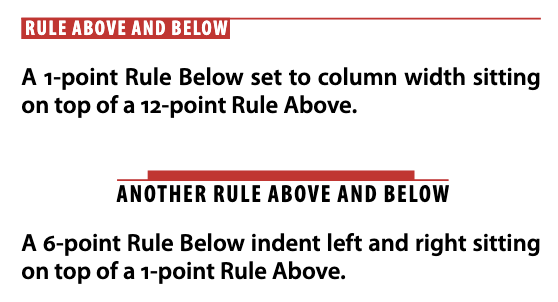
In the second example I’ve adjusted the width of the rule by specifying a left and right indent (Figure 2).
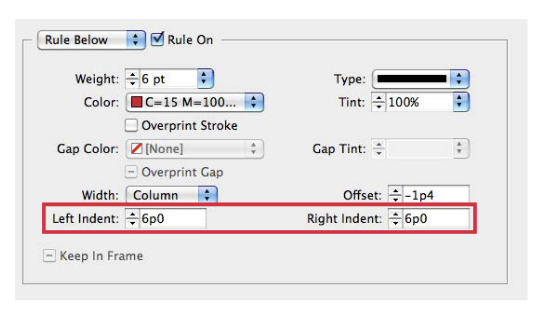
In fact, when the type reverses out of a color I always apply a small amount of left and right indent to give the type an inset from the rule’s edge. For body text sizes I find that -2 points works well. And then, to keep the type flush with the left edge of the frame, I’ll add a 2 point left indent to the text itself—fiddly stuff, but as I said before, you only need to get it right once and then define it as a Paragraph Style (Figure 3).

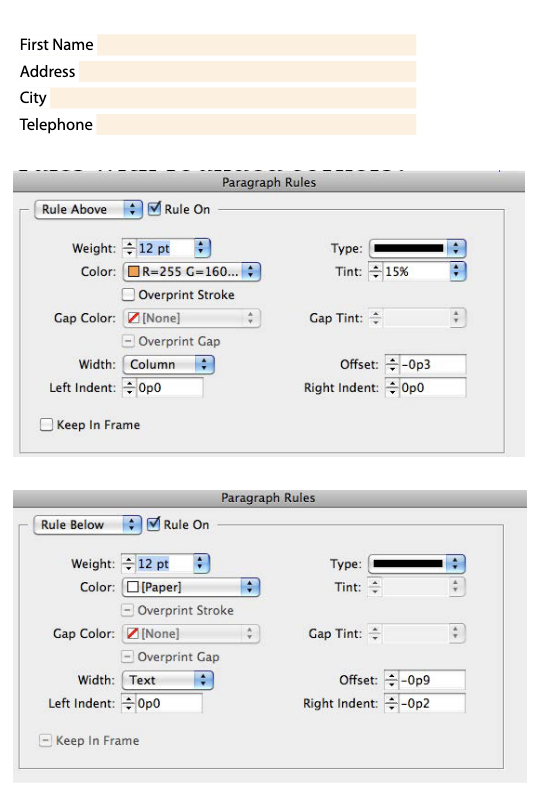
The two rules trick is great to use on forms or reply coupons, where you can use a tint to indicate the field to type in. In the following example, each category has a Paper rule below set to the width of the text and a tinted rule above set to the width of the column (Figure 4).

What about rules with rounded corners? Sorry, these aren’t allowed because they look cheesy. But, if you can’t resist, you can use a dotted rule with a Gap Color (Figure 5) to achieve this:
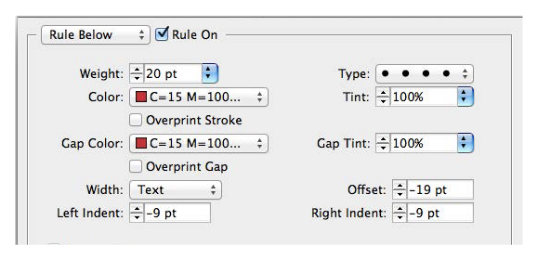
There’s no law (save common sense) that dictates both the dots and the gap have to be the same color.

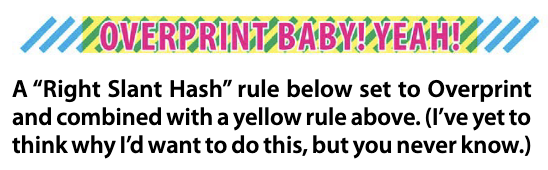
Things can get really crazy if you use colors that blend to make a third color and check Overprint Stroke. Good luck with that.
Stupid paragraph rule tricks aside, there is one very useful option I haven’t yet mentioned, and that’s Keep in Frame.
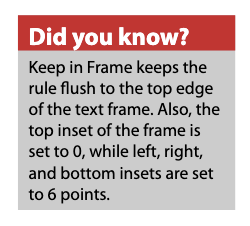
When you apply a rule above to a line at the top of a frame, checking this option causes the type to move down as opposed to having the rule stick up above the top of the frame. I find this particularly useful when using a reverse out head rule at the top of an info box (Figure 6).
With paragraph rules being this good, you may wonder if there’s anything they can’t do. Well…
Paragraph rules are great for applying rules to single line paragraphs; they’re not so great for multiline paragraphs. If you want a box around a multi-line paragraph that’s part of a text flow, then use a single row, single column table instead (Figure 7).

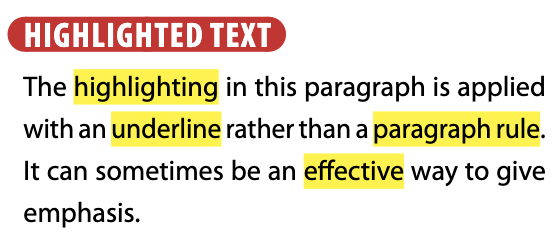
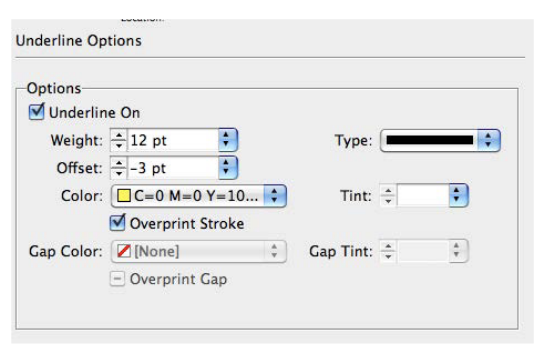
Also, don’t forget that paragraph rules are, as their name suggests, paragraph level formats, so they’re no good for putting a rule above, below, or behind a text selection. For this you can make a character style that uses an underline and adjust the weight, color, and offset of the underline accordingly (Figure 8).
This article was last modified on December 5, 2025
This article was first published on October 22, 2012
Commenting is easier and faster when you're logged in!

Recommended for you

Review: Monotype Library Subscription
Love them or hate them, subscriptions and cloud-based services are here to stay....

TypeTalk: Optical and Size-specific Fonts
The phrase “one-size-fits-all” is a misnomer when it comes to digital fonts. Whi...

TypeTalk: Must-Have Symbols for Audio Packaging
Q. I need a sound recording copyright symbol (the letter P in a circle) for a CD...