

When it comes to applying color to objects in InDesign, there are several approaches you can take. Many InDesign beginners open the Color Picker by double-clicking on the Stroke or Fill Indicator with an object selected. In the Color Picker dialog box, you can click to choose a color, drag the Hue slider to adjust the range of colors available, or enter numeric values for the color. Then, when you click OK, it applies the color to a selected object. This method may seem to be exactly what you want, but there are limitations to it that you should take into consideration. What you’ve created is what’s referred to as an unnamed color.
Unnamed Colors
An unnamed color is a color that is created using the Color Picker or Color Panel that is basically a one-off instance of a color. There are several downsides to using unnamed colors, some of which are:
- It’s difficult to easily use this same color again on another object.
- It’s difficult to modify the color when it’s applied to several objects.
- If you need to change the color throughout the document, it will be a manual process.
In sum, the use of unnamed colors makes it much less efficient to change the look of your document.
Creating Swatches
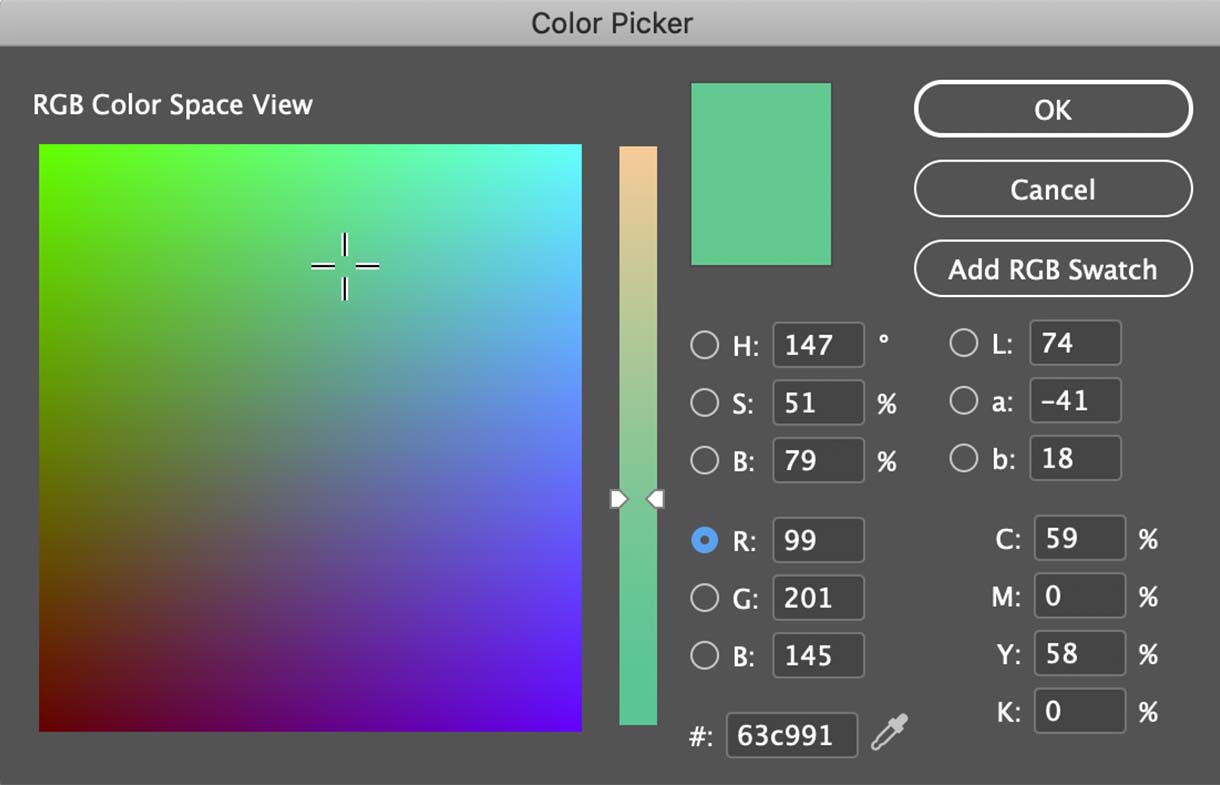
Swatches in InDesign give you a way to increase the flexibility of applying and modifying colors throughout a document, and they’re not very hard to create. As a matter of fact, you can create swatches in InDesign using the same method described above using the Color Picker. There’s just one additional step: When you’re defining a color with the Color Picker, you’ll notice a button within the Color Picker that allows you to add the color as a swatch. You’ll see either Add HSB Swatch, Add RGB Swatch, Add Lab Swatch, or Add CMYK Swatch. Which one you see is dictated by which color field you are currently targeting. If you’re trying to create a swatch with a certain color mode, simply click within one of those field values and then click the Add Swatch button to create a swatch with that color mode.
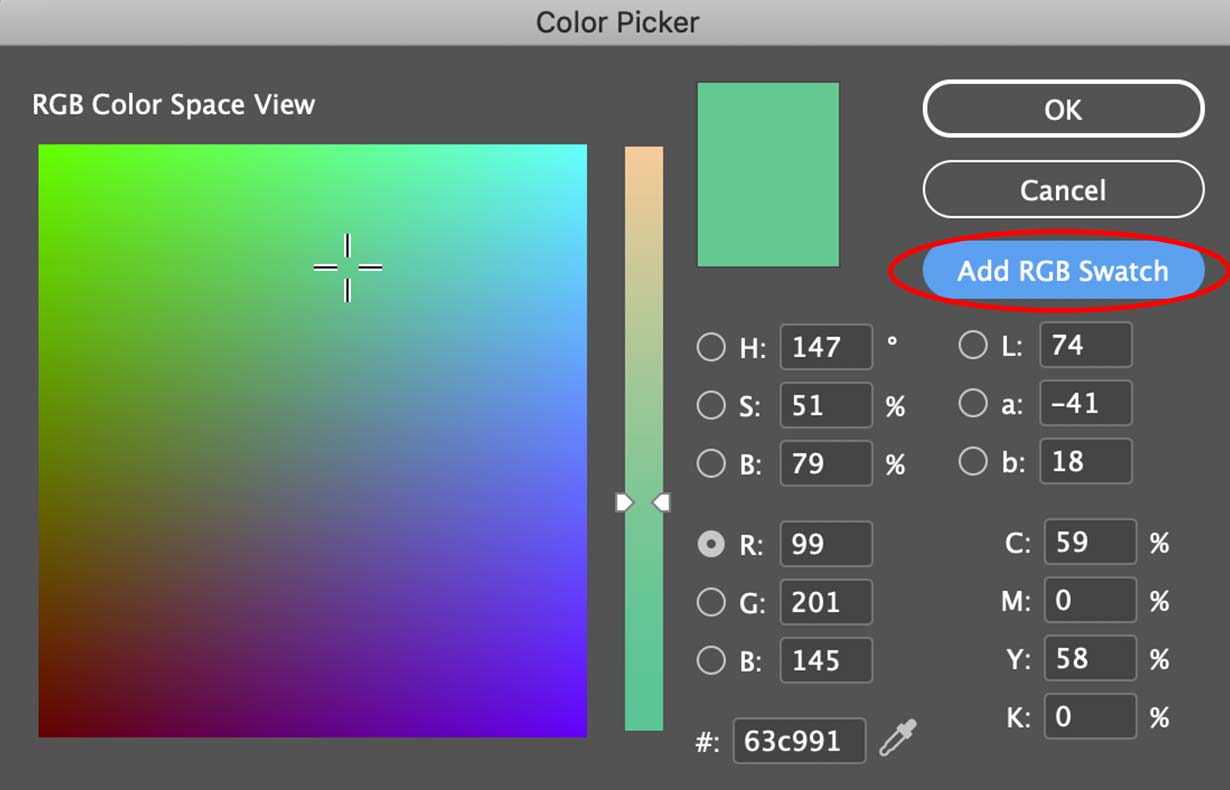
In this example, the R field value is selected, so “Add RGB Swatch” is available.
This adds the color to the Swatches panel. By default, it is named using the color values that define the swatch.

You can modify the swatch properties by double-clicking on the swatch within the swatches panel to display the Swatch Options dialog box. Or, you can right-click on the swatch and choose Swatch Options to do the same. In the Swatch Options dialog box, you can deselect the Name with Color Value option, which will allow you to enter a more recognizable name. In addition, you can adjust the color values to redefine the appearance of this swatch. Click OK when you’re done.

Another option is to skip the Color Picker altogether and create a new swatch by clicking on the New Swatch button at the bottom of the Swatches panel or choosing New Color Swatch from the panel menu.
Tip: Hold down the Alt (Windows) or Option (Mac) key when clicking the New Swatch button to display the Swatch Options dialog box, so you can set all the properties of the swatch at that time.
Benefits of Using Swatches
So why would you want to take the extra time to create a swatch as opposed to just using the Color panel or Color Picker? Where do I begin? For starters, when you create a swatch and use it to apply color to an object, the color that you apply is connected to the swatch itself. So if you ever modify the value of the swatch, all objects throughout the document with that swatch applied will automatically update with the new color value! Unlike those unnamed colors that have no relationship between the object and the color applied to it, named swatches act as a set, allowing you to modify the look of your whole document much more easily.
Furthermore, when you use a swatch, you can open the Color panel and adjust the tint value of the swatch that you wish to apply to an object. You can also create a Tint swatch by adjusting the tint value in the Color panel, then right-clicking on the fill indicator in the Color panel at the bottom of the Tools panel, and choosing Add to Swatches. This adds a new swatch to the swatches panel that is a tint percentage of the original swatch and is connected to that original swatch.

So if you were to modify the definition of the swatch, all tint swatches based on that swatch and all objects with any of those swatches applied will update automatically throughout the document.

Reusing Swatches
Swatches are also very versatile. Once you have a document that contains swatches, you can reuse those swatches in other InDesign documents by choosing Save Swatches from the Swatches panel menu and providing a name for the file. This file is saved as an Adobe Swatch Exchange (.ase) file that can be loaded into other InDesign documents and other Adobe applications, such as Illustrator and Photoshop. To load the swatches into another document, simply choose Load Swatches from the Swatches panel menu in InDesign and choose an .ase file or an InDesign document that contains the swatches that you want to use and click OK. All of the swatches will be loaded into that document.
Beginning with the 2014 release of Adobe Creative Cloud, InDesign offers another alternative to reusing swatches across documents and applications via a Creative Cloud Library. If you select a swatch in the Swatches panel, you’ll notice an icon in the lower-left corner of the Swatches panel that, when clicked, will add the swatch to the currently active Creative Cloud library.

Swatches added to a Creative Cloud library are accessible from other Adobe applications and other InDesign documents as well. As soon as you click on the Creative Cloud swatch in another InDesign document, the swatch is automatically added to the InDesign Swatches panel in that document, creating an easy and efficient way to access swatches from other InDesign files.
Remember, swatches provide greater control and consistency within your InDesign documents and they make it extremely easy to update those colors with the click of a button. Take advantage of them whenever possible!
This article was last modified on February 11, 2022
This article was first published on August 23, 2016
Commenting is easier and faster when you're logged in!

Recommended for you

New Contest! Mystery of the Empty Swatches Panel
Solve this InDesign mystery for a chance at winning a great prize.

Create InDesign Swatch Groups Instantly
Khara Plicanic shows how to quickly create a swatch group in InDesign from selec...

How to Continue Headers in Split Tables in InDesign
Learn how to set table headers as "continued" when split across frames.