
InDesign 101: Flowing Text
Learn how save time when placing large amounts of text into long documents.

This article appears in Issue 59 of InDesign Magazine.
Importing text seems simple: You choose File > Place (or press Command/Ctrl+D) and navigate to a text file to place it onto your page.
But once that place cursor is loaded, what are your options? What’s going to happen if you click, click and drag, click inside an existing frame, or click on the pasteboard? You’ve got a lot of decisions to make, and—as always—the more you know about these basic functions, the more productive you’re going to be in InDesign.
Remember that InDesign can import only plain text, RTF, or Word documents, so if you have some other format (such as Open Document Format), you’re going to have to convert it to something InDesign can read. And I’m not going to go into the options you get when you choose “Import Options” in the Place dialog box—that’ll have to be a topic for another day.
Instead, I’m going to focus on that place cursor. Here’s a rundown of all your options.
Looking at the loaded cursor
Once you’ve selected the text file you want to place and clicked OK to move back to the InDesign page, you’ve got a cursor that’s loaded with the text that you chose. (Hey, remember what they say: Never point a loaded cursor at anyone, unless you intend to use it. But seriously, folks—if you do change your mind and want to cancel placing at this point, just press the Esc key to remove the loaded file.)
Look closely at the cursor. The first thing you should notice is that the first few lines of your text are displayed as part of the cursor (Figure 1). This terrific and handy feature gives you the chance to confirm you’ve chosen the right text file.
 "Chapter 3 – How Dorothy Saved the Scarecrow/When Dorothy was left alone she began to feel hungry. So she went to the”” width=”95″ height=”96″> Figure 1: The loaded text cursor shows a thumbnail preview of the beginning of your story.
The next thing you should pay attention to is the particular look of the cursor, which changes based on where you place it.
Clicking an empty area with a loaded cursor
If you hover the cursor above a blank area (not over an existing frame), you’ll see a document icon with dotted lines on its top and left edge (again, Figure 1). This cursor design indicates that if you click your mouse (if you’re placing text) or if you release your click (if you’re dragging and dropping a file), InDesign will place the text inside a new frame at that location.
If you click somewhere in the middle of the page where there’s no frame (Figure 2), InDesign creates a new frame that’s as wide as the area inside your page (or, if you are using a multicolumn layout, one of your columns).

Figure 2: Clicking a loaded text cursor in the middle of a page creates a new text frame.
The top of that frame appears where the cursor was clicked. The text extends downward as far as the bottom margin.
If, instead, you click right at the top margin (Figure 3), the frame fills the entire area inside your column. (Look for the little pointer arrow in the cursor to turn from solid to hollow; that indicates you’re right at the margin.)
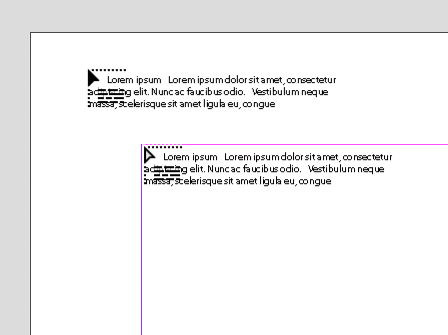
Figure 3: Clicking a loaded text cursor at the top of the margin will fill the page. The arrow icon in the cursor will change from solid to hollow when hovering over the margin.
If you click on the pasteboard (Figure 4), the top of the frame appears where you click, the width is the same as your column width, and the frame extends to the bottom margin.

Figure 4: Clicking a loaded text cursor on the pasteboard
Dragging with a loaded cursor
Instead of clicking, you can drag to create a specifically-sized text frame, then release to fill the new frame with your text.
Annoyingly, two of InDesign’s standard modifier keys don’t work while you’re dragging to create a text frame. Shift won’t constrain the frame to a square frame, and Option-Command (Alt) won’t draw the frame from the center outwards. However, you can hold the spacebar to reposition the frame as you drag.
Clicking into existing frames
You may not want to create a new frame on a page—many times you already have text frames that you want to fill with the loaded text. In that case, position the loaded cursor over the existing frame. The cursor changes to display curved lines around the text icon (Figure 5). This is the signal that the text will be placed into the frame.

Figure 5: Curved lines around the text icon indicate that the loaded text will flow into the frame.
You can also just select any frame—text, graphic, or unassigned—and choose File > Place. After you choose the file on disk, the text will by default automatically flow into the frame without any loaded cursor. And it doesn’t have to be a text frame to flow text into it.
You can change this behavior in several respects:
- You can set your preferences so that InDesign will place text only into text frames. Just deselect Type Tool Converts Frames to Text Frames in the Type pane of the Preferences dialog box.
- If you select Replace Selected Item inside the Place dialog, the text will flow into the frame; if you leave it unselected, InDesign ignores the currently selected frame and loads the place cursor.
What can you do when your cursor is loaded?
Many students freak out at the thought of holding a loaded cursor. They want to click to unload it as soon as they can. Or they are frustrated if they do something and they lose the loaded text.
Don’t rush into it! Here are just some of the things you can do without losing the text inside the cursor:
• Move to a new page
• Add a layer
• Move to a different layer
• Choose a menu command
• Start a new document
• Switch to a different document
• Switch to a different application
• Print or export
• Hold Command/Ctrl to get the Selection tool to move items around the page
• Zoom in or out (with keystrokes or keyboard shortcuts)
• Hold the spacebar to move around the page
• You can even change the program preferences!
That’s pretty much everything in the program, with one major exception—you can’t choose a new tool. If you click a tool or type its keyboard shortcut, your text disappears from the cursor. But that’s a good thing.
It’s easy to unload the cursor, and you’ll often find you want to do so. You can do so by choosing almost any tool, either with the mouse or with its keyboard shortcut—I routinely tap the V key, which changes to your Selection tool by default. An exception is that if you tap the W key; you’ll still keep your loaded cursor, but you’ll toggle in and out of the Preview mode.
Fortunately, emptying a loaded cursor is undo-able. So if you’ve accidentally lost the text in your cursor, just press Command/Ctrl+Z, and the text will reappear.
Threading text
If you have more text than can fit into the frame, the excess text becomes “overset,” and a red plus sign appears in the out port control (Figure 6). Click the plus sign with the Selection tool to load the cursor. Now you need more text frames in your design, and you need to thread your text from one frame to the next. You might also hear the concept referred to as linking. The InDesign Help files use both terms, but remember that if you want to see the lines that connect text frames, it is “Show Text Threads,” not text links (View > Extras > Show Text Threads).

Figure 6: The red overset marker on a text frame
Once you have text in a frame, you can thread the story so it flows from one frame to another. This is done using the in port and out port controls on the frame (Figure 7).

Figure 7: The in port and out port controls on a text frame
Using the Selection tool, you link text from one frame to the next by clicking the out port of one frame; if the red overset indicator is there, it will disappear. When you see a loaded cursor, move it over to the frame that you want the text to flow into. When you hover over the next frame, the icon will turn into a little chain (Figure 8). Click, and the text will flow in.

Figure 8: Click the out port of one frame to load the cursor and then link to a second frame.
Flowing text onto many pages
When you click at the top of an empty page or column with the Place cursor, your text will fill only that one column. Imagine doing that for a whole book! Obviously, you need a way to flow the text automatically onto many pages, and InDesign delivers with Autoflow.
Position the loaded cursor at the top of your first page and hold the Shift key while you click. Notice how the text lines of the cursor are replaced by the Autoflow indicator (Figure 9). Click, and the text flows onto one column and page after another, threaded as one continuous story. You don’t have to worry about adding enough pages. By default, Autoflow adds as many pages as are necessary.

Figure 9: The Autoflow icon in the loaded cursor indicates the text will flow onto as many pages as necessary.
If the idea of InDesign automatically adding frames is too much, you can use Semi-autoflow, which automatically loads the pointer with more text. You can then click sequentially on previously created text frames or in pages, as described above, to have InDesign make new frames within your column guides.
To use Semi-autoflow, keep holding down Option/Alt when you click the loaded cursor (Figure 10). If you release Option/Alt before the text is placed, your last frame will end up with overset and the red symbol on the out port.

Figure 10: Holding down Alt/Option changes the loaded text cursor to Semi-autoflow mode.
Flowing onto a fixed number of pages
You can also use Fixed-page Autoflow to flow text so it will not add new pages to the document, even if that means some of the text will be overset. Let’s say you have created a booklet that must stay at the four pages you created when you set up your document, and you don’t know if the space you have can accommodate all the text in your file.
Hold Option/Alt+Shift as you click; notice that Fixed-page Autoflow has its own cursor, too, which looks like a straight down-arrow. In this mode, the text will flows onto all the existing pages but will stop at page 4, even if there is more text (Figures 11 and 12).

Figure 11: The Fixed-page Autoflow cursor has a down-arrow design.

Figure 12: Fixed-page Autoflow will add new text frames as needed but will not add pages to your document. Note the overset marker on the selected text frame on page 4.
Using a Primary Text Frame
If you are flowing text into a document with a lot of pages, you may want to specify a primary text frame when you create the document (Figure 13). Primary Text Frames have special powers that make them much more versatile than their predecessors when changing the master applied to a page.

Figure 13: Select Primary Text Frame when you create a new document.
To get the Primary Text Frame to automatically create new pages as you flow text, you need to make sure that Smart Text Reflow is turned on in the Type pane of the Preferences dialog (Figure 13).

Figure 14: The Smart Text Reflow settings for working with long documents
Once you’ve got your Primary Text Frame on the master page, you can simply load your cursor (with the Place command) and click on top of one of the frames. The text automatically flows into that frame, and then … wait a moment … InDesign creates as many pages as are necessary to hold all the text.
You might think the Primary Text Frame is describing the same situation as Autoflow, and that’s understandable—they are similar, particularly if you are designing simple books with one-column pages. Unlike Autoflow, which creates new frames as needed to fit the columns on your page, you control the size and location of the Primary Text Frame on your master pages, and you can have multiple master pages that, when applied, seamlessly pick up the flow of text.
With the primary text frame feature, you can apply a new master page to a document page and the frames on the document pages adjust accordingly (Figures 15 and 16).

Figure 15: Pages with one primary text frame

Figure 16: Text automatically reflows when a new master page with three linked frames is applied.
Creating your own Primary Text Frames
If you didn’t turn on the Primary Text Frame checkbox when you started your document, don’t fret: It’s pretty easy to create your own custom primary text frames. Open the master page and draw as many frames as you need. For instance, a cookbook publisher I know uses three linked frames on the page.
Click the out port on the first frame to load the cursor. Click inside the next frame that you want to link. Then click on the out port of the second frame, and link to the third frame. Repeat until all the frames have been linked. (You might want to choose View > Extras > Show Text Threads (Figure 16) to keep track of which frames are linked.)

Figure 17: Text threads show how the frames are linked.
Your frames are now linked, but they don’t yet have the special abilities of primary text frames. When you select any of the linked frames, you’ll see a small icon on the upper left corner. A text-frame-with-text icon (Figures 18 and 19) indicates that it is an ordinary frame. But click on the icon, and you will see the addition of an arrow extending from the out port position. That means the frame (and by extension, the whole thread of frames you just made) has changed to a Primary Text Frame.

Figure 18: An ordinary text frame on the master page

Figure 19: Once the icon on an ordinary master page text frame is clicked, it becomes a Primary Text Frame.
You can have as many linked frames as you want in the primary text frames, but you can have only one Primary Text Frame story on each master.
For more on Primary Text Frames, visit “InDesign Basics: Primary Text Frames.”
Understanding text flow
Once you understand how to flow text, you can speed through your long-document projects. Here’s a table to help you choose which type of text flow you will want to use.
| Method | Without a Primary Text Frame | With Primary Text Frame |
|---|---|---|
| Manual text flow | • Adds text one frame at a time. • You must reload the text icon to continue flowing text. | • Adds as many pages as necessary if Smart Text Reflow is turned on |
| Semi-autoflow (Option/Alt-click) | • Adds text one frame at a time, and the cursor is automatically reloaded. | • Adds a single frame at a time if Smart Text Reflow is turned on. • Creates new pages to hold all the pages but leaves the cursor linked to the frame on the last page. |
| Autoflow (Shift-click) | • Adds as many pages as necessary, even if Smart Text Reflow is turned off. | • Does not insert text into the primary text frames. • Creates new frames above the primary text frame. |
| Fixed-page Autoflow (Option/Alt-Shift-click) | • Flows all text onto all the existing pages in the document. • Does not add new pages. • Creates an overset if necessary. | • Flows all text onto all the existing pages in the document. • Does not add new pages. Creates an overset if necessary. • Does not insert text into the primary text frames. Creates new frames abova the primary text frame. |
Commenting is easier and faster when you're logged in!

Recommended for you

Tab Leaders (Part 4): Automatic Styling
First, in part 1, we talked about separating columns of text with dot or other k...
Sandwiching Text or Logos Inside an Image
Joe wrote: I notice on every magazine out there -- such as Maxim, Stuff, or any...

dot-font: Trilateral Typography
dot-font was a collection of short articles written by editor and typographer Jo...