
Automatic tracing gets a big boost in Adobe Illustrator CS2 in the form of LiveTrace. While previous versions of Illustrator had a trace tool, it could trace an image only one contour at a time. The new LiveTrace feature rapidly traces an entire imported image at once, and you can control the degree of detail in the resulting paths. Long-time Illustrator users may see LiveTrace as the incorporation of Adobe Streamline-like features into Illustrator, but LiveTrace actually goes beyond Streamline. Because LiveTrace objects are “live,” you can change the tracing settings at any time and LiveTrace regenerates the traced paths with the new settings.
The final illustration.
Scott Crouse drew this portrait of George Jenkins, the founder of Publix Markets, as part of a series of exterior murals for the Publix grocery store chain. To communicate the warm, friendly personality of “Mr. George,” Crouse applied his personal illustration style as he hand-traced the portrait from a photograph. The background image didn’t need to be as distinctive as the person, so Crouse saved time by using the LiveTrace feature to create the background from the same photograph.
Before he began the tracing process, Crouse simplified the image by using Photoshop to limit tonal levels and remove distracting stray marks.
Preparing the Illustrator Document
In a new Illustrator CS2 document, Crouse chose Select All Unused from the Swatches palette menu, and then clicked the trash can icon in the Swatches palette. Removing all unused swatches from the document made it easier to see the swatches that would later be created by LiveTrace.
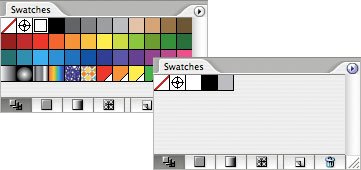
The Swatches palette before and after removing unused swatches.
Crouse chose File > Place to select the original photograph of Mr. George and clicked the Place button to close the dialog box and add the photo to the page.
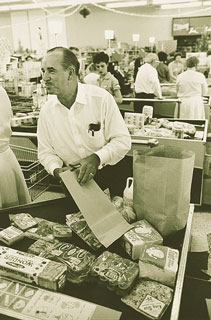
Crouse used this original photograph as the starting point for both the LiveTrace background and hand-traced foreground.
Because the two copies of the image (one for the foreground and one for the background) had to align exactly, Crouse duplicated the image layer in the Layers palette by dragging the layer to the New Layer button. Crouse named each layer to represent its function. He clicked the upper layer’s eye icon to hide the layer, because he wanted to create the background on the lower layer first.

The Layers palette after duplicating the image layer, renaming the layers, and hiding the upper duplicate.
Creating the Background with LiveTrace
Crouse selected the photo on the lower layer and chose Object > LiveTrace > Tracing Options.

The Tracing Options dialog box.
You can produce results similar to Crouse by applying Tracing Options dialog box settings like these: For Mode, choose Grayscale; for Max Colors, enter 3 (some images need more levels); and Select Output to Swatches. Leave other options at their default settings. Click Trace to commit the settings. The tracing is live, so you can change the settings at any time by clicking the Trace Options button on the Control palette.

Tracing Options button on the Control palette, located to the right of the Preset pop-up menu.
LiveTrace works by creating paths along significant changes in contrast. In some photos, the areas you want LiveTrace to trace may not contain enough contrast. To address this, open the image in Photoshop and apply a Curves adjustment layer to increase or decrease contrast or make other changes to emphasize areas as needed. After you edit a placed image outside of Illustrator, use the Links palette in Illustrator to update the image link; the LiveTrace object will update as well.
Adjusting the Background Graphic’s Colors
To keep the viewer’s focus on the subject, Crouse gave the background a light, low-contrast appearance. Selecting the Output to Swatches option back in the Trace Options dialog box added colors to the Swatches palette as global swatches applied to the LiveTrace object. Global swatches are extremely useful because editing a global swatch updates all of its applied instances. To edit any of the new global swatches created by LiveTrace, double-click them. Crouse changed the gray tones to colors and lightened them all.

Before (left) and after (right) editing swatches output by LiveTrace; white corners signify global swatches.
For this illustration, Crouse selected the LiveTrace object and clicked the Expand button on the Control palette. This is normally not necessary because expanding removes the ability to edit the tracing options, but Crouse wanted to make the tracing permanent. LiveTrace updates a tracing when the underlying image changes, which normally has the positive effect of keeping the LiveTrace object up to date with the underlying image. However, Crouse wanted to edit the underlying image and yet keep the current traced paths as they were.
Preparing a Photo Copy for Hand-Tracing
Before hand-tracing a photo, Crouse likes to emphasize a photo’s essential forms using Adobe Photoshop, making the photo easier to hand-trace. Crouse opened the original photo in Photoshop, and chose Image > Grayscale to remove its color. Next, Crouse simplified the image by lowering the number of tones in the image. He chose Layer > New Adjustment Layer > Posterize, entered 3 for Levels, and clicked OK.
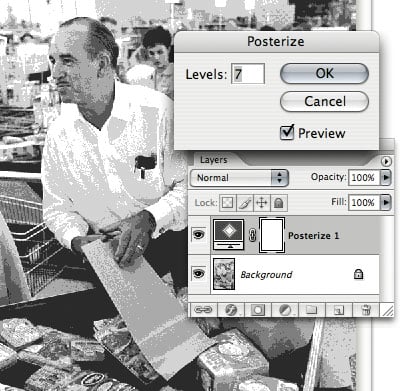
Adjusting levels in the Posterize filter dialog box.
He also wanted to suppress distracting stray marks, so he chose Filter > Noise > Median, adjusted the Radius value until he was satisfied with the level of detail and the smoothness of tonal edges, and clicked OK. He saved the file without changing the name.

After applying a Radius of 2 for the Median filter.
Hand-Tracing the Foreground
Crouse switched back to Illustrator and was greeted by an alert message saying that a linked file was missing or modified and asking if he wanted to update the document. He clicked Yes.
He then clicked the New Layer button on the Layers palette to create a new blank layer for the tracing paths he was about to draw. He switched to the Pen tool to hand-trace the template image, resulting in the foreground portrait. The goal of hand-tracing is to produce a personal interpretation of the original image, so Crouse didn’t follow the template exactly; he added, edited, or removed paths as needed. Through his linework, Crouse enhanced and advanced the desired mood and feeling of the illustration and the physical and facial expressions of the subject.

The Layers palette with the LiveTrace background layer, hand-tracing image set up as a template layer, and a new layer (Hand-trace) added on top to contain the hand-traced paths.
When he was satisfied with his hand tracing, Crouse deleted the tracing template layer, leaving the final hand-traced foreground over the LiveTrace background.

The completed hand-tracing over the dimmed template (left), and with the template hidden to reveal the actual background (right).
This article was last modified on July 20, 2021
This article was first published on April 20, 2005
Commenting is easier and faster when you're logged in!

Recommended for you
Free Art Books Galore
Art books are often incedible sources of education and inspiration. They can als...

Recosoft Corporation releases PDF2Office v2.1.1 Professional for Mac OS X
Recosoft Corporation the developer of cross platform Macintosh and Windows file...
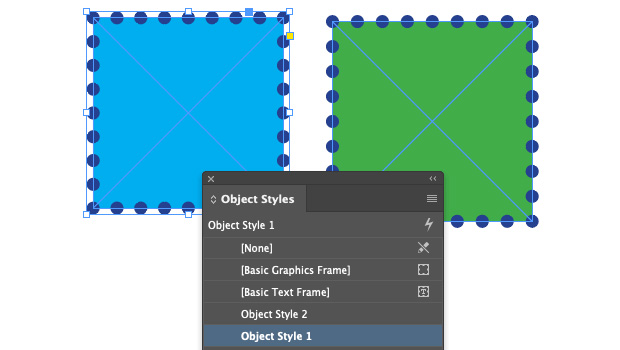
Making Based On Object Styles in InDesign
Maximize your efficiency in InDesign by using the Based On feature to connect ob...