
HTML5 from InDesign
Frustrated you can’t export Publish Online replica layouts to your own website? Try HTML5 instead.


This article appears in Issue 45 of CreativePro Magazine.
The Publish Online feature of InDesign, which has been around since 2016, lets you easily create a version of your document that can be viewed in a web browser with all formatting intact and support for interactive and media playback features. But Publish Online content must be hosted on Adobe’s servers, which presents barriers for some uses. InDesign 2025, version 20.0, offers you a new path: the ability to export HTML5. With it, you can now export content like that of Publish Online to your local storage and then upload it to your own website. There, you can display the content however you wish, password protect it, or put it behind a paywall.
The good news: HTML5 export is easy to do and provides faithful reproduction of complex layouts. The not-so-good news: Adobe’s scant documentation about this feature doesn’t tell you how to optimize the output, how to incorporate it into your own website, or which InDesign features output correctly and which do not. The best news for you: I’ve done a ton of experimentation and testing of this feature and will tell you what you need to know to create great output and include it on your website.
Why Use HTML5?
InDesign’s HTML5 export creates fixed-layout output that matches your InDesign layout exactly. Most importantly, the output won’t be responsive. In other words, the layout won’t reflow, resize, or adjust to fit the browser screen. The output is best for replica layouts of magazines, magazine articles, newsletters, manuals, directories, presentations, and interactive documents. It is a low-effort way to include this type of content within a website.
All the interactive and media playback features that are supported by Publish Online should function in exported HTML5 documents. This includes animation, buttons, multi-state objects, embedded video and audio, and embedded iframe (inline frame) content like Google Maps and YouTube videos.
The HTML5 export doesn’t create a single file. Instead, it creates a package, a single folder that contains an index.html file as well as a handful of subfolders (Figure 1). Each InDesign page or spread is represented by the individual files in the html folder.

How to Export
You’ll find HTML5 export in two places. You can choose File > Export, and select HTML5 for the Format, or choose File > Publish Online and click the Export HTML5 Package button. I recommend the latter method, as it provides access to settings that aren’t available via File > Export.
The Publish Online dialog box displays three tabs that contain various settings. The only settings that affect HTML5 export are highlighted in Figure 2. All other settings are ignored.

In the General tab, you can specify a document title, which will be used as the name of the folder that the files are exported into. Assuming that you’ll eventually upload this folder to a web server, use a web-friendly name with no spaces and no special characters. Below the Title field, you can specify which pages to output and whether to output single pages or spreads.
On the Advanced tab, you can choose which page to use for a cover thumbnail. This thumbnail will appear in the publication-web-resources/Thumbnails/Cover folder, but it won’t be used by the HTML output unless you create some sort of system to display thumbnails in the output.
Likewise, turning on the Allow Viewers To Download The Document As A PDF option will cause a PDF version of the document to be generated and placed in a publication-web-resources/pdf folder, but this also won’t appear anywhere in the web output as a download option unless you create an interface for it.
The Image Settings section of the Advanced tab affects how images are rasterized. You can usually leave the default settings, but for some special cases, such as bitmap line art, you might desire higher-quality images. In that case, you can increase the quality of all images by choosing different settings here. If you want an individual image to appear at a higher resolution, select the image in InDesign and choose Object > Object Export Options. Click the EPUB And HTML tab, and fill in the dialog box as shown in Figure 3.

Optimizing InDesign Layouts for Web Use
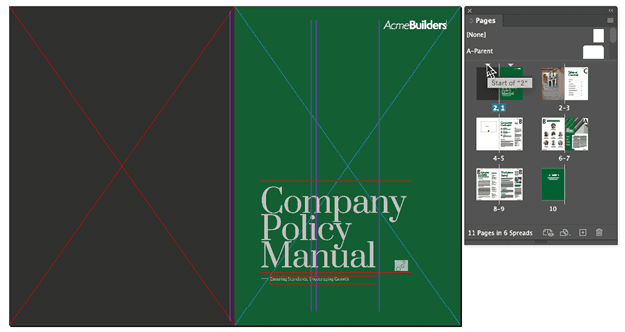
You can output both single-sided and facing pages documents to HTML5. If you use facing pages in your layout and want to export spreads, you may want to start your InDesign file on page 2 so that the layout begins on an empty left-hand (even) page. Otherwise, the first right-hand page will be aligned to the left margin of the browser window instead of the fold of the document, as the subsequent right-hand pages are. That looks odd. You can either cover this empty page with a rectangle the same color as the background you use in your HTML output so that it won’t be visible, or you can use this space to include reading or navigation instructions for your users (Figure 4).
Use an appropriate page size. InDesign’s HTML5 output isn’t easily scalable in the browser. In other words, the reader can scale the output size up and down with their browser zoom controls (Command+plus/minus or Ctrl+plus/minus in most browsers), but resizing the browser window won’t scale the output. Each point in InDesign becomes a pixel in the output, so a letter-size page at 8.5 × 11 inches (612 × 792 points) will output at 612 × 792 pixels. If you output spreads, the output will be twice this width: 1224 × 792 pixels in this example. A common desktop and laptop monitor size is 1920 × 1080 pixels, so this size displays nicely on most desktop monitors, but it won’t be a very good reading experience on a phone. Thankfully, a simple one-line tweak of the HTML output allows you to scale the default size as needed if your InDesign page size isn’t optimal. (See “Scaling the output size” later in this article.)
For the easiest output, use locally-installed OpenType or TrueType fonts for which you have a print and web license. Avoid using fonts that are served from fonts.adobe.com or fonts.google.com. (See “Including Adobe Fonts” later in this article.)
Font rendering
After you click the Export HTML5 Package button, you’ll see the dialog box in Figure 5 where you need to choose between exporting HTML text tags and HTML SVG tags. What you decide here affects the appearance, searchability, and rendering speed of your document.

SVG tags are the easier, more accurate option, rendering all the text characters as SVG outlines in the HTML output. Conceptually, this does much the same thing as if you were to select all the text and choose Type > Create Outlines in InDesign. This choice will ensure that the output matches your document exactly, no matter which or how many fonts you’ve used. Type will be rendered faithfully even if you’ve included advanced OpenType typographic features, lots of custom kerning and tracking, or special characters in your design. A good choice if you are outputting a display ad with limited text, the HTML SVG Tags option has two downsides. First, your output can’t be searched by a user or discovered or indexed by search engines. Second, the total size of the files that are output (which affects the speed at which it renders in the browser) may be larger if your layout contains lots of text.
Selecting the HTML Text Tags option causes InDesign to output actual text characters, with fonts and styles assigned through Cascading Style Sheets (CSS). If you opt for text tags, you’ll likely also want to turn on the Copy Fonts option. Doing so will copy the fonts you’ve used to a Fonts folder in the HTML5 package, and the CSS will reference these fonts. This method of embedding fonts in a web page works in all modern browsers if you’ve used locally-installed OpenType or TrueType fonts. See CanIUse.com for more details. You’ll be best off avoiding advanced OpenType font features such as oldstyle numerals, swash characters, and fractions in your layout with this option. Ensure that you have the proper license; many fonts require an additional paid license (beyond the print license) to use them on websites.
If you wish to use fonts from fonts.adobe.com or fonts.google.com in your layout, you can do so, but this will require some editing of the HTML and CSS files. (See “Including Adobe Fonts” later in this article.)
Customizing the Output
After you’ve exported a file, open the index.html file in your browser to see the results. Regardless of which font rendering choice you made, this “local” output should look good. If you chose the HTML Text Tags export option, you should either use a font manager to disable the fonts or remove the fonts from your system folders to test if the text still renders properly when the fonts aren’t available on your system.
You’ll notice that the output appears in the upper-left corner of the browser window. This is okay if the output is a single page that will be included in another web page as an iframe, like a display ad, for example. But if the output is a multi-page document, this alignment isn’t great. With some very simple HTML tweaking, you can make the output look much better.
I’ve already done most of the work
Every time you do an HTML5 export, the index.html file that InDesign creates is identical because it’s just a “wrapper” around the actual HTML content. After a lot of trial and error and reverse-engineering of how Adobe creates the HTML, CSS, and JavaScript in the output package, I’ve done the work for you and created a new index.html file that makes the output look much better than Adobe’s index.html file. You can download it here.
All you need to do is replace the index.html file created by the export with the index.html file I created. Then, crack the file open with a text editor and change the width and height on lines 11 and 12 to the size of your page or spread in points (Figure 6). Save the file, then open the index.html file in your browser. If you’ve done it correctly, the output will look similar to the after image on the right in Figure 7.


Scaling the output size
You can enlarge or reduce the default size of the page by simply changing the percentage displayed next to scale on line 14 of the index.html file. Enter a decimal representation of the percentage you want. For example, .5 is 50%, .7 is 70%, 1 is 100% (no scaling), and 1.2 is 120%. This is useful if you’ve created a document with a large page size in InDesign, but you want to reduce the default size displayed in the browser. Note that you don’t need to adjust the width and height on lines 11 and 12. Those should remain at the original size of the document.
Adding a spine
If you’re publishing a facing-pages document, you’ll find that there is no visible boundary between the left and right pages in the HTML output. My workaround is to simply add a 2-pt rule on the spine of the parent pages in InDesign.
Customizing the background color
In the custom index.html file I changed the background color (the color outside the page boundaries) to the same dark gray as used by Publish Online. You can enter any RGB value you want for the background color on line 16.
Customizing the arrow appearance
You can change the color of the forward and back arrows by entering an RGB value on line 18. There are additional settings that affect the arrow appearance on lines 47–63.
Hiding the arrows
If you’ve included your own navigation throughout your document by adding buttons, hyperlinks, or cross references, you may want to remove the previous and next arrows provided by the export. To do this, delete the two lines in the index.html file that are highlighted in Figure 8.

Including Adobe Fonts
All the fonts on the Adobe Fonts website are licensed for web use when they are served to other websites from fonts.adobe.com. Unfortunately, the font tags that are included in the HTML5 export contain OpenType font names, and to serve these fonts from fonts.adobe.com the font tags need to specify the web font names. With some ingenuity, you can edit the HTML5 output to use fonts from fonts.adobe.com if you’ve used these fonts in your layout. This process is much simpler if your design uses fonts that include only four styles: regular, bold, italic, and bold italic.
You’ll need a little understanding of how to create “web projects” on Adobe Fonts, and how to edit Cascading Style Sheet (CSS) files. This help file is a good place to start. Here are the general steps you would follow:
- Create a web project on Adobe Fonts that contains the exact fonts, styles, and weights that you used in your InDesign layout.
- Copy the one-line code generated by your web project into the <head> section of the index.html file you’ve exported. The code will look something like this:
<link rel="stylesheet" href="https://use.typekit.net/dbo5iuy.css">
- Open the URL in the one-line code generated from the web project to view the correct font-family names.
- Open the publication-web-resources/css/idGeneratedStyles.css file and edit the @font-face names to match the names from step 3 above.
The process is similar to serve Google fonts in your project.
Cleaning up
In the publication-web-resources folder created by the HTML5 export, you can safely delete the pdf and Thumbnails folders and any files or subfolders they contain, unless you have created some kind of custom web wrapper for your project that uses these files.
Including the Output on Your Website
After you output your file to HTML5 and customize the output, then what? What do you do with the output? Although the folder of HTML, CSS, and JavaScript that the export creates is a self-contained little website all by itself, you’ll probably need to incorporate it in another, larger website. There are at least four ways that you might go about this, depending on your needs.
- The simplest method is to upload the package of files created from InDesign in a folder by itself somewhere on your web server. Then, you can simply link to the folder name elsewhere on your website. For a folder named report, such a link would look something like this:
<a href="https://gilbertconsulting.com/report">Read our annual report</a>
- You can embed the content as an iframe on another web page. This would look something like the code below, replacing the width and height with the final scaled height of your output. In other words, if your spread width is 1224 pixels but you’ve scaled the output 70% in the index.html file, you would enter 857px (.7 × 1224) for the width in this iframe code (Figure 9).

<iframe src="https://gilbertconsulting.com/report/" title="Report" width="857px" height="555px"></iframe>
- You can create a ZIP file of the folder and send it to someone for use on their website as an advertisement if you have determined that the content meets their requirements for file size and other properties.
- A skilled web developer could recreate a wrapper like Adobe’s Publish Online interface that displays the pages along with various buttons to display thumbnails of each page, switch to full-screen view, download a PDF version of the file, and more. This is not a trivial undertaking, especially if you wish to add the ability for the pages to scale as you resize the browser window, due to the coding method Adobe uses to re-create the InDesign layouts in a browser.
Limitations
With the tweaks mentioned in this article, the HTML5 export works reliably and accurately. You should, however, be aware of a few additional limitations:
- Browser scaling: As mentioned earlier, the output will not resize when you scale the browser window. Anyone reading your document must know how to use their browser-specific method for resizing web content within the browser window. This is unfortunate, and I unsuccessfully researched a way around this. As far as I can tell, the way that the HTML is written at export prevents this. Perhaps someone smarter than I will come up with a workaround.
- Find: When viewing an exported document in the browser, you can use the browser’s Find feature to search for text. Because the HTML5 export writes individual pages or spreads as individual HTML files that the previous and next arrows load as needed, the browser Find feature highlights words on the currently-displayed page or spread only. Also, Find will function on files that were exported with HTML text tags only. Files exported with SVG tags are not searchable.
- SVG tags bug: As of this writing, there’s a bug with files output with SVG tags. Any pages that contain one or more text hyperlinks will display a thin black rule around the text frame that contains the hyperlinked text when viewed in the browser. The workaround is to draw an invisible frame on top of the text and assign the hyperlink to the frame, or output with HTML text tags.
- Transparency effects: Most transparency effects and blend modes will work properly, with a few exceptions. The most common of these is that text with transparency effects applied will not appear properly in the output when HTML text tags is selected.
If you want more control over your content than Publish Online provides, can live with a few limitations, and are willing to do some minor code editing, InDesign’s HTML5 export is a good way to include highly formatted content on your website.
Commenting is easier and faster when you're logged in!

Recommended for you

Learning After Effects
How to create attention-grabbing content with After Effects and InDesign

Adding Navigation Buttons for Interactive Documents
In the current state of design and publishing, the desire and need to create int...

Remote Collaboration with InDesign
Collaborating on documents is crucial for creatives. InDesign and InCopy make it...