

Grossly distorted wide angle photographs are ugly and confusing. Photoshop’s Adaptive Wide Angle filter lets you correct even extreme distortions simply by drawing lines over the image, automatically straightening them to turn an unusable photograph into an appealing one. Here’s how to make use of this powerful filter.
Step 1: The original image
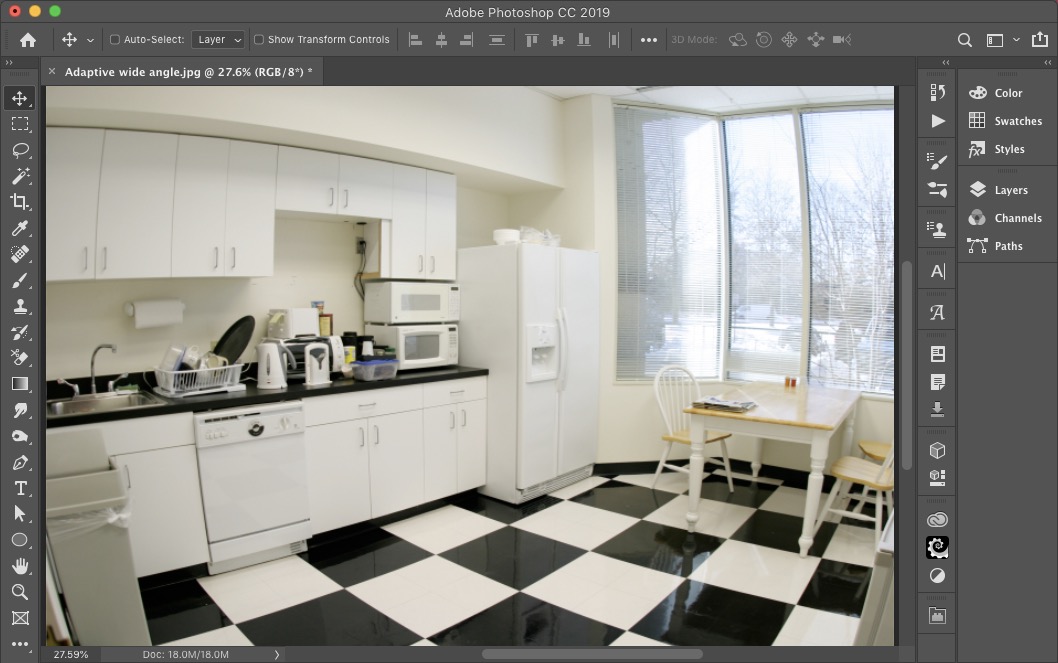
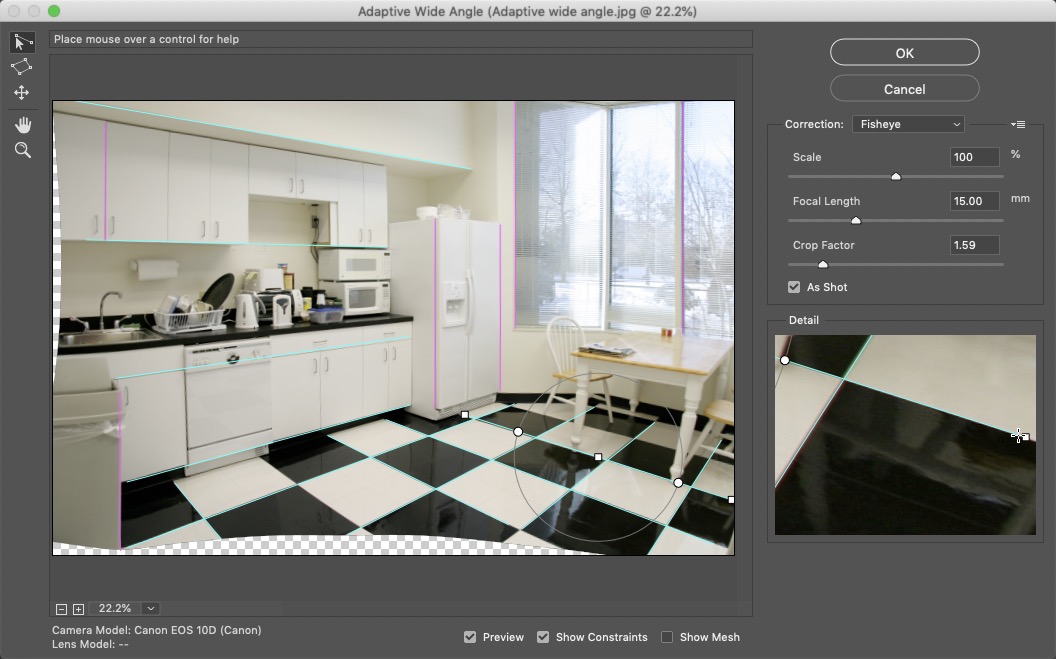
This is the sort of photograph taken by real estate agents who need to capture an entire room without being able to get far enough away. The fisheye lens has produced ugly, almost spherical results. To start fixing this, choose Filter > Adaptive Wide Angle.
Step 2: Draw the first line

Click at one end of a line that should be straight, and then click at the other end. The end you’re drawing will also appear in a magnified detail view, so you can see precisely where to position it.
Step 3: Choose your distortion
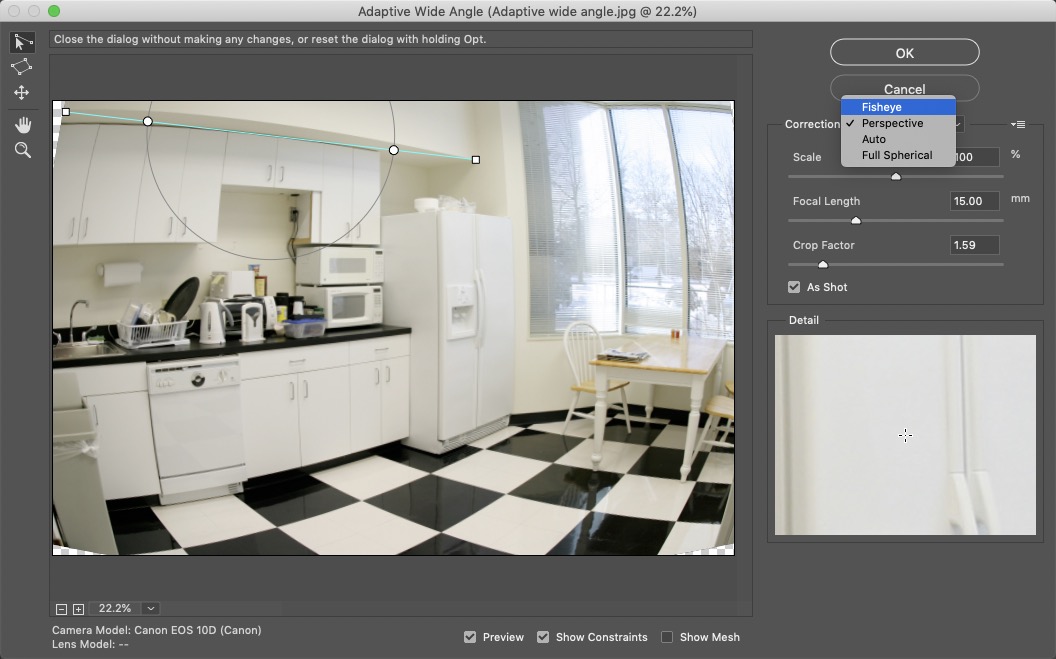
The default method, Perspective, clearly isn’t working in this case. From the Correction pop-up I’ve chosen Fisheye for this image.
Step 4: Adjust the midpoint
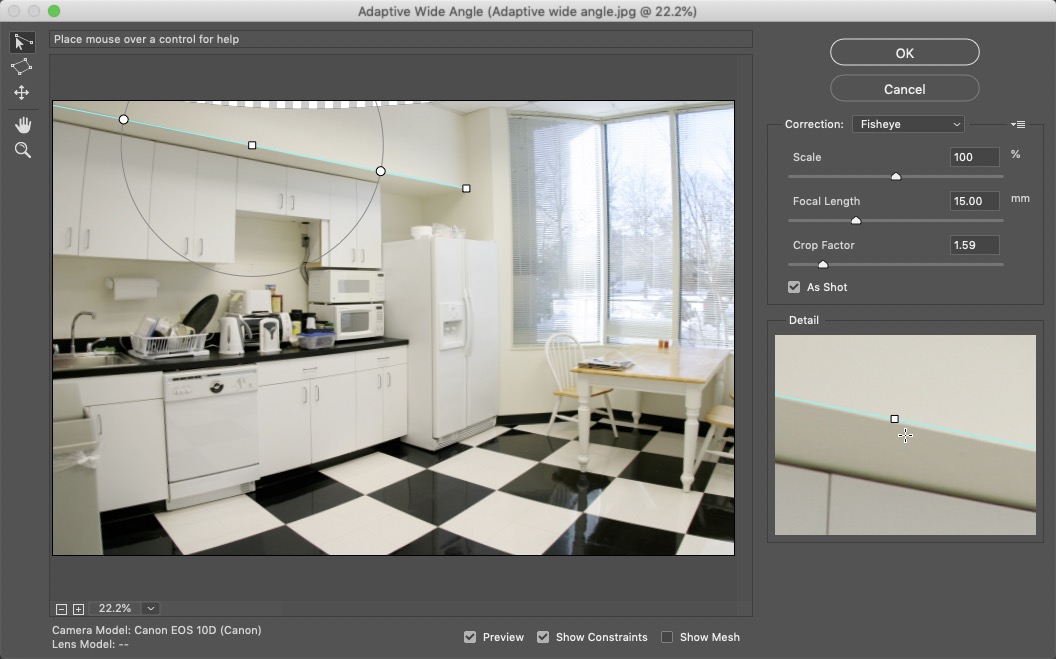
The Fisheye correction matches the image, and you can drag the midpoint onto middle of the distorted surface. As you do so, you’ll see that curved surface above the cupboard turning into a dead straight line.
Step 5: Draw more lines

Adding more lines along surfaces that are supposed to be straight will help the filter to know how the image is constructed. Here, I’ve drawn additional lines along the bottoms of both the upper and lower cupboards. When you draw these lines they’ll match the curve as you draw them, but as soon as you click the second point the lines (and the image) will be straightened out.
Step 6: Mark a vertical
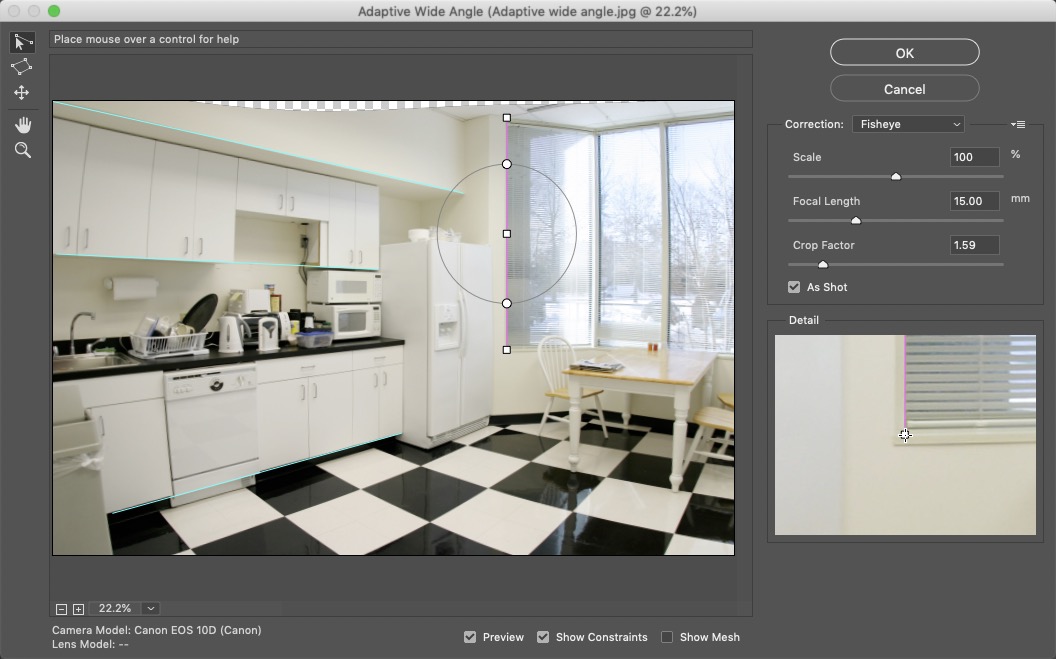
Because of the angle of view there are no lines in this image that should be perfectly horizontal, but there are several that should be vertical. I’ve drawn a line down the left side of the window to mark it as straight. Holding the Shift key constrains the line to purely vertical, and it turns pink to show the constraint.
Step 7: Add more vertical lines

I’ve drawn a couple more vertical lines on this image, holding the Shift key each time to make them exactly vertical: on the trash can on the far left, between two cupboards, down the sides of the refrigerator, and down the center of another window.
Step 8: Sort out the floor
Drawing lines between the joins of the tiles on the floor straightens them out as well—and of course, you don’t want to hold the Shift key when doing this. But you can see how the table now appears to be at a rolling angle.
Step 9: Fix the table
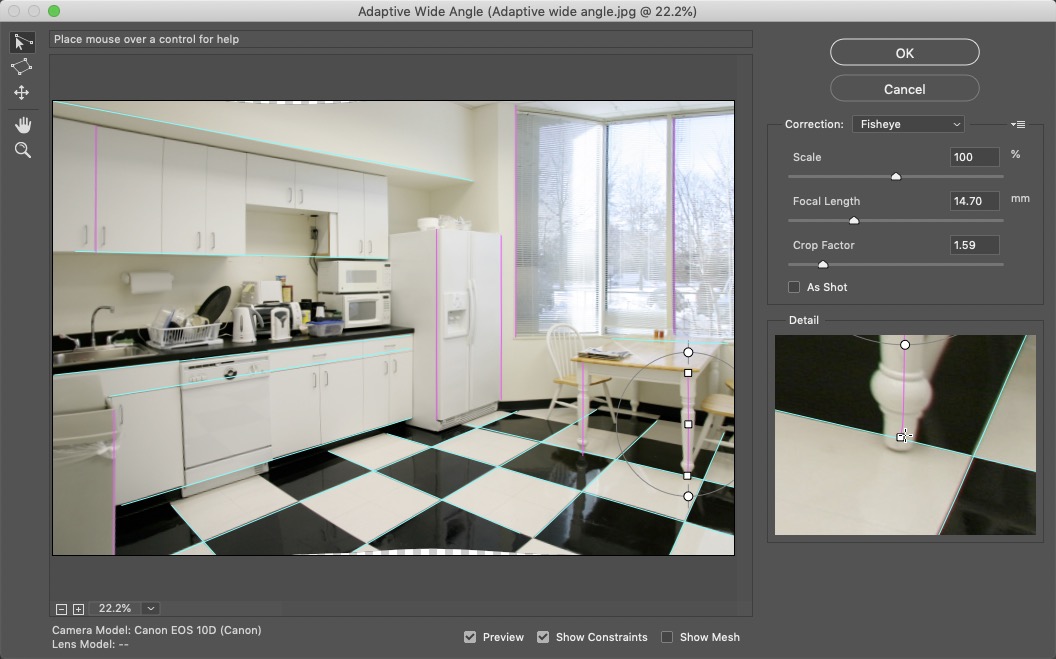
A couple of vertical lines drawn down the table legs, while holding the Shift key, straightens them out.
Step 10: Scale, if necessary
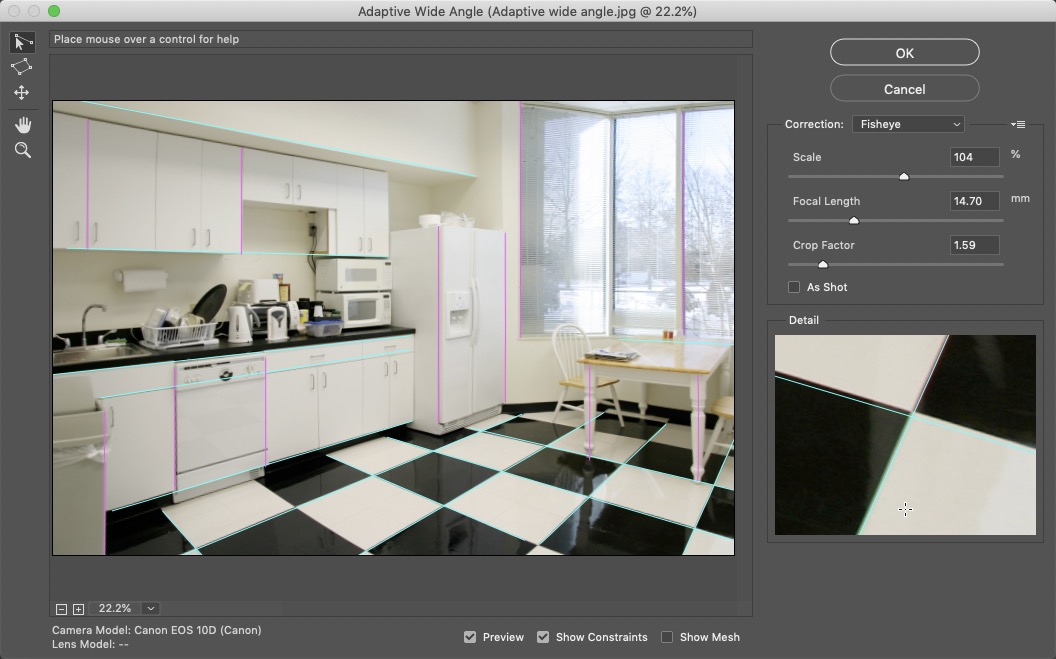
The steps so far have produced transparent areas, top and bottom, where the image has been undistorted. The simplest way to deal with this is to increase the Scale by just enough to hide these missing portions: in this case, a factor of 104% is enough to do the job.
Step 11: The finished image
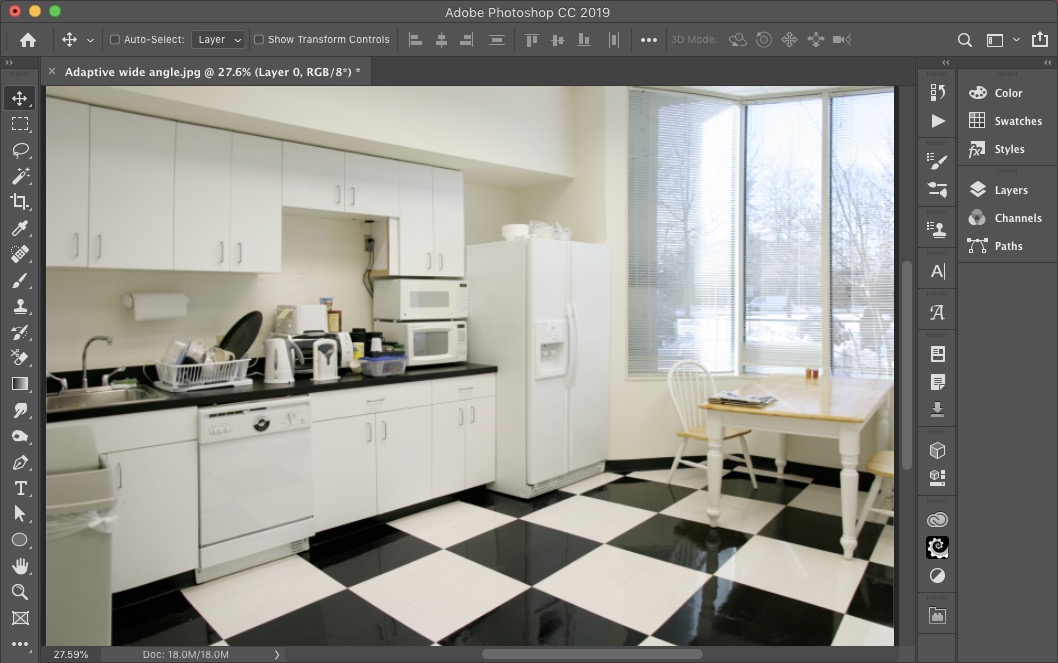
Here’s the kitchen with the fisheye distortion removed, producing a much more usable image. Although it seems like a long-winded process, it’s very intuitive once you get started, and it’s a real pleasure to see the image gradually losing its distortion as you work with it.
This article was last modified on May 7, 2020
This article was first published on August 26, 2019
Commenting is easier and faster when you're logged in!

Recommended for you
Photoshop Automation
A basic introduction using actions, scripts, and data driven graphics to make yo...

Create Interactive Infographics with Infogr.am
Infographics can be a great way to make boring or obscure data into something be...

How to Clone a Row of Stormtroopers in Photoshop
Here’s how you can make your own Attack of the Clones in Photoshop, using the Cl...