
How to Use 3D Models in the After Effects Beta
Learn how to import and manipulate 3D models in the public beta of Adobe After Effects

This article appears in Issue 25 of CreativePro Magazine.
For the past few years Adobe has been releasing public beta versions of its forthcoming software, so users can try out new features before they’re implemented in stable releases. The public beta of After Effects includes the ability to import and manipulate 3D models: Here’s how I used it to make a ticking version of Big Ben.
Get Yourself a Clock (or another 3D model)
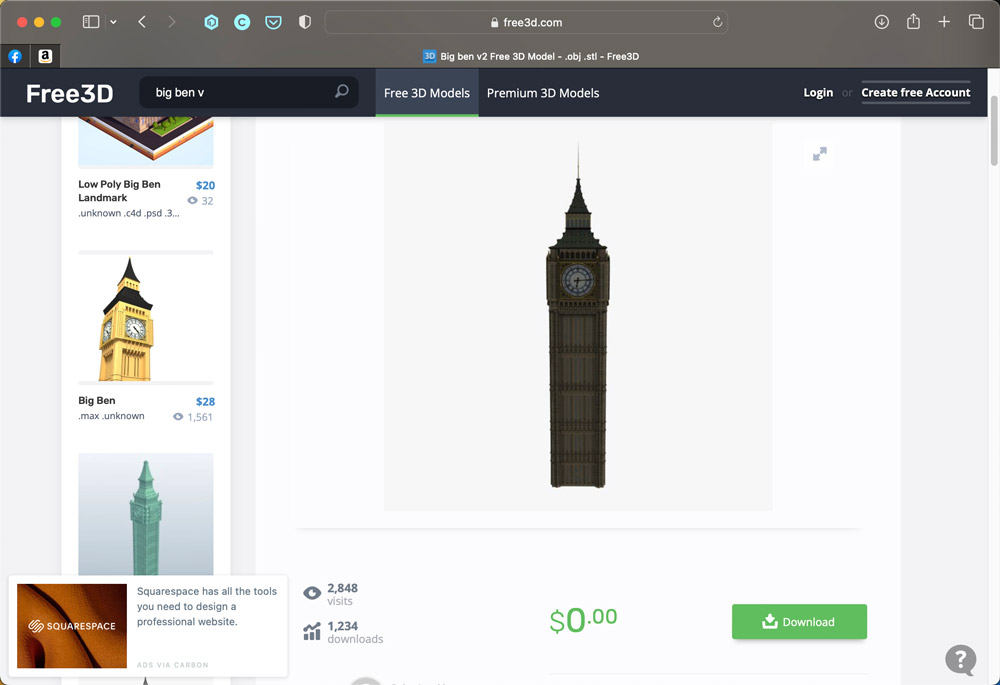
You can find many 3D models of Big Ben online (for pedants: Big Ben is actually the name of the bell that chimes the hours, not the clock tower, which is properly called the Elizabeth Tower. But everyone calls the tower Big Ben, so I will too). Several models can be freely downloaded, such as this one.
Find a Background Video
You’ll find plenty of videos online that are free to download and use in your projects. This one, filmed by Boyan Minchev, is available from Pexels.

Grab a Still Image
Before you start animating, you’ll need to do a bit of work in Photoshop. The first few seconds of the video are a bit wobbly, so scroll forwards a few seconds and copy a frame – in QuickTime, you can do this using Command-C. You can then paste the frame into Photoshop.

Cut Out the Foreground
You’ll need to cover the base of Big Ben as it rocks back and forth, so make a selection of the tops of the railings, as well as the base of the building to the right. Include the traffic light as well, as when this appears in front of Big Ben it will make the scene look more realistic. Make a new layer from this selection, and call it Foreground.
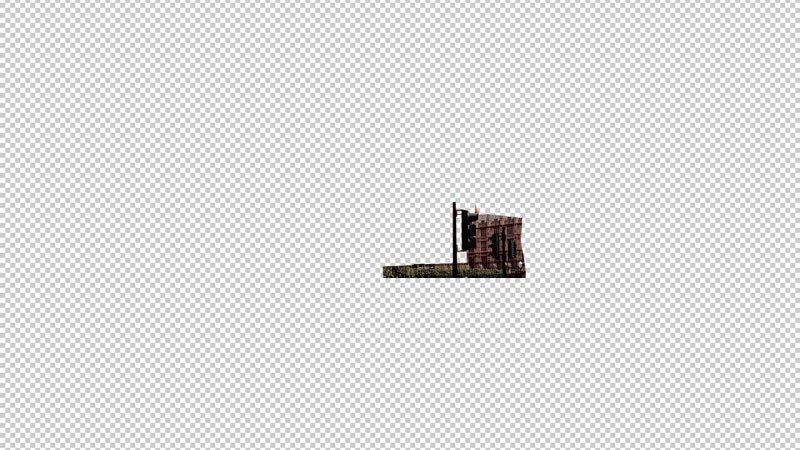
Patch the Background
As Big Ben rotates, you’ll need to hide the original clock tower behind it. Make a selection of the area around Big Ben, and make a new layer from it – call it Background. Then use the Clone tool to fill the clock area with sky. Save the file as a Photoshop document.

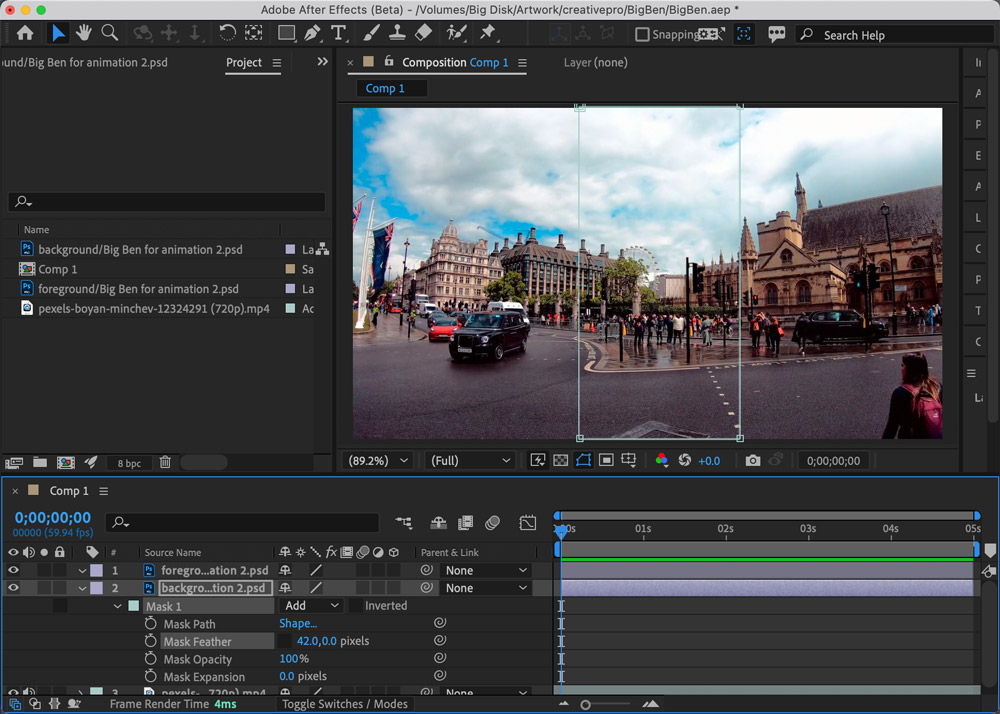
Bring It All Together
In After Effects Beta, make a new Composition and open the video file. As the beginning is a little jerky, drag it to the left so you avoid the first few seconds. Then import the two Photoshop layers – the background and the foreground – and place them in position above the video.

Blur the Edges
Because the clouds move slightly, you’ll need to soften the edges of the placed Background. Make a new Mask and move the sides to the edges of the layer, then use the Feather control in After Effects to add a horizontal feather.
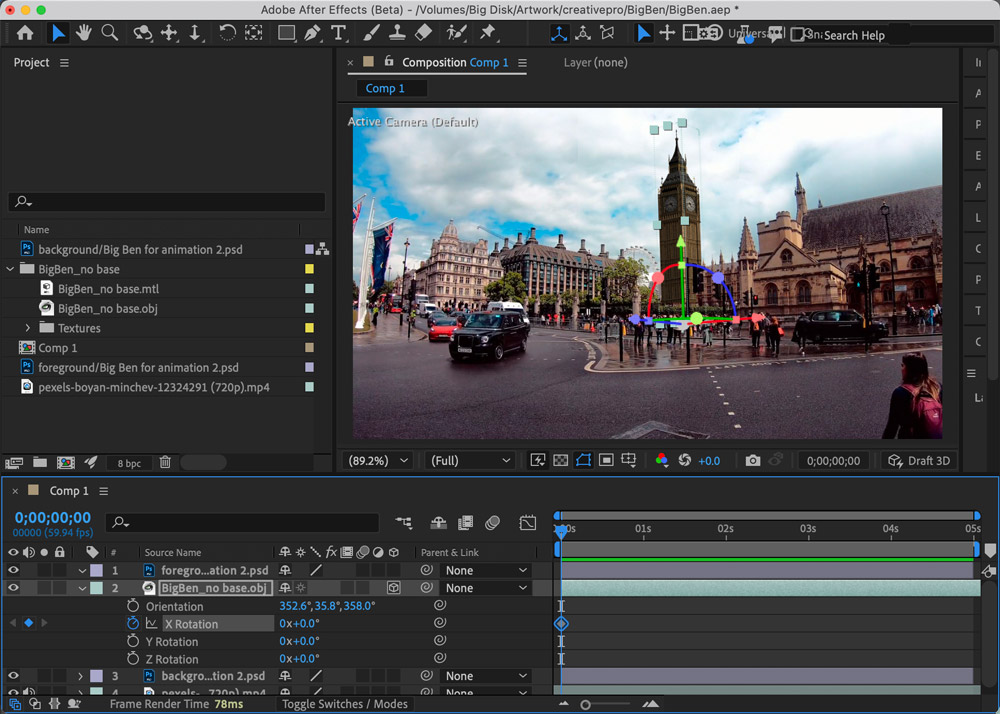
Bring in the 3D Model
Now import your 3D model into After Effects. You’ll probably need to reduce its size considerably in order to fit the scene: here, I reduced it to just 0.04% of its original size. This is most easily done using the numerical Scale controls rather than the head-up display, as you need such a tiny scale that it’s almost impossible to drag to this size.

Place the Model
You can now adjust the model so that it matches the background film. The head-up display controls make it easy to move and rotate it into the correct position – use the X, Y and Z arrows to move the tower around, and the corresponding circles to rotate it.

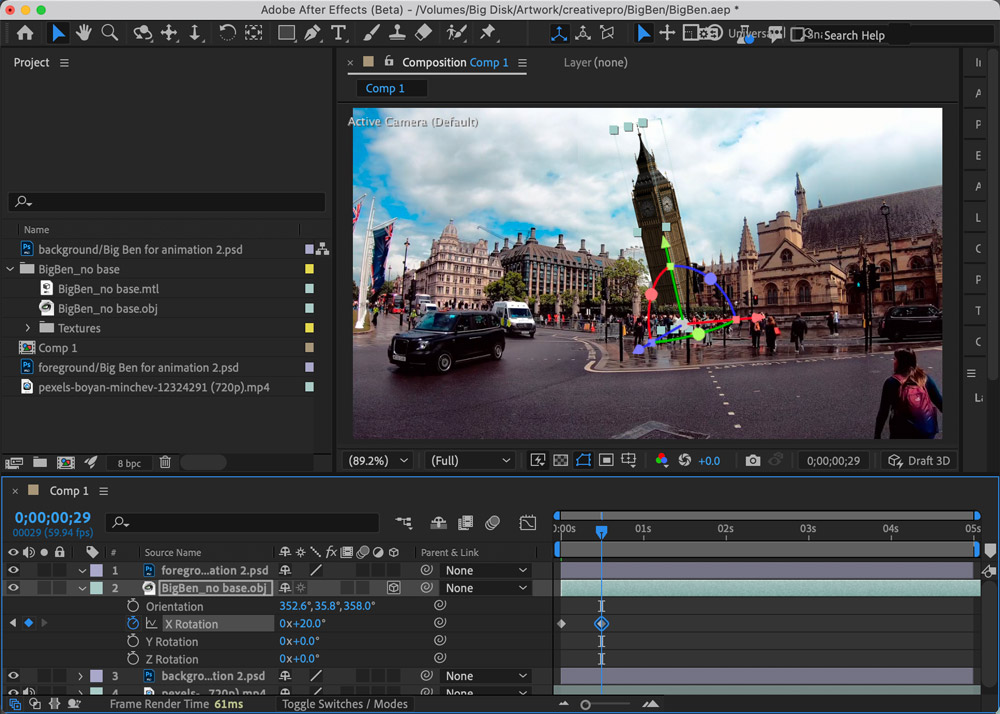
Add a Keyframe
Select the model layer in After Effects and press R to open the rotation controls. As it’s a 3D object, you’ll see different controls to those found in regular layers; as well as an Orientation control, there are separate controls for X, Y and Z rotation. Move to the beginning of the animation and check the stopwatch by the X rotation control to set Big Ben in its vertical position.
Start the Rotation
Drag the time slider forwards to half a second, and set the X Rotation to around 20 degrees. You can do this either by dragging the head-up display handles, or by using numerical input. A keyframe will automatically be inserted at this point.
Add Some More Keyframes
Drag to one second, and set the X rotation to zero; then drag to one and a half seconds and set the rotation to -20 degrees. Press the Spacebar to play the video to check the animation works.
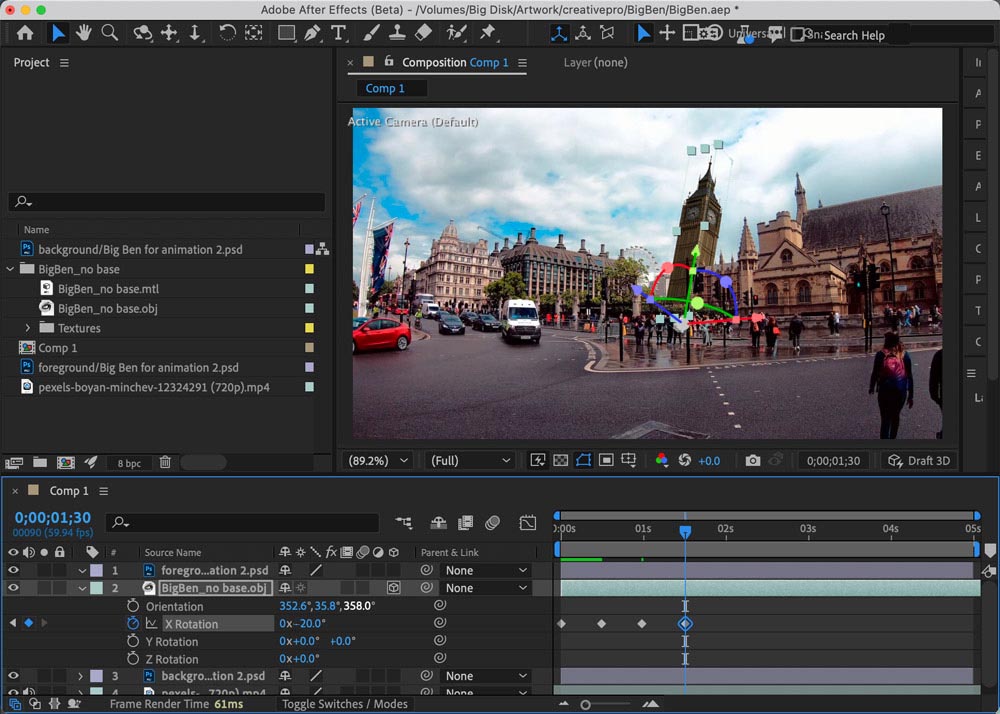
Duplicate the Keyframes
You don’t have to repeat the process for the rest of the keyframes. Instead, just select the four keyframes you’ve created, move to the two second mark and Paste; then move to the four second mark and Paste again. Your animation should now play correctly.

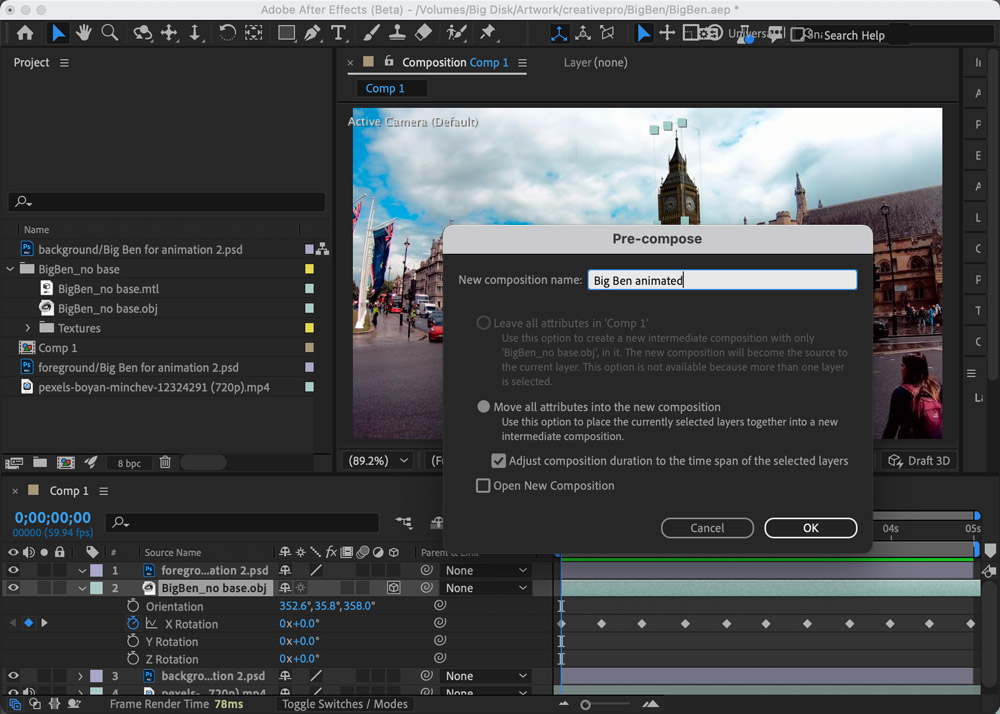
Pre-compose Big Ben
The Big Ben model moves well, but it’s too dark and slightly the wrong color. You can’t, however, apply any color effects to the 3D layer. The solution is to select the layer and choose Layer > Pre-compose. In the resulting dialog, give the new layer a name and click OK. This will place the whole animation back into After Effects as if it were a regular layer.
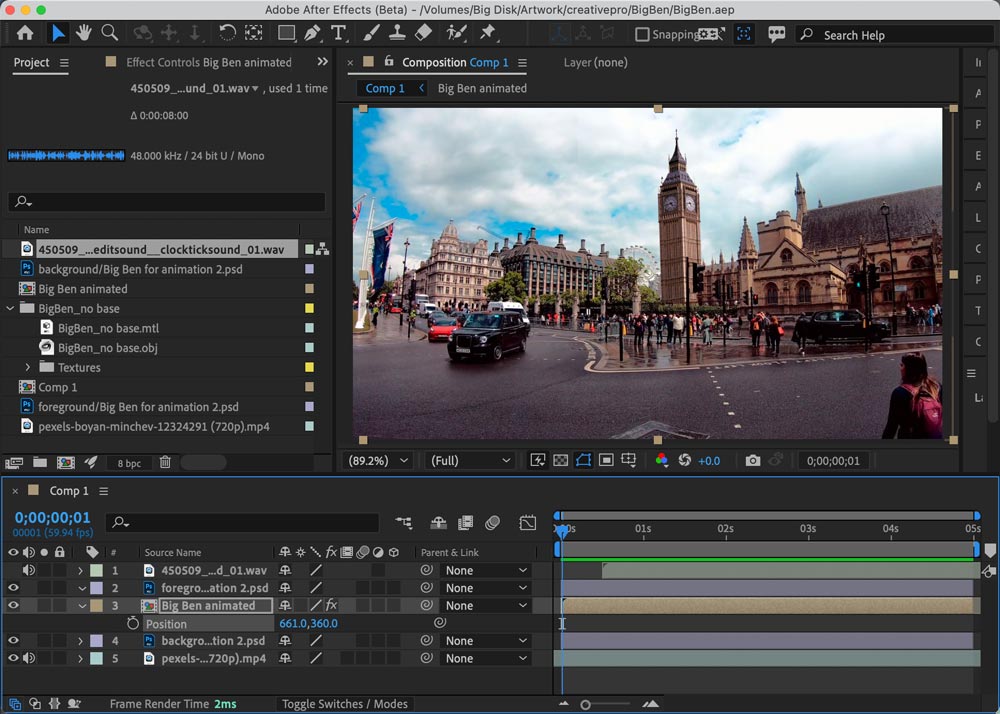
Fix the Color
You can use your favorite adjustments to correct the color of the clock tower; I prefer Curves. Select it using Effect > Color Correction > Curves, and drag upwards in the curve to brighten the tower. Then adjust the color by increasing the blue slightly, and making a small reduction in the green.

Add Some Sound
There’s already background sound in the video, but you need to make the clock tick. Freesound.org has a vast collection of sounds that are free to download, including many ticking clocks. I liked the strong sound of this tick, from user abyeditsound.
And that’s it! Your animation should be ready to play. If you like the idea, you can see my longer version with other London clocks here. And for more on getting started in After Effects, see this article by Chris Converse from issue 132 of InDesign Magazine.
Commenting is easier and faster when you're logged in!

Recommended for you

Review: Mockup 3D
It’s not unusual for designers to create packaging artwork, but visualizin...
Free 3D Photoshop Objects from Pixelsquid
Online image libraries come and go, and the good ones get swallowed up by Getty....

How to Create 3D Objects Quickly in Illustrator
See how easy it is to create great looking 3D objects in Illustrator quickly. Us...