


From holidays to birthdays, greeting cards are special gifts when they are personalized. Instead of searching for that perfect card at the store, create one that says exactly what you want.
Here’s how to create a hand-cut trifold card, with techniques you can build upon to create your own unique designs. (And if you have access to a laser cutter, you can produce many cards quickly!)
Determine your card size
In Adobe CC Illustrator, create a document according to the paper size you’ll print on, in landscape orientation. Next, calculate your card width. To make a trifold card on printers that cannot handle bleed, subtract at least 0.5 inches from the length of the paper (to accommodate for the no-print margin) and then divide that figure by three. The resulting number is your maximum card width.
For example, I’ll be printing on U.S. standard letter paper (8.5 x 11 in.), so 11 inches minus 0.5 inches is 10.5 inches. Dividing 10.5 by 3 yields 3.5 inches, the maximum card width for this paper size. Since I plan to use a “4 baronial” size envelope, I’ve set this card height at 4.875 inches. You can set your card height to fit other envelope sizes or create your own custom envelopes.
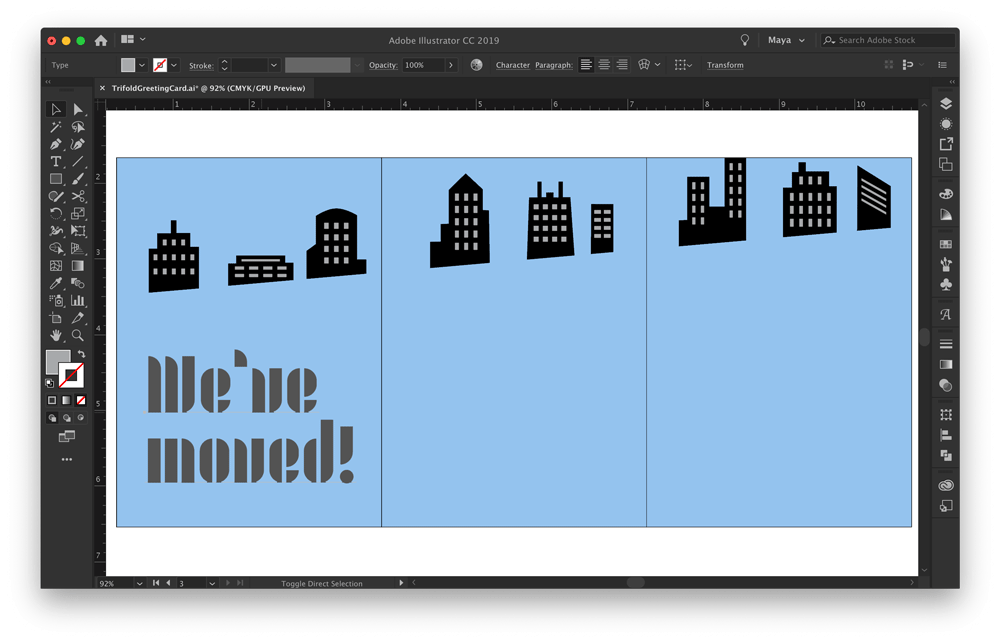
Click the artboard with the Rectangle Tool and type in your card measurements (with units). Since I’ll print my card on blue paper, I’ve turned my rectangles blue to help me visualize the design. Make two copies of the rectangle, and align them horizontally.
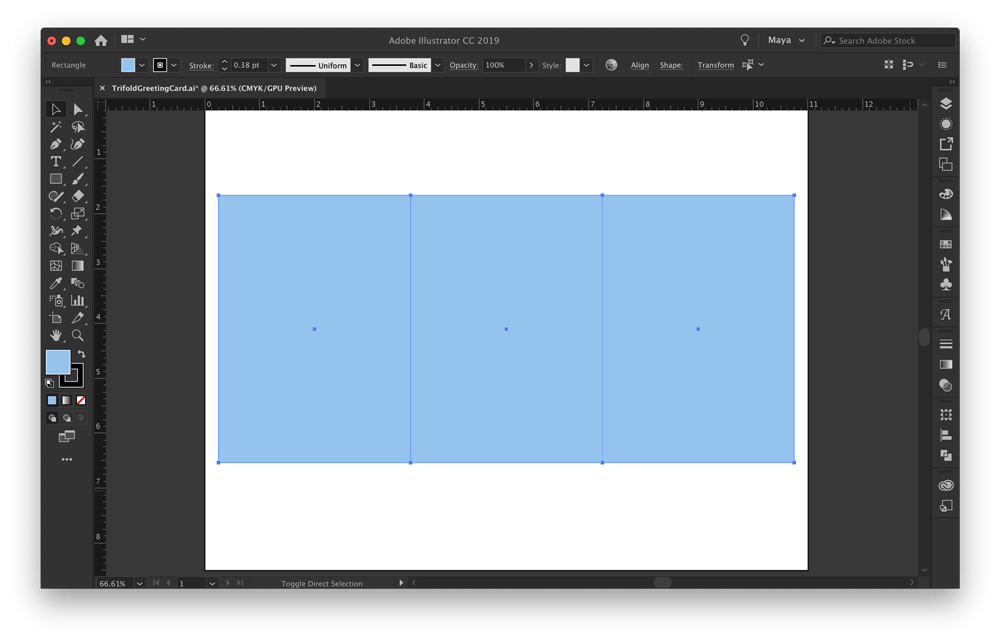
This is the view of the card fully opened (the left-most rectangle is the front of the card, the middle is the middle panel, and the right-most rectangle is the last panel). Lock these shapes in your Layers panel.
Add and arrange vector art
Drag in vector artwork that you want on your card. Art with simpler outlines, such as silhouetted objects, are easier to cut by hand. Draw your own, or choose from thousands of stock image options (pro tip: include “silhouette” in your search). I’m using the third skyline out of this set of city silhouettes.

For a tiered effect when the card is folded, draw a diagonal line running upwards to the right, and arrange the artwork to rise up from this slope. This skyline will need some modifications…
Customize art
Adjust your vector art as you wish. I used the Knife Tool to cut the skyline into three pieces so I could move them to overlap the slope. Then, I used the Pen Tool to simplify the art for style and for easier cutting.
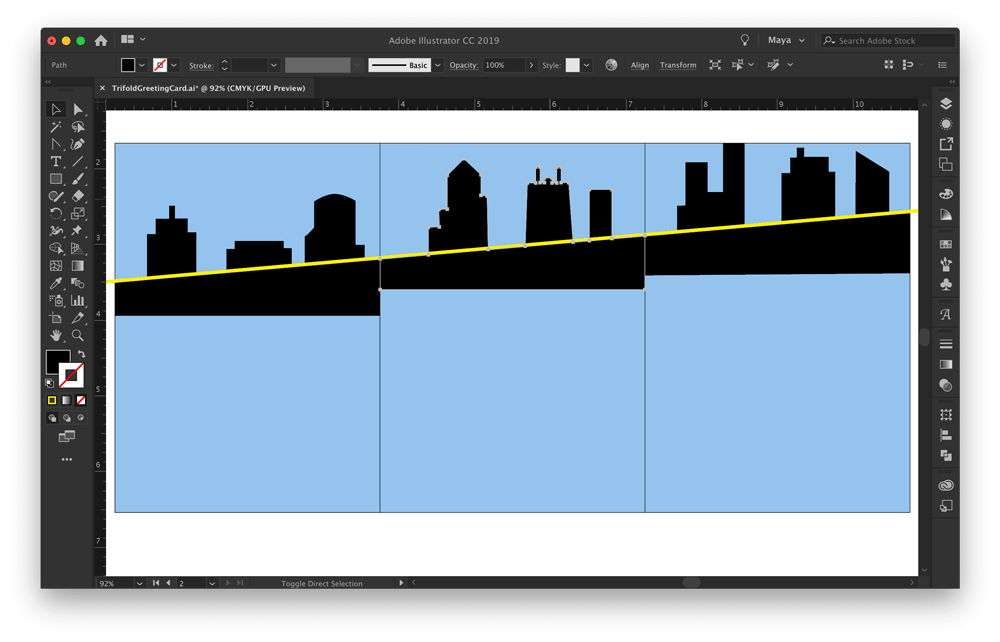
To trim the art to the diagonal line, select all of the art and the diagonal line, and click on “Divide” in Pathfinder. Double-click into the groups to select and delete items.
To create windows for these buildings, use the Rectangle Tool to draw a small rectangle, drag out a copy by holding down Option (Alt on a PC), and then use Transform Again to duplicate that move (CMD+D, or CTRL+D on a PC). Copy rows similarly.
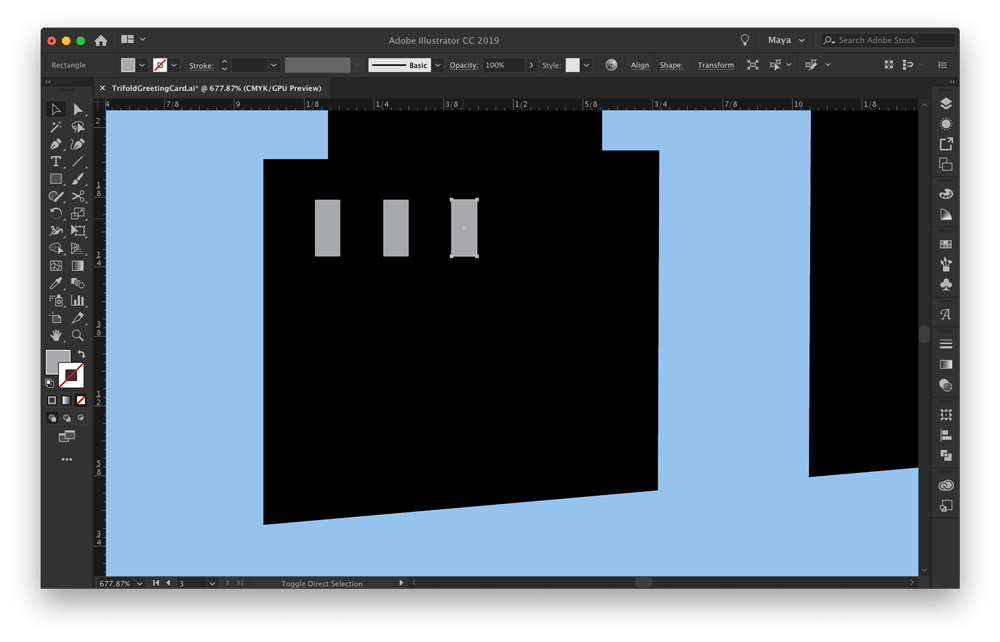
If you wish to modify the windows afterwards, try the “Start editing similar shapes together” function to edit one object and have those changes applied to all similar objects.
Apply text
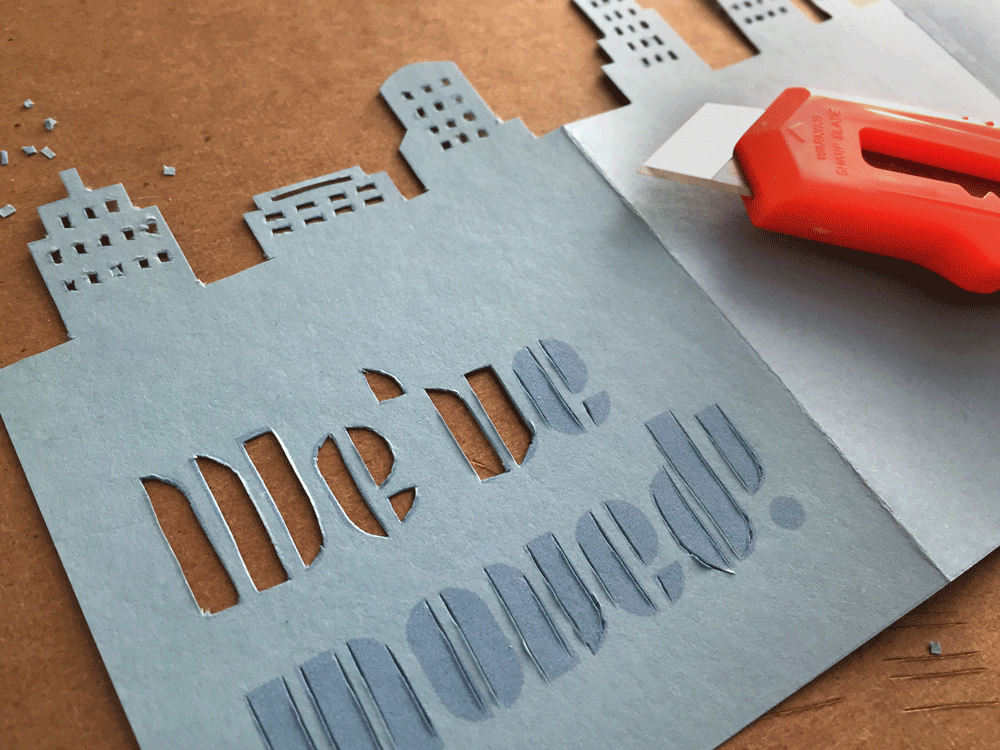
Choosing a suitable font for cutting is key. Stencil-like fonts are best, or any font with thick lines that doesn’t have the counters fully enclosed. Adobe Fonts has many great options, including Dapifer Stencil; Tripper; Rufina Stencil; Milka Regular; Jeanne Moderno OT Geometrique; Embryo; and HWT Mardell Regular. Some fonts, such as Modish Regular, can be easily modified by creating outlines of the text and adjusting the points so that the counters won’t be lost upon cutting. If you want to use a font that looks difficult to cut (such as those with thin line weights), consider simply printing the text instead. For this card, I’m using Joschmi Regular. Place your text on the left-most panel (the front of your card).
Prepare to print and cut
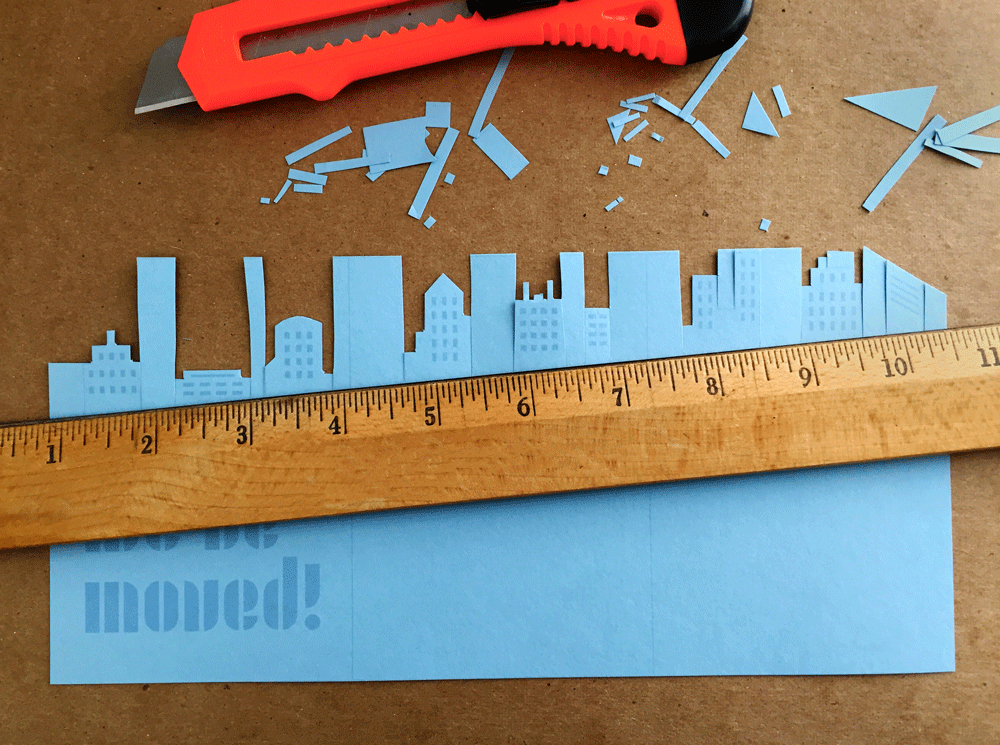
Make sure that everything fits inside your three rectangles, and change everything to the colors you want printed. I’ve changed my blue rectangles to “no fill” with a very thin gray stroke (to help guide cutting and folding). Use the Scissor Tool to remove any lines you don’t want to print, such as the bottom edge of these buildings. You can download the finished Illustrator file here.

After printing, use a sharp craft knife to cut out the areas you want to remove. For a sloped effect, simply align the ruler against the bottoms of the buildings and cut between them (or cut a wavy horizon freehand). After cutting, carefully score along the fold lines. If you make a mistake while cutting, just improvise in its place—it will make your card even more unique!

The possibilities await…
Using these guidelines, you can create many kinds of customized cards. Some ideas:
Cut with a laser cutter: Save your design as an .svg, and import the .svg into the design software that comes with your laser cutter. Be sure to specify in the program not to cut the fold lines.
Use a personal photo: Use Illustrator’s Image Trace to vectorize a photograph you’ve taken, such as the profile of a loved one or a special place.
Add color (and reduce cutting): Print details onto your cards rather than cutting them out.
Set the type in another language: Adobe Fonts has a growing list of fonts in other languages. Look for the “languages” filter when browsing fonts.
Add finishing touches: Break out the markers, stamps, and glitter!
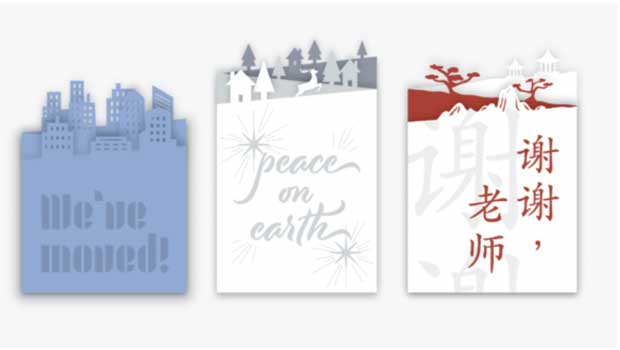
Here are two remixes of the card—a wintery scene, and a thank you card for a teacher in simplified Chinese. Individual panels can be printed in color so that the text shows in color when cut out. Notice how the text outline has been adjusted so that counters aren’t lost upon cutting.

This article was last modified on May 18, 2021
This article was first published on December 7, 2018
Commenting is easier and faster when you're logged in!

Recommended for you
The Secrets to Smoother Paths in Illustrator
Don’t let poorly placed points ruin your designs.

Rotating Text with a Character Style
Learn the trick for applying character rotation with a style, something that's u...

CreativePro Video: Fill Live Illustrator Text With a Gradient
In this week’s CreativePro video, Mike Rankin shows us how to quickly fill text...