How to Draw a 3D Ribbon in Adobe Illustrator, part 1

Step 3: Twisting the Fabric
This is where the fun really begins. In Illustrator—again, just about any version at least as far back as CS2—you can actualize on nearly any object any kind of twisting, crunching, squishing, stretching, turning, and distorting you can imagine through the use of a Mesh Warp. In this case, of course, we’re going to twist, turn, and distort the rectangle and text frame as if they were composed of fabric.
1. With the group selected, go to Object > Envelope Distort > Make w
ith Mesh.
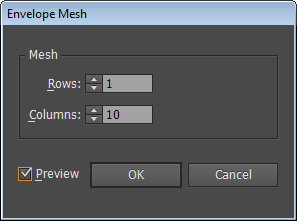
2. The Envelope Mesh dialog defines how the mesh is initially broken up (see Figure 7). Each column and row provides intersections that enable you to distort the shape; the more columns and rows, the more intersections, the more finely you can control the distortion. Too many rows and columns, however, increases the work unnecessarily. So, for such a long and narrow shape as this, let’s try one row and ten columns. When you click OK, your artwork will display a grid with mesh points at all intersections. You are no longer working directly with the group of text and scribbled box; now you’re working with the distortion mesh.

Figure 7: The Envelope Mesh dialog divides the selected shape into rows and columns for easy manipulation.
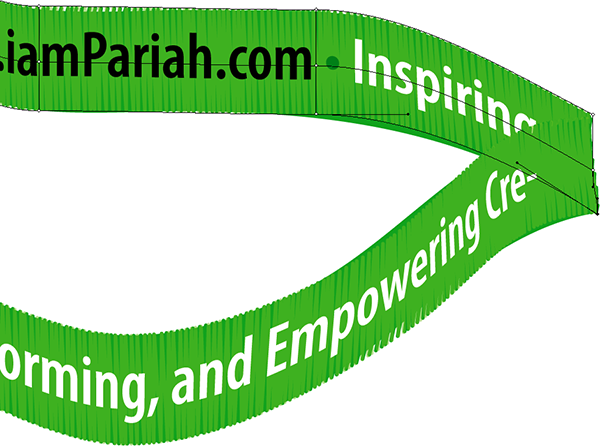
Mesh points are like anchor points but that they control distortion—and, later, color. They behave much like anchor points in a path, and are selected and manipulated with the white arrow Direct Selection tool, like anchor points. Solid points are selected, hollow unselected. Mesh points also have curve handles that affect the curvature of mesh lines on either side of the point—just like path segments emanating from anchor points (see Figure 8).

Figure 8: A close up of the mesh reveals selected and deselected mesh points, mesh lines, and curves handles. Note that the contents have been dimmed for clarity.
Using the Direct Selection tool, move the mesh points around and distort your box until it resembles one length of a loosely-arranged lanyard, with bends and curves and maybe even folds (see Figure 9). Adjust the distance between the mesh points at the top and bottom to create depth, such as a bend pushing the lanyard toward or away from the viewer while narrowing the horizontal space between columns in the mesh to create curves and folds with depth.
Because lanyards are fabric, they rarely form sharp angles. Keep your distortions graceful by adjusting curve handles.

Figure 9: After moving mesh points my lanyard begins to show indications of depth.
3. When you’re happy with the first side of the lanyard, show the second layer, the one we copied and hid, and distort it with a mesh to create the other length of the lanyard (see Figure 10).

Figure 10: Now both strips of lanyard are distorted.
4. A lanyard is a continuous length of fabric, so remember to match up the ends of the two pieces after distorting them (see Figure 11).

Figure 11: Align the ends of the two lengths to give the illusion of a continuous ribbon.
In part 2 of this tutorial, we’ll add highlights and shadows to finish the effect.
This article was last modified on December 13, 2022
This article was first published on June 10, 2013
Commenting is easier and faster when you're logged in!
Recommended for you
Create Beautiful Contact Sheets Easily With DiapoSheet
If you need to build a contact sheet of images you have lots of options. You can...

How to Make a Cinemagraph in Photoshop
Cinemagraphs are images in which just a portion is animated on an endless loop....

How to Adjust Colors in Photoshop Using Hue and Saturation
Learn how to manipulate an image’s colors using Photoshop’s Hue and Saturation s...


