
How to Create Panoramas in Lightroom

As with a lot of things in digital photography, creating panoramas was once more difficult than it is today. The time and effort involved is now more focused on making good captures (where you also get to enjoy the scenery and the fun of making photos) than on post-processing in front of a computer screen. A new batch feature just rolled into Lightroom Classic makes the process even easier.
First, let’s distinguish between the two types of modern panoramas. Your smartphone likely has a panorama feature that is simple and clever; on the iPhone, for instance, you switch to Pano mode, tap the shutter button, and slow pan horizontally to capture the scene.
What I’m covering in this article is the approach of shooting several overlapping still images and combining them in software. Those tend to make better panoramas, because you have more control over the process and can shoot in raw for broader dynamic range. You also gain a significant resolution advantage by merging the photos together into one panorama.
Panorama Shooting Tips
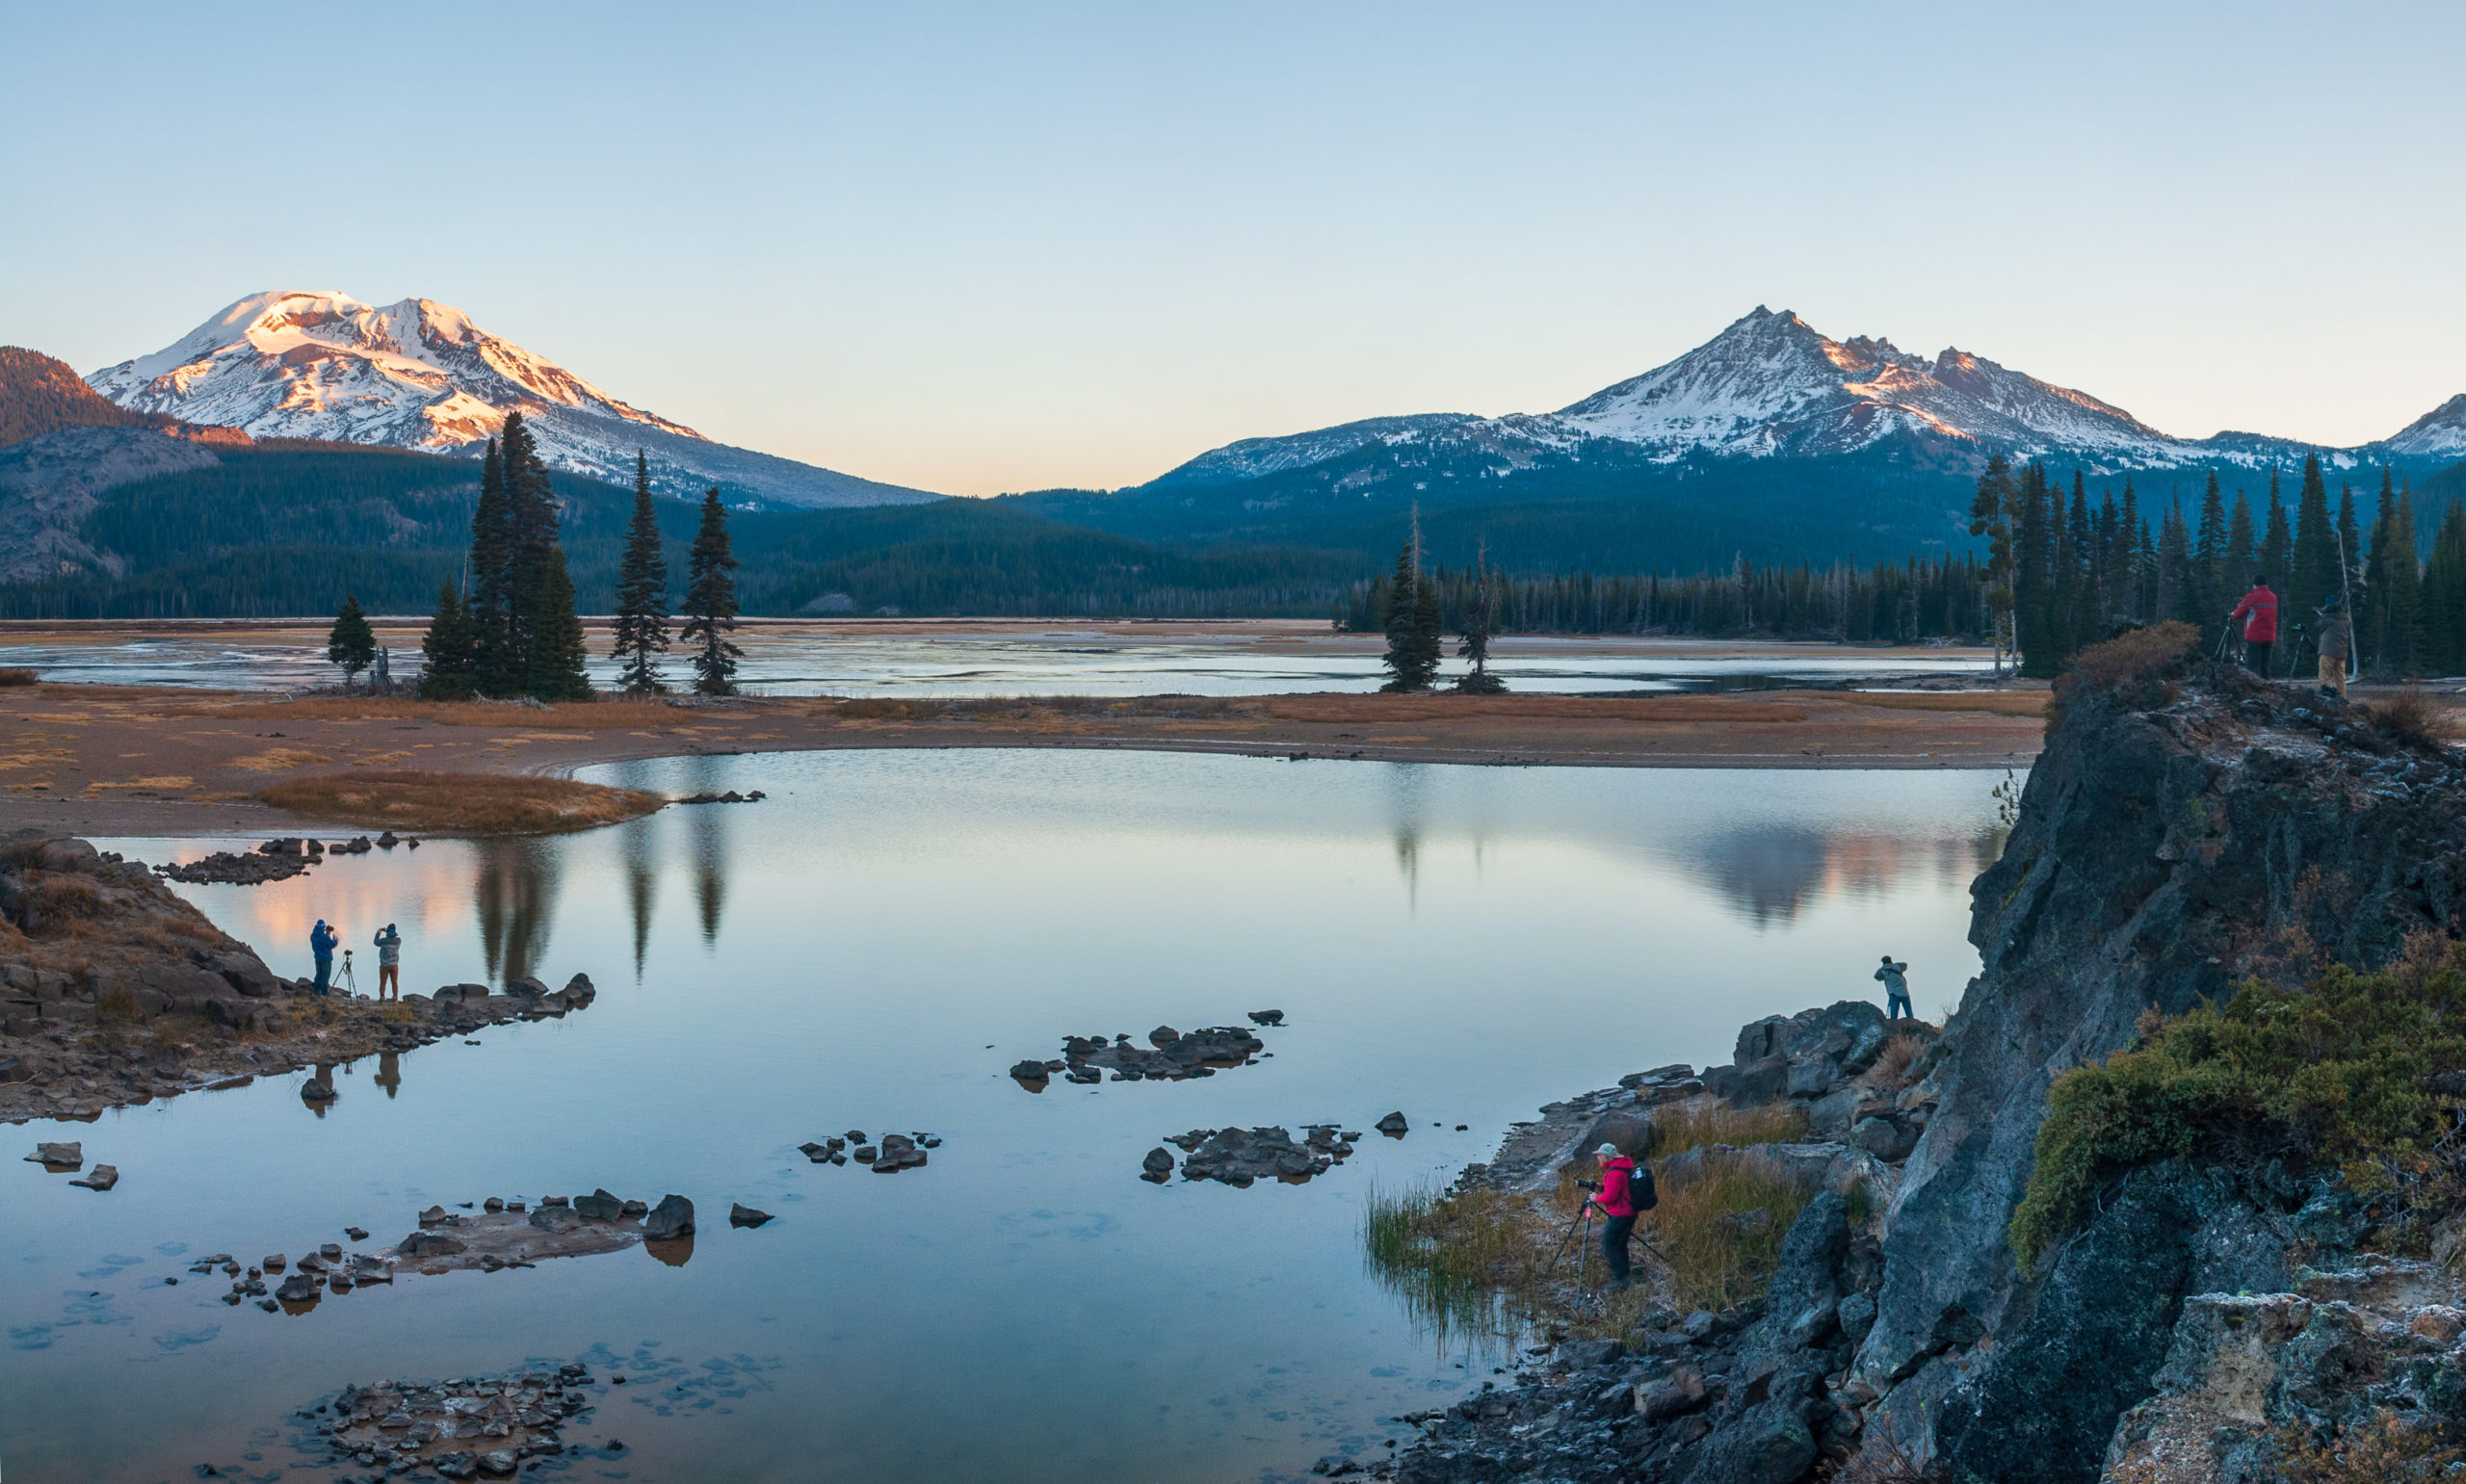
To get the best results, mount your camera on a tripod for stability; shooting handheld works, too, but won’t be as precise. Set a manual exposure that works for the entire range of the panorama, and also set a manual focus to ensure that the images match. Overlap each frame between 30 and 50 percent.
For horizontal panoramas, I prefer to put the camera into portrait orientation. You can also capture a panorama using several rows of overlapping photos to get the full scene, not just a narrow band in the middle. Lightroom can automatically detect the arrangement.
Create the Panorama in Lightroom and Lightroom Classic
Both desktop versions of Lightroom share the same Photo Merge Panorama features, though they look slightly different.
In either application, select all the images that make up the panorama. Then, choose Photo > Photo Merge > Panorama (which appears in Lightroom as “Panorama Merge”). Or, right-click and choose Photo Merge > Panorama/Panorama Merge from the contextual menu.

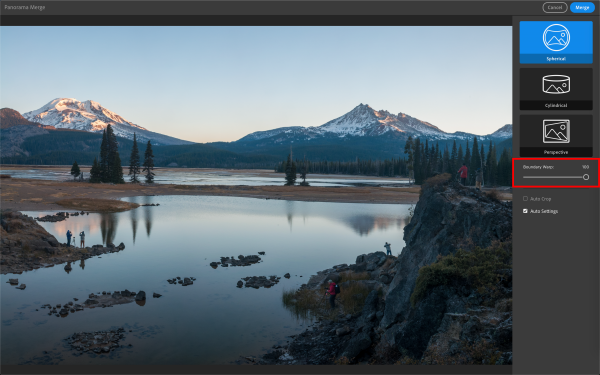
Lightroom assembles and aligns the images. Depending on the content of your panorama, you may want to change the layout projection:
- Spherical: The images are assembled as if they’re projected onto a sphere, which works for most panoramas. It’s especially good if you have multiple rows of shots.
- Cylindrical: When it’s important to retain vertical straight lines, switch to Cylindrical projection.
- Perspective: This projection is more aggressive than the other two, attempting to keep horizontal and vertical lines straight. This is the option to choose for architectural shots where you don’t want to see lens distortion affect straight lines.
Merging panorama images always ends up with some dead space around the edges, which can be dealt with in two ways. The Boundary Warp slider extends the pixels to the borders. Sometimes increasing this slider will do the trick, but it can distort objects in the foreground.
The other option is to select the Auto Crop feature, which trims the unused area at the edges. If you want more control over the crop, leave this control unchecked and crop manually after the panorama has been created. This is a good way to go when the photo doesn’t have a level horizon.

The Auto Settings option applies tonal adjustments to the panorama to save you the trouble.
In Lightroom Classic, there’s an additional option: Create Stack. That puts the panorama plus its images into a stack for easy organization. In Lightroom, the images are automatically put into a stack if one doesn’t already exist.
When the image looks good, click the Merge button to create the panorama.

HDR Panoramas
To get the most dynamic range out of a scene, create HDR (high dynamic range) panoramas. For each slice of the panorama, capture several exposure brackets (normal, brighter, and darker).
Until recently, you’d need to first process each set of brackets as HDR images (by choosing Photo > Photo Merge > HDR or HDR Merge), and then combine the outputted HDR images and create a panorama from them. With both HDR and Panorama merge options available, Adobe combined the operations into one HDR Panorama merge command that automates the whole process.

Shortcuts and Batch Processing:
Lightroom Classic includes a few keyboard shortcuts to start building a panorama, which can be handy not just to save you some mouse clicks. Select your images and press Control-M to open the Panorama Merge dialog.
However, you don’t need to go through the dialog every time, especially if you’re using the same settings for each panorama. In that case, select the images and press Control-Shift-M (or hold Shift and choose Photo Merge > Panorama); the panorama gets assembled in the background while you’re working on something else. You can queue several panorama jobs quickly using this shortcut and continue reviewing other images.
The latest update to Lightroom Classic, version 8.4, introduced a better merge option. Before you create any panoramas, group their images into stacks (select the photos and choose Photo > Stacking > Group into Stack). With the stacks built, select them and choose Photo > Photo Merge > Panorama (or right-click and choose Photo Merge > Panorama or HDR Panorama from the contextual menu). Each stack’s panorama is processed as a background task.

A Panorama Cheat
These options are great when you’re shooting panorama slices and combining them later. But don’t forget one other method of creating a panorama.
If you have a photo that captures the wide vista you want, but suffers from an excess of boring sky, for example, simply crop that single image into a panoramic aspect ratio. You don’t get the same resolution improvement as stitching multiple images, but often that isn’t the point: you want to show off an ultra-wide view of something, regardless of how it was created.
This article was last modified on May 7, 2020
This article was first published on September 16, 2019
Commenting is easier and faster when you're logged in!

Recommended for you
Photoshop Quick Tip: Applying OpenType Alternates
As Ilene Strizver wrote in a recent TypeTalk, you can use alternate characters i...

Google Slashes Prices on the Nik Collection
Last fall, Google announced that it had acquired Nik Software, makers of the pop...
CreativePro Tip of the Week: Make Illustrator Do the Math for You
This CreativePro Tip of the Week on making Illustrator do the math for you was s...