

How to Create a Burnt Paper Effect in Photoshop

Creating a burnt paper effect in Photoshop is much easier than you might think. By using Layer Masks and adding the burn effect on a new layer, you can keep the original document intact so that you can always return to it later, or edit the effect if you change your mind. Here’s how to do it.
Step 1
Choose the document you want to burn, and make sure it’s on its own separate layer. Use the Lasso Tool to trace a rough hole shape, being careful not to make it too regular.

Step 2
From the Layer menu, choose Layer Mask > Hide Selection. This will hide the hole on the current layer, and you can easily change the shape of the hole by painting in black on the mask to hide more, or painting in white to reveal more.

Step 3
Choose Layer > Layer Style > Drop Shadow, and add a soft shadow to the paper to give it some distance from the background. Once you’ve set the size and opacity of the shadow, you can move it around by dragging directly in the document window.

Step 4
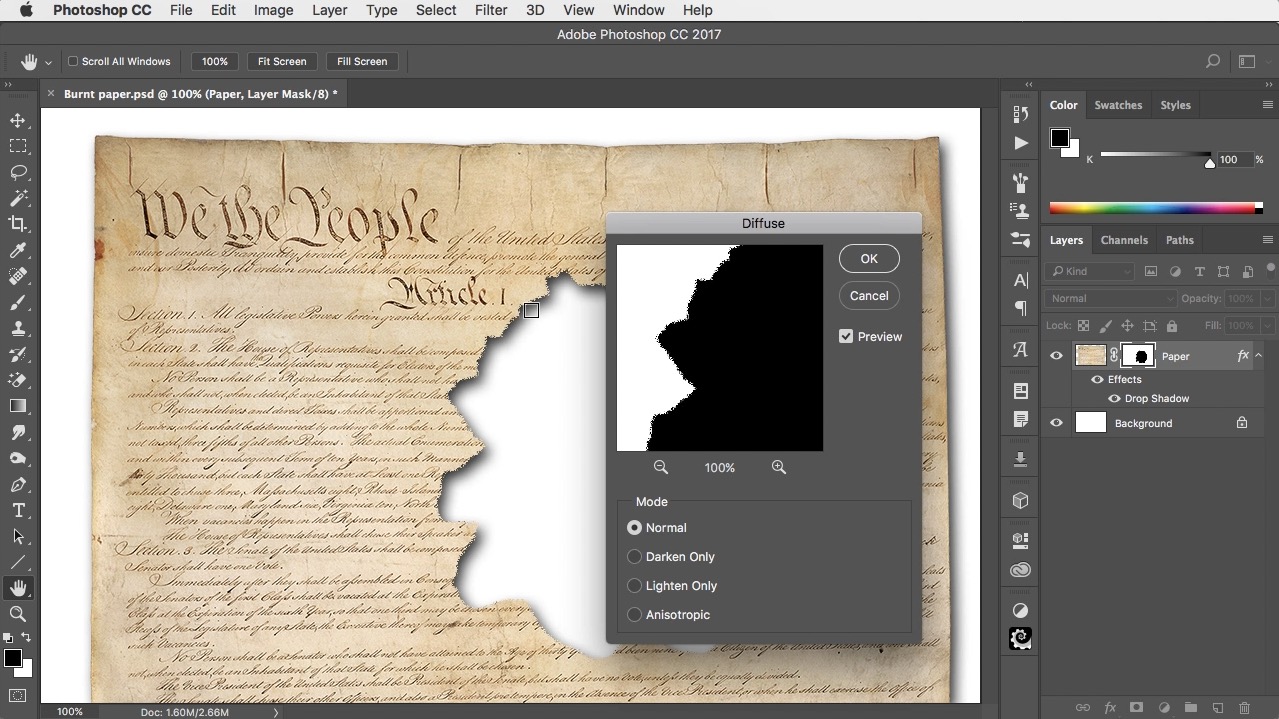
The drawn hole will be too smooth to look convincing. Make sure the mask and not the layer is selected by clicking on it in the Layers Panel, and choose Filter > Stylize > Diffuse. Set the mode to Normal, and you’ll see the edges roughening. Click OK, then use Command+F (Mac) or Ctrl+F (Win) a couple of times to repeat the filter, to make the effect stronger.
Step 5
The Diffuse filter will make the hole look very pixellated at the edges. To fix this, use Filter > Blur > Gaussian Blur, and set a radius of just 0.5 pixels. This will soften the effect, for a more natural appearance.

Step 6
Make a new layer on which to paint the burn effect. Set the mode of this layer to Multiply, and tick the checkbox to use the previous layer as a Clipping Mask.

Step 7
Switch to the Brush Tool and choose a large, soft brush. Pick a bright orange color, and paint around the edges of the hole to make the paper look scorched. Because it’s using the underlying layer as a Clipping Mask, it will only show up where it overlaps that layer; and because the layer mode is set to Multiply, the effect will be to darken the layer beneath. Don’t make the painting too even.

Step 8
Make the brush size much smaller, and choose a dark brown as the foreground color. Paint around the edges of the hole, leaving some gaps so that the effect isn’t too even. This time, you’re painting not scorch marks, but the fully burnt paper.

Check out the video version of this tutorial below, and get a link to download the original artwork at https://www.2minutephotoshop.com/how-to-make-burnt-paper/
Interesting procedure. But I wish you would have chosen a different document to “burn.”
Very useful tutorial. Agree with Steve, wrong choice of document.