
If you need to compress exported video for online viewing but you’re not familiar with the options, the sheer number of export settings can be bewildering. Luckily, you can boil them down to a few key choices; you just have to know which ones they are.
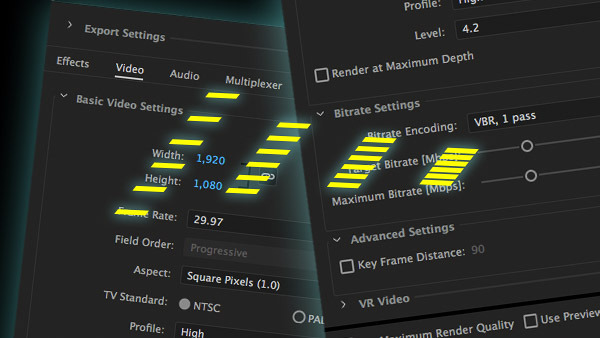
The Export Settings dialog box of Adobe Premiere Pro CC 2017 has six tabs and seemingly infinite options in each tab. Where do you even start?
Standardized Presets Simplify the Process
If you tried to watch Internet video in its early days, watching video on three different web sites might mean installing three separate video players that your computer might or might not be able to run. If you had to export video, you probably had to set all of the cryptically named options manually. Today you can watch video from almost any website without installing any extra software because the hardware and software on your smartphone, your computer, and your internet TV box have all standardized around the H.264 video specification. (You’ll probably also see references to the newer H.265/HEVC specification, which addresses the demands of emerging advanced formats such as Ultra HD.)
Standardization makes exporting easier now too. Consumer video editing applications such as Apple iMovie use presets to hide complex settings, so all you have to do is choose the preset.
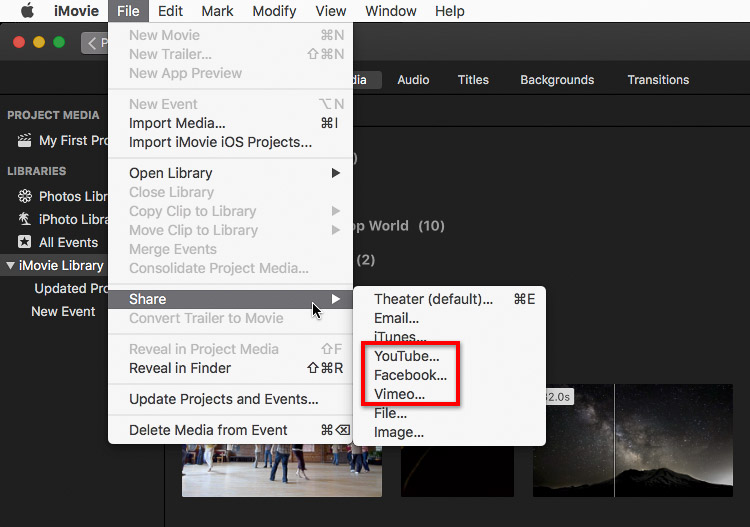
iMovie provides menu commands for some common streaming services. These are presets that apply a long list of important compression settings behind the scenes.
Simplifying the export process is even more important if you use a professional video editing application such as Premiere Pro, where the export options are visible and numerous.
Presets in Advanced Video Applications
When you see a dizzying “wall of options” for exporting video in an application such as Adobe Premiere Pro CC Adobe Photoshop CC, or Adobe Media Encoder CC, don’t panic. Look for a Presets menu and choose the most appropriate one. To see the presets for YouTube and other popular streaming services, you must first choose H.264 as the Format.
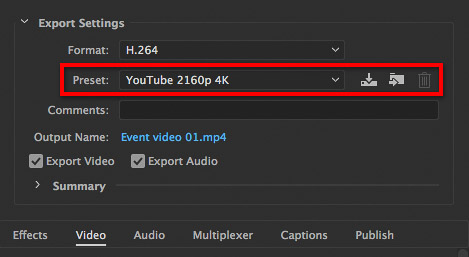
In Premiere Pro, the Presets menu is the key to simple high-quality video exports. The Format menu setting determines the Presets list.
The list of presets can be daunting on its own, but you can probably ignore most of them if you’re uploading a video to a popular video streaming service. Don’t be concerned about exporting many device-specific versions of a video. Upload just one high-quality video file, and let the streaming service adjust their video stream for different devices and network connection speeds.
If you don’t see a preset for the website you’re uploading to, one of the YouTube presets is usually a safe bet. Quick tip: Instead of scrolling the long menu to get to the YouTube preset, press the End key to quickly scroll to the end of the list. On a keyboard without a labeled End key, such as on a laptop, try pressing Fn+right arrow.
Beyond the Presets
In Premiere Pro you’ll find the options affecting compression in the Video tab; more about those soon. Be careful when deviating from the settings configured by a preset. First try a different preset that results in a smaller file size. For example, choose a 720p preset (1280 × 720 pixel frame size) instead of a 1080p preset (1920 × 1080 pixel frame size).
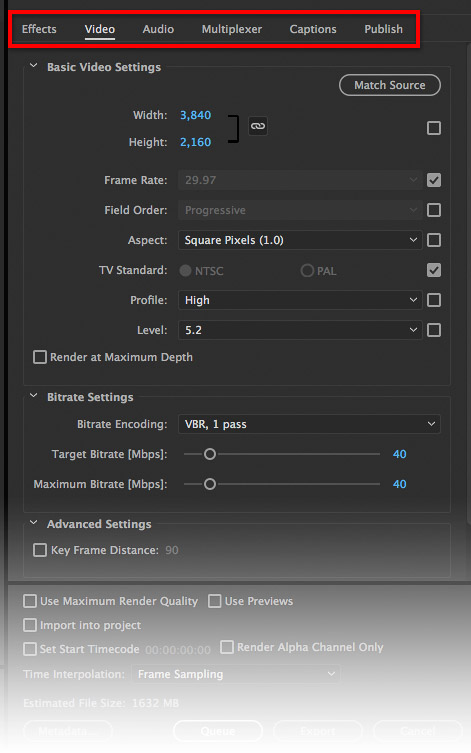
To help you anticipate how your settings affect file size, Premiere Pro and Adobe Media Encoder show you the estimated file size at the bottom of the Export Settings dialog box. This is useful when you’re trying to fit a video within a file size limit for uploads. The exported file may be a little larger than the estimate, so aim for an estimated file size that’s slightly lower than you need.

The Estimated File Size display in Premiere Pro helps you tune compression settings to a target file size.
In this article, I talk about how to compress for final output. If you want to compress video for further editing, the answers are different. If you’re preparing video to send to a video production house, their workflow may have specific requirements that don’t match any preset. Ask them to recommend export settings for the program you’re using. They may be able to provide their own preset for you to install and select.
Compressing Video Further
A high definition video file can easily be larger than 1GB, and 4K video is even bigger than that. These massive file sizes can take a long time to upload to a video streaming service. They’re also too large to attach to email messages. Let’s find out whether any of the following options might help lower the file size a little more:
- Frame size is the width and height of the frame in pixels. A standard HD (1080p) frame is 1920 × 1080 pixels; this size is also called 2K because it’s almost 2000 pixels across.
- Frame rate is the number of frames per second. Set this according to the requirements of your final output. You might be able to use a lower frame rate for casual videos or some software demos.
- Bitrate is the amount of data contained in each second of video. The more data per second, the higher the quality and the bigger the file, just like audio MP3 files. Target Bitrate is the desired bitrate. To limit the bitrate when a specific form of delivery requires it (such as DVD), set the Maximum Bitrate. Changing Bitrate Encoding doesn’t lower file size but may make rendering take longer, so leave it at the default VBR setting unless you’re told otherwise.
- Duration is the time length of the sequence.

In the Export Settings dialog box in Premiere Pro, the Video tab contains Frame Size, Frame Rate, and Bitrate options. Duration is the total time of the sequence of clips in the Timeline view (not shown).
Testing Different Ways to Compress
I rendered some video tests to determine which options make the most difference in file size. The tests used a 5-minute 4K sequence in Premiere Pro that contained 4K source clips.
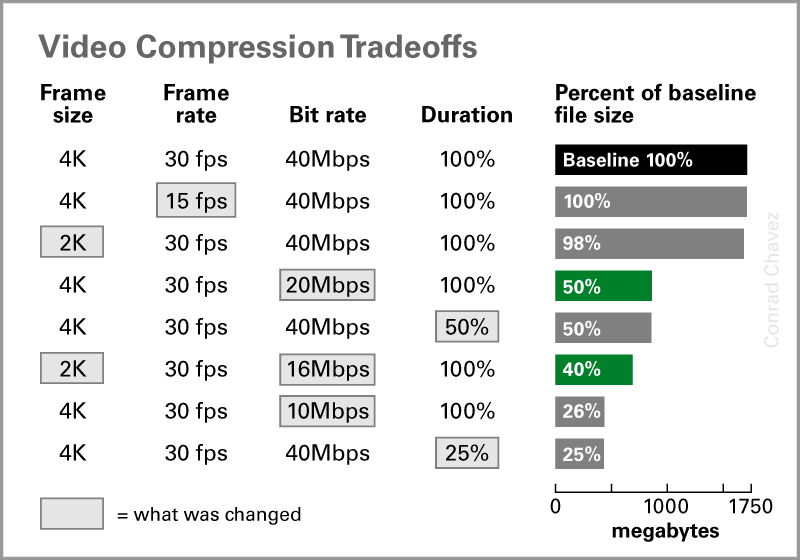
The most effective way to reduce the file size of the sample 4K video project is to lower the bitrate. Making a much shorter video is also effective, but that’s not always practical.
Two settings have the biggest effect on file size: lowering the bitrate and shortening the duration of the video. But if you’re editing a video that must be a specific duration, all you can do is lower the bitrate.
What about reducing the frame size? The third row of the table shows that a smaller frame size won’t lower the file size by itself. If the bitrate remains the same, the software will try to reach the target bitrate by increasing image quality. For similar reasons, dropping the frame rate doesn’t help if the target bitrate remains the same.
A smaller frame size can help only because it gives you more leeway to lower the bitrate while maintaining reasonable image quality. It’s like saving still images with JPEG compression: You work out how far down you can reduce the amount of data before image quality problems are visible, and it’s easier to reduce the file size while maintaining quality when the image width and height (in pixels) are smaller.
This animated image shows detail of a 4K frame at two different bitrates. You can see how the bitrate differences affect the quality of details, tones, and colors.
In some productions, such as talking-head videos, you might not need 4K or even 2K worth of detail. You can consider lowering those to a 720p frame size to gain the freedom to drop the bitrate further.
It’s All About the Bitrate
Before you go down the long road of changing individual video compression settings, first try an appropriate export preset. If your Internet connection is fast enough to upload the exported file in a reasonable amount of time, just send that file. If you have a good reason to reduce the video file size further, focus on lowering the bitrate. Make sure you maintain acceptable image quality as you shrink the file size.
This article was last modified on August 9, 2017
This article was first published on August 9, 2017
Commenting is easier and faster when you're logged in!

Recommended for you

InDesign How-to Video: Create a Duotone Effect
In this week’s InDesignSecrets video, Mike Rankin shows off a great technique to...
InDesign How-to Video: How to Customize Placeholder Text
In this week’s InDesignSecrets video, Erica Gamet shows us how to customize InDe...
InDesign How-to Video: Create Documents With Bleed
In this week’s InDesignSecrets video, Mike Rankin sets up a document to bleed—or...