
Getting Started with Photoshop on the iPad
Take your favorite Photoshop tools and techniques on the go.


This article appears in Issue 24 of CreativePro Magazine.
Editors’ note: For a few years now, Adobe has offered an incredibly intuitive version of Photoshop for the iPad. This means that wherever you are, you can use the familiar Photoshop tools to retouch photos, create compositions, work with layers, add text, and take advantage of its powerful abilities to work with other familiar Adobe apps, from Lightroom to Fresco. Rob de Winter has provided us with some practical information from his book Photoshop on the iPad (New Riders, 2023). Read on to discover if Photoshop on the iPad fits in your workflow, too. (Spoiler alert: It probably does!) And if you’re inspired by this article, do check out the book, which Rob has packed with practical exercises and inspiring interviews with four world-renowned Photoshop artists—Ted Chin, Russell Brown, Frankie Cihi, and Magdiel Lopez—who tell all about how they use Photoshop on the iPad as an essential tool in creating their mind-blowing work.
 Use the code ONTHEGO at Peachpit.com/PSoniPad to get 35% off. Offer valid through October 11, 2023.
Photoshop on an iPad. It once began as a joke within the Photoshop team: “Let’s try to make Photoshop run on an iPad.” That joke turned out to be a hit. Since then, the iPad version has grown into a promising and serious project, and the app has taken a prominent place within Adobe’s Creative Cloud ecosystem.
class=”Apple-converted-space”> The project did take some doing. Copying Photoshop one-to-one to an iPad was not an option. To make such an extensive program work well on a touchscreen, the entire interface had to be redesigned (Figure 1). Because of the smaller screen, it needed to be more compact but with larger buttons so it could be operated with fingers or an Apple Pencil. A touchscreen requires controls that are very different from those of a regular PC or Mac.

Figure 1. Photoshop on the iPad puts a touchscreen-user-centric interface atop the Photoshop desktop code.
Your Assets on an iPad
If you’re going to work with Photoshop on the iPad, it’s important to be able to put photos or other images on your iPad. There are several ways to do so.
Via Cloud Documents and Cloud Storage Services
Cloud Documents (PSDC files) are automatically saved when you work on a document in Photoshop on the iPad. You can easily open them from the Photoshop Home screen on the iPad, desktop, and the web. This makes it very easy to quickly navigate between all your devices. To access files in your favorite cloud storage service, like Dropbox, OneDrive or Google Drive, it’s important that you install the accompanying app (Figure 2) on your iPad. From there, your cloud storage files will automatically appear in the iPad Files app. These files can be accessed in Photoshop and other apps.

Figure 2. With the Creative Cloud app, your files will appear in the iPad’s Files app.
Via iPhone and Lightroom for mobile photos
Your iPhone photos and Lightroom for mobile photos are automatically synced with your iPad if you’re logged in with the same Apple ID and Adobe ID. This is really useful. Photos shot with your iPhone can be opened directly in Photoshop on your iPad.
Via USB-C
All iPad models that are compatible with the Apple Pencil (Second Generation) have a USB-C connection. Many external hard drives today also have such a connection, allowing you to connect them directly to the iPad (Figure 3). The drive can then be accessed directly from the Adobe apps, or you can copy the files to the iPad using the Files app. If you have an iPad model with a Lightning connection, you can also use a hub to connect an external hard drive.

Figure 3. You can connect an external hard drive to your iPad.
Five Tips for Photoshop on the iPad
These five tips will get you started quickly!
Tip 1: Select hair and other thin elements
Photoshop on the iPad also allows you to select hairs and other thin elements in a photo. This feature is very similar to the Select and Mask feature in Photoshop on the desktop. In Photoshop on the iPad, if you want to select a person, follow these steps:
- Make a basic selection with your favorite selection tool. In the case of Figure 4, I used the Object Selection tool to draw a rectangle frame around the woman in the photo. Then Photoshop automatically selects the subject (the woman) within that frame.
- At the bottom of the screen, you’ll find the Contextual Task Bar with the actions you can apply to your selection. Tap the Refine Edge button.
- You’re now in the Refine Edge workspace (Figure 5). Use the Refine Edge brush to draw over the areas on the hair where you can still see a white background. Because this brush is activated by default, you can start drawing with it right away.
- If necessary, change the brush size. Then, on the right side of the screen, you can set View Mode to Overlay to show unselected parts in red for better contrast. Once you draw over the hairs, the white background will be removed automatically. Tap Done when you’re finished.
- Tap the Mask button in the Contextual Task Bar to add a layer mask and hide everything outside the selection. A layer mask will be added to the Layers panel, too.
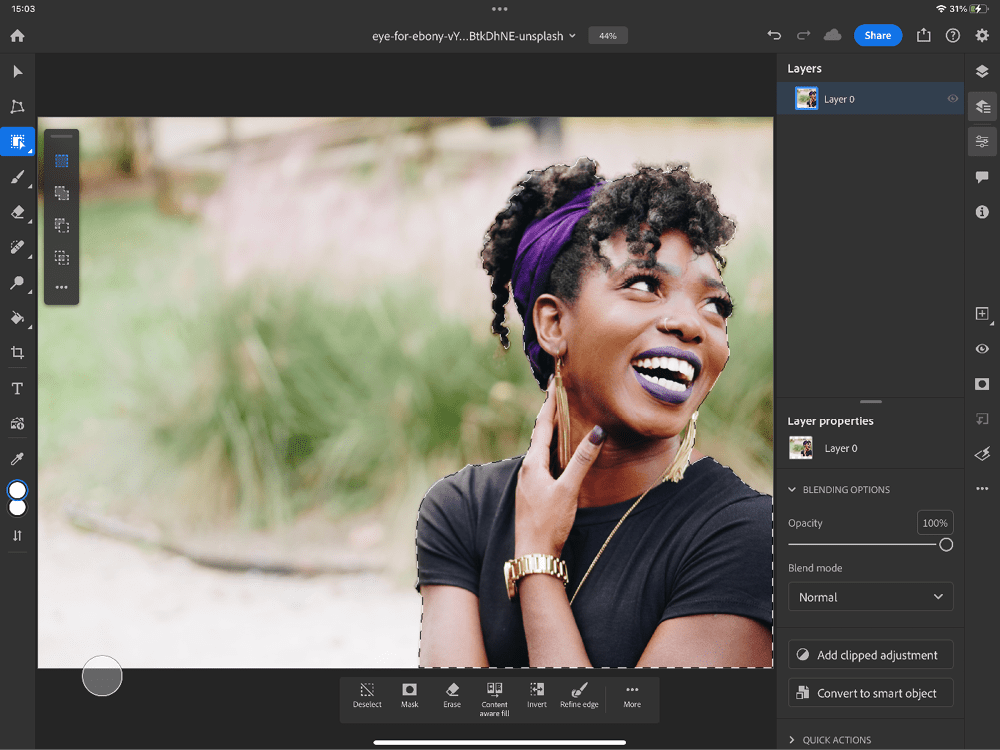
Figure 4. Make a basic selection with the Object Selection tool.
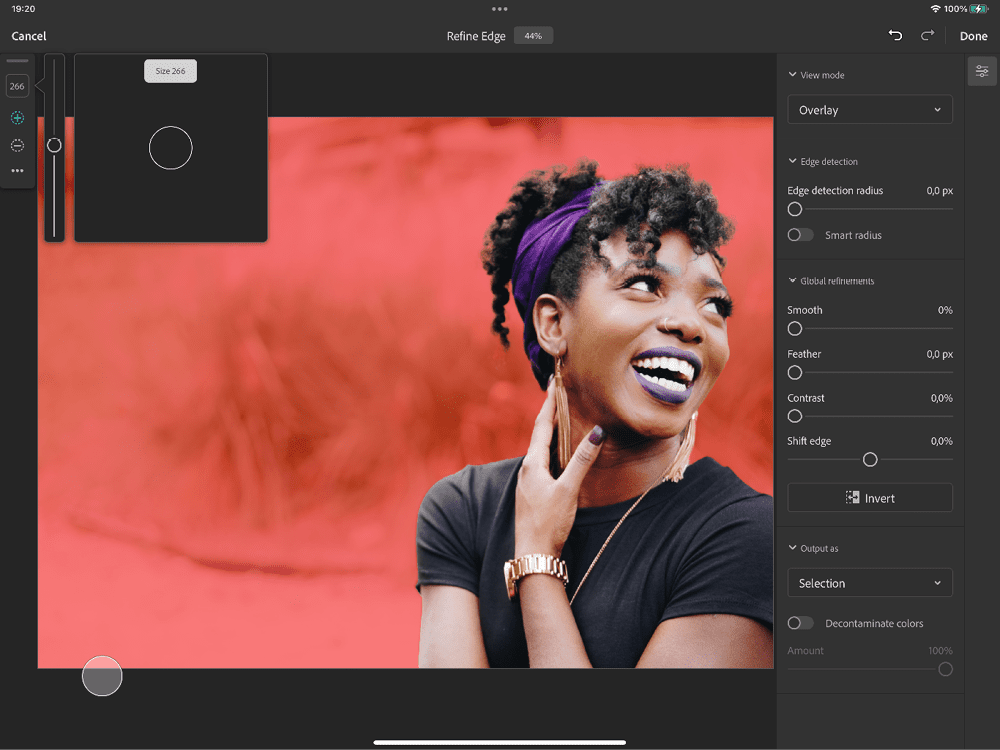
Figure 5. The Refine Edge workspace
Tip 2: Import brushes
Here’s how to take a brush you’ve pre-made in Photoshop on the desktop or downloaded from the web and import it into Photoshop on the iPad. You can follow along by downloading this brush file.
- Make sure you’ve saved your brush (an ABR file) in a storage service that’s also available on your iPad (e.g., Dropbox, iCloud Drive, or others).
- Double-tap the Brush tool in the toolbar to open the Brushes panel.
- At the bottom of this panel, tap the + icon.
- Choose Import From Files (Figure 6).
- Find the ABR file in your online storage or other folder. Tap this file to import it. The brush is now loaded into your Brushes panel. This panel automatically scrolls all the way down, and you’ll see a folder containing your brush.
- Start drawing (Figure 7). In most cases, you’ll first create a new layer in the Layers panel by clicking the + button in the taskbar on the right side of the window.

Figure 6. You can easily import a brush (in the form of an ABR file shared with your iPad).

Figure 7. Once your brush is imported, you can start painting.
Tip 3: Combine Lightroom for mobile and Photoshop
In Photoshop on the iPad, you can perform basic operations on raw files. But my preference is to edit raw photos in a much more comprehensive editing program: Lightroom for mobile. Lightroom works seamlessly with Photoshop. The process of editing a raw photo on an iPad is analogous to the workflow many photographers have on the desktop: When you’re done editing your image in Lightroom, you can send it to Photoshop and continue working on it there.
- Open Lightroom on your iPad.
- In Lightroom, tap the Add Photos From button at the bottom and choose Device, Files, or Connected Camera/Card, depending on where your photo is saved.
- Open your photo.
- The photo will be loaded into the current Lightroom library or the current Lightroom album. If the photo disappears among all your other photos, tap the Recently Added view; the raw photo file should be at the top.
- Tap the thumbnail in the library to open the photo.
- The photo will be loaded (Figure 8). On the right side, notice all the disclosure triangles for categories of editing options (e.g., the Light panel to edit lighting, the Color panel to edit color). On the far right you’ll find a collection of other tools.
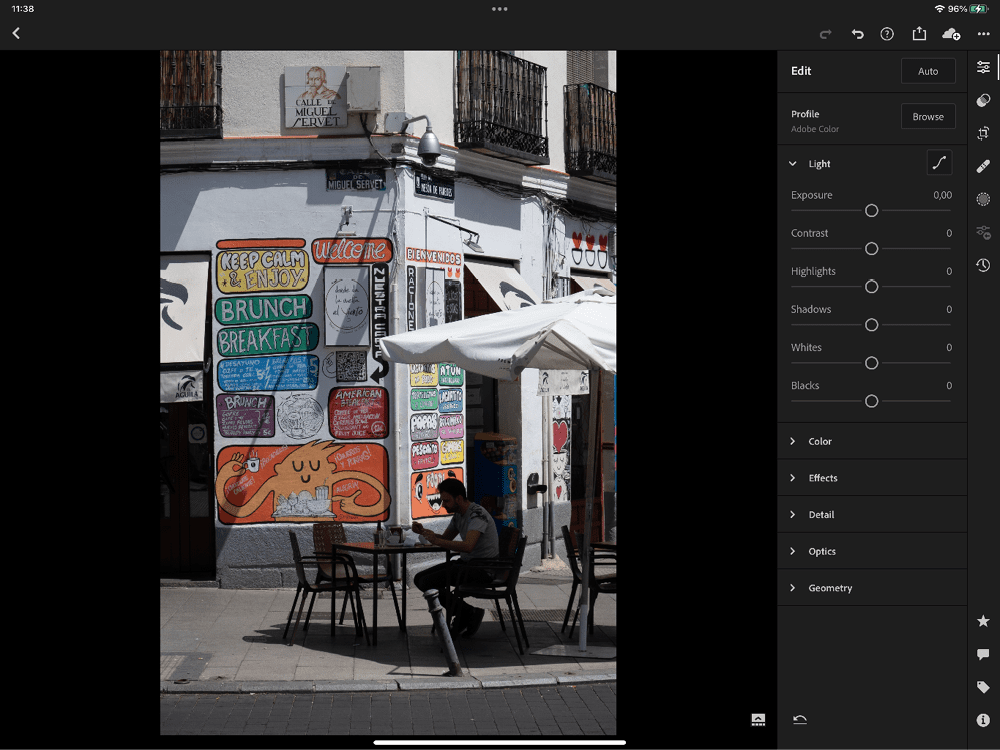
Figure 8. You can seamlessly move your work from Photoshop to Lightroom for mobile, an iPad workflow that’s analogous to the way many work on the desktop.
- Feel free to experiment with the tools. You can’t really do anything wrong (Figure 9).

Figure 9. Adjust any of the settings in Lightroom for mobile.
- When you’re finished with the global editing, go to Photoshop, where you can continue editing the photo. Tap the Share button at the top right of the Lightroom screen to access the Share menu, where you’ll see many of the familiar share options (Figure 10).
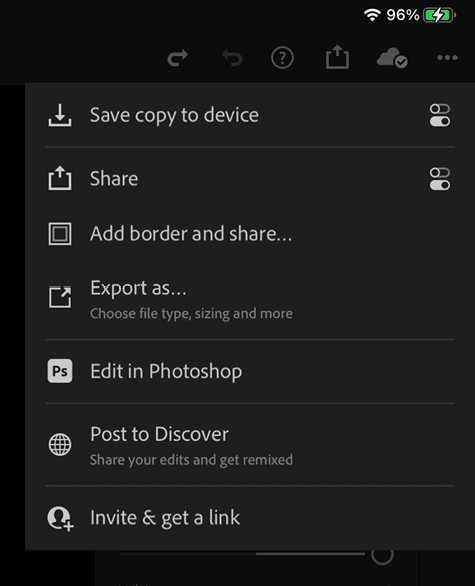
Figure 10. The Lightroom for mobile app’s Share panel
- Tap Edit in Photoshop to launch the app and establish a connection with Lightroom.
- Retouch and edit the image in Photoshop as needed, and then send it back to Lightroom, using the Send to Lightroom button (Figure 11). Awesome!
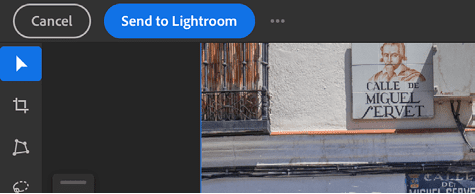
Figure 11. You can easily transfer images between Photoshop on the iPad and Lightroom for mobile while editing.
Tip 4: Adjustment layers
In Photoshop on the iPad, you can also use your favorite adjustment layers to change color or adjust the exposure of your layers. You can apply adjustment layers to all underlying layers or, using a clipped adjustment layer, to a single layer or layer group. In the steps below, you’ll learn how to apply a clipped adjustment layer.
- In Figure 12, you see a turtle layer with the background already removed. To lighten this turtle, select the layer in the Layers panel.

Figure 12. Add a clipped Curves adjustment layer to lighten the turtle.
- Open the Properties panel via the corresponding button in the upper-right corner of the screen, tap Add Clipped Adjustment, and then tap Curves. The Curves adjustment layer appears in the Layers panel, and the Curves properties appear in the Properties panel at the bottom of the screen.
- Lighten the midtones slightly by dragging the center of the diagonal line a little bit upwards (Figure 13).
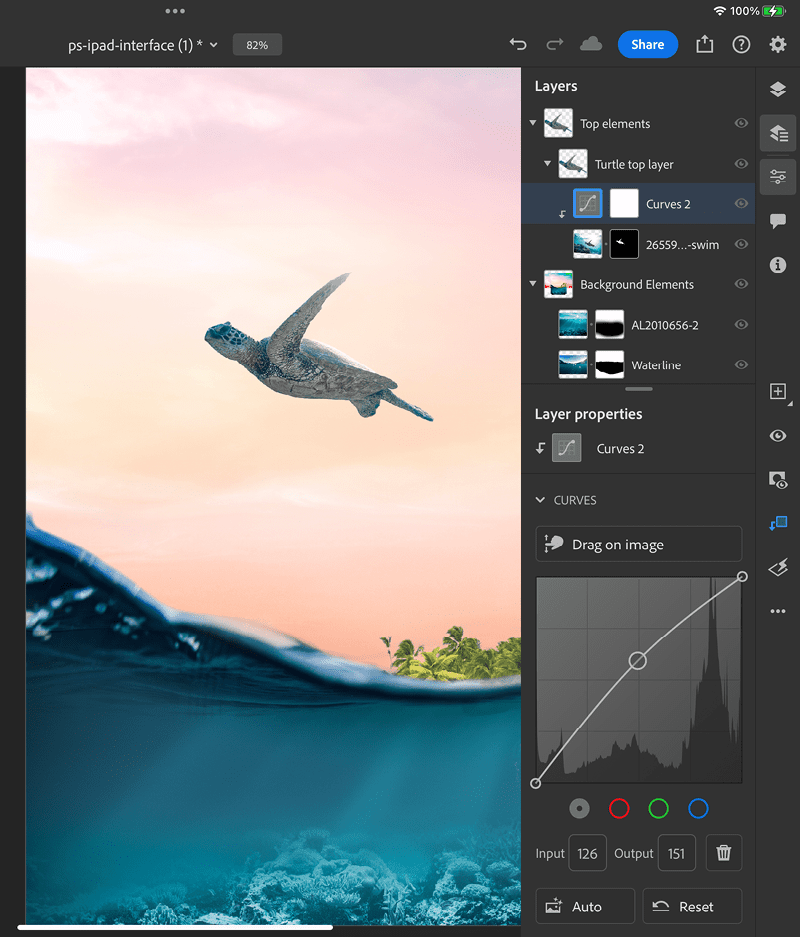
Figure 13. Edit Curves in the Layer Properties panel.
Tip 5: Adding fonts to your iPad
With your Creative Cloud subscription, you have access to thousands of premium fonts through Adobe Fonts. You can download and activate those fonts to when you start editing your text, and you can use them when you’re working with Photoshop. But you can also activate fonts from the Creative Cloud iPad app, and when you do, they will be available in all your other apps. Here’s how:
- Open the Creative Cloud app on your iPad.
- Go to the Fonts section on the left side of the Home screen (Figure 14).
- Tap the magnifying glass icon at the top right to search for a font, or choose a featured font in the Browse Adobe Fonts tab.
- Tap the font name to view the font family.
- Tap the cloud icon next to the font to add the font to your iPad (Figure 15).
- When the iPad asks if you want to install the font, choose Install. The font is now installed and can be used in all apps.

Figure 14. The Creative Cloud app lets you use Adobe Fonts in any of the apps on your iPad—not just Adobe’s offerings.

Figure 15. Tap the cloud icon next to the font to activate a particular font from Adobe Fonts on your iPad.
In Short…
You’ll find more advanced options for image editing on an iPad than you might think at first glance. These five tips are just the tip of the iceberg. The artists I interviewed in my Photoshop on the iPad book use this program in completely different ways on projects that range from photo compositions to murals. If you explore all the options, you’ll be creating sophisticated compositions, retouching photos, and designing images for social media in no time. And with major new artificial intelligence features in development, there’s much more to come!
Commenting is easier and faster when you're logged in!

Recommended for you

Sales Enablement Platforms
Create, manage, and distribute interactive sales materials from InDesign content...

This Week in InDesign Articles, Number 22
Some great early-February articles and videos about InDesign. Don't miss 'em!

What’s New in Illustrator 2021
The 2021 version of Adobe Illustrator brings few interesting new features, altho...