
Touching Up Darks and Lights and Equalizing Value
In Chapter 1, I covered how I created a digital drawing of a client’s house (called “The Point”) by compositing four drawings together. After the client approved the composition however, I needed to clean up the final version to my satisfaction (see figure 5).
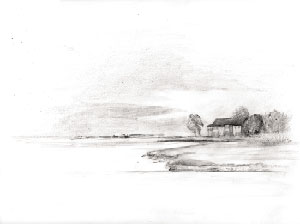 Figure 5: The image of “The Point” as approved by the client, but before my final cleanups.
Touching Up the Darks and Lights. The first touch-ups that I wanted to focus on were punching up some darks and cleaning up the whites. To create the darks, I made a new layer above the composited image by clicking the New Layer icon in the Layers palette. In the Layers palette, I then set this layer to the Multiply Blending mode so the new marks would interact with the drawing underneath and therefore maintain much of the texture. So that I could draw subtlely with my graphics tablet, I used a small Brush tool with the Brush Dynamics option set to be pressure sensitive in Size and Opacity (see the Appendix, “Arranging Your Workspace,” for more about tablets). Using black and almost black colors, I lightly and slowly drew in the areas where I wanted to create more darks, undoing and using the Eraser tool as needed (you can use the Eraser portion of the Stylus if you’re using a tablet). (see figure 6.)
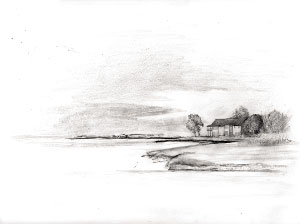 Figure 6: Punching black into the composition on a New Layer set to Multiply Blending mode.
To clean up the whites, I created another new layer on top of the others. Into this top layer I painted with white using the painting tools and erasing my marks as needed.
Equalizing Value. To finish the image, I needed to equalize the value between the detail of the house itself (which was drawn and then composited separately) with the rest of the composition.
Special layers called Adjustment Layers provide you with many ways to alter the colors and values of your image. In the Layers palette, click and hold the Adjustment Layer icon to see the long list of options.
While some of the options, such as Gradient, Pattern, and Posterize, create layers that radically shift your image, most of the options provide you with powerful ways to make more subtle adjustments. Experiment with the different options for adjusting your image (refer to your Photoshop manual if you need help figuring it out).
In this project I used the Layer Mask attached to the Adjustment Layer to control how the adjustment would be applied.
If you have an active selection when you create a new Adjustment Layer, your selection is automatically transformed into the Layer Mask for that Adjustment Layer. This Layer Mask reveals your adjustments within the area you had selected and will protect the area outside your selection from your adjustments.
For “The Point” I decided that I wanted to shift the value of the majority of the image to match the slightly darker value of the house Detail. To adjust everything except the Detail, I began by selecting the Detail of the house with the Lasso tool and then chose Select> Inverse. When I chose Levels from the Adjustment Layer icon in the Layers palette, the Adjustment Layer Mask affected everything except the house (see figure 7).
 Figure 7: After selecting the house Detail, I chose Select> Inverse to select everything but the Detail.
With everything active except the Detail layer, I chose Levels from the Adjustment Layer icon in the Layers palette. The portion of your image, which was selected when you created a new Adjustment Layer, is the portion you’ll be adjusting. You’ll soften the transition between this adjustment and the rest of your image later, so concentrate on the basic correction. In the Levels dialog box I darkened the portion of the image that had been selected (moving the center slider slightly to the right) and clicked OK. I then used my Brush tool, using black and white to clean up the mask for the Adjustment Layer so that the transition between the house and the rest of the image was smooth (see figure 8).
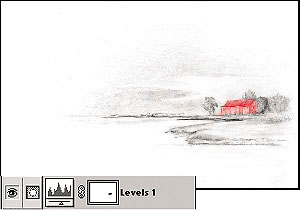 Figure 8: The cleaned up Layer Mask for the house (shown as an overlay by clicking the mask in the Channels palette), and the Adjustment Layer and Mask as they appeared in the Layers palette.
The last decision I made after applying the darker Adjustment Layer to the composition was to tone down the blacks somewhat by setting the Opacity of the layer to 59% (see figure 9).
 Figure 9: The final, cleaned-up version of “The Point.”
This article was last modified on January 3, 2023
This article was first published on December 13, 2002
Commenting is easier and faster when you're logged in!

Recommended for you
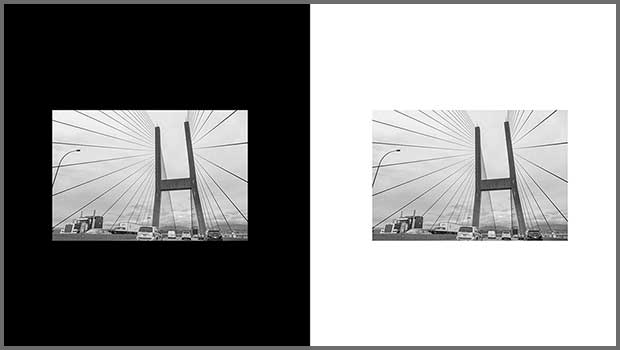
How to Perceive Brightness More Accurately
Learn how to control the key factors that can affect how you perceive brightness...

CreativePro Tip of the Week: Make Illustrator Do the Math for You
This CreativePro Tip of the Week on making Illustrator do the math for you was s...

CreativePro Tip of the Week: Making Dotted Lines in Illustrator
This CreativePro Tip of the Week on Making Dotted Lines in Illustrator was sent...