
Dual-camera iPhones like the iPhone 7 Plus, iPhone 8 Plus, and the iPhone X have the ability to shoot “portrait” images in which the background is blurred, to create a bokeh effect. Now, with Photoshop CC 2018 you can open those images and change the focus in them, based on the depth map that’s stored within the image.
Accessing those images, however, isn’t straightforward, as iPhones will export them as JPEG files by default. Here’s how you can find them, and process them in Photoshop. Note that these instructions only work on a Mac.
Take the photo
Set your iPhone camera to Portrait mode, and take the image as usual. In the example shown here, you can see it trying to identify the faces on the busts in the image. Make sure you have your iPhone set to upload images to iCloud so you can reach them.

Open the photo
In Photoshop, go to Open and select Photos in the dialog’s sidebar. Scroll right down to the bottom and you’ll see what appears to be your image. Click to open it.

It’s the wrong image
When you open the file, you’ll see it isn’t Apple’s new HEIC image format, but the JPEG file used for sharing. No matter; just close the opened file, and choose Open once more.

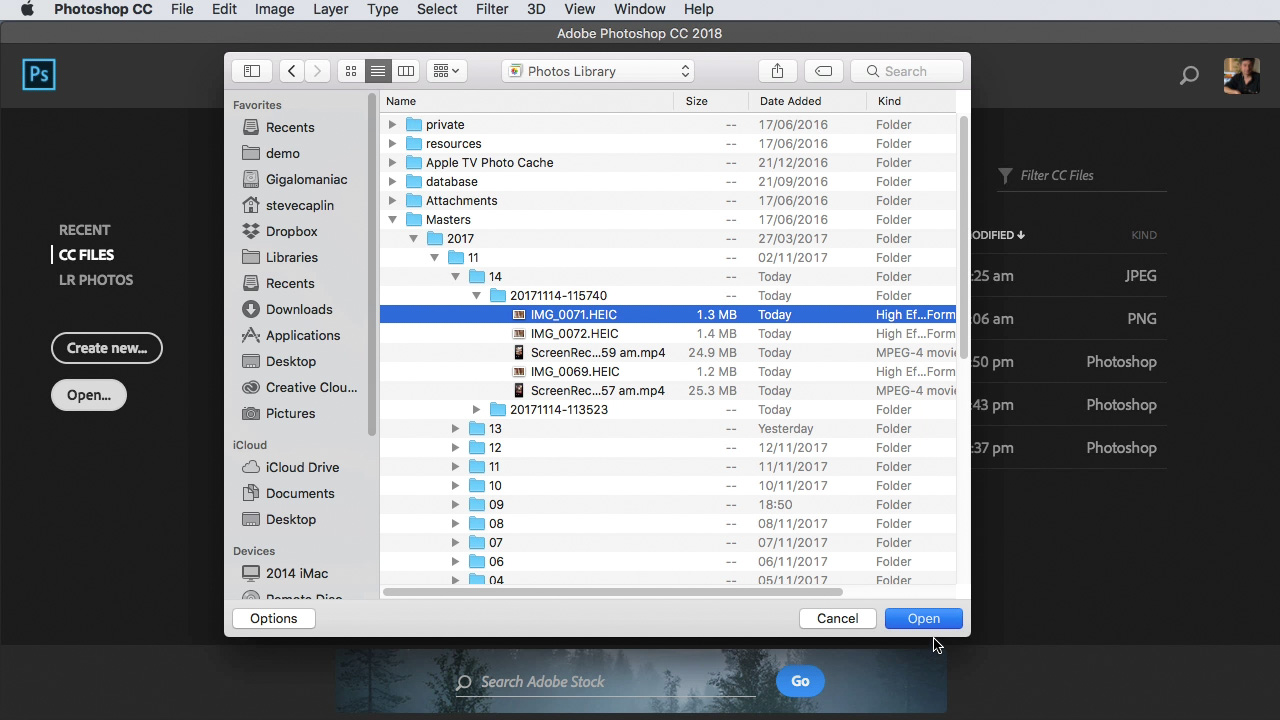
Finding the HEIC image
This time, the Open dialog will show not your photo library, but the folder in which the image was found. This is good, as it gives you access to the file structure inside your Photo Library (which is otherwise hidden).

Navigate to the file
Hold the Command key and press the Up cursor key several times until you see the folder named ‘Masters’. Open this folder, then the current year, then the month, and finally the date, and you’ll see a folder containing the image you want – it will have the .HEIC extension.
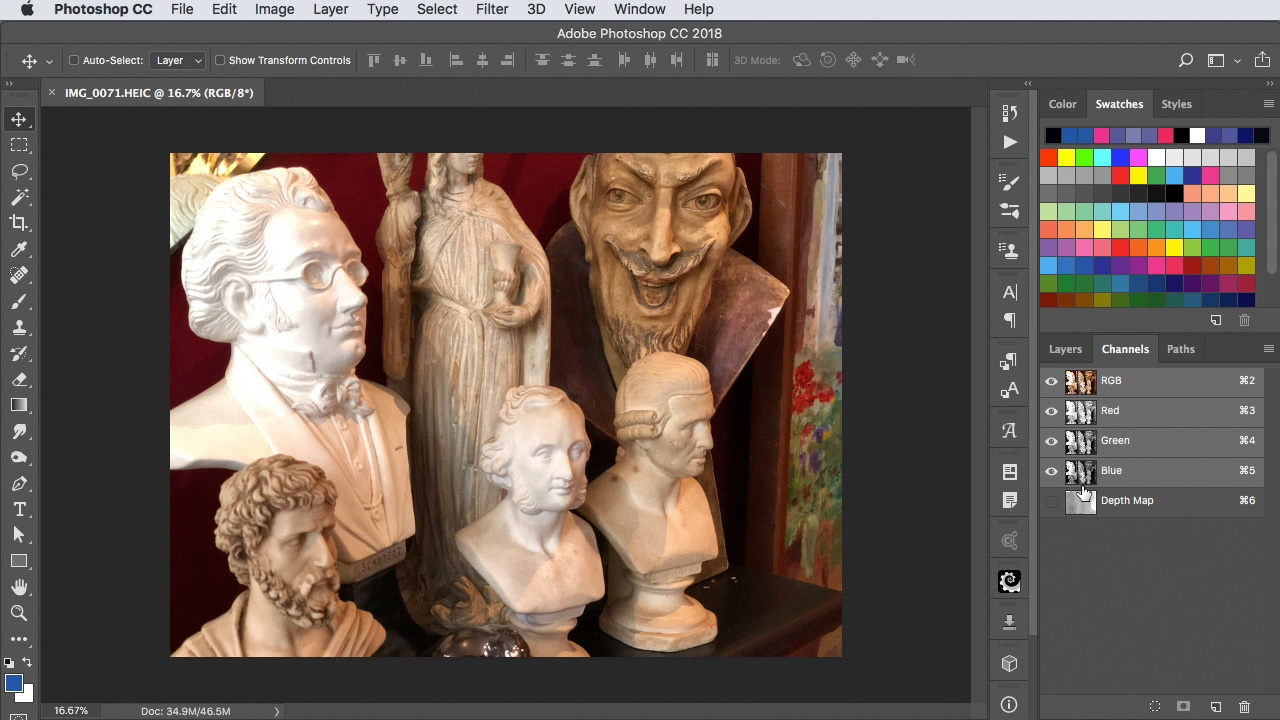
Check the image
If you open the Channels panel, you’ll see that in addition to Red, Green, and Blue there’s a fourth channel named Depth Map (its visibility is turned off). This is what Photoshop will use to process the image. Choose Filter > Blur > Lens Blur to continue.
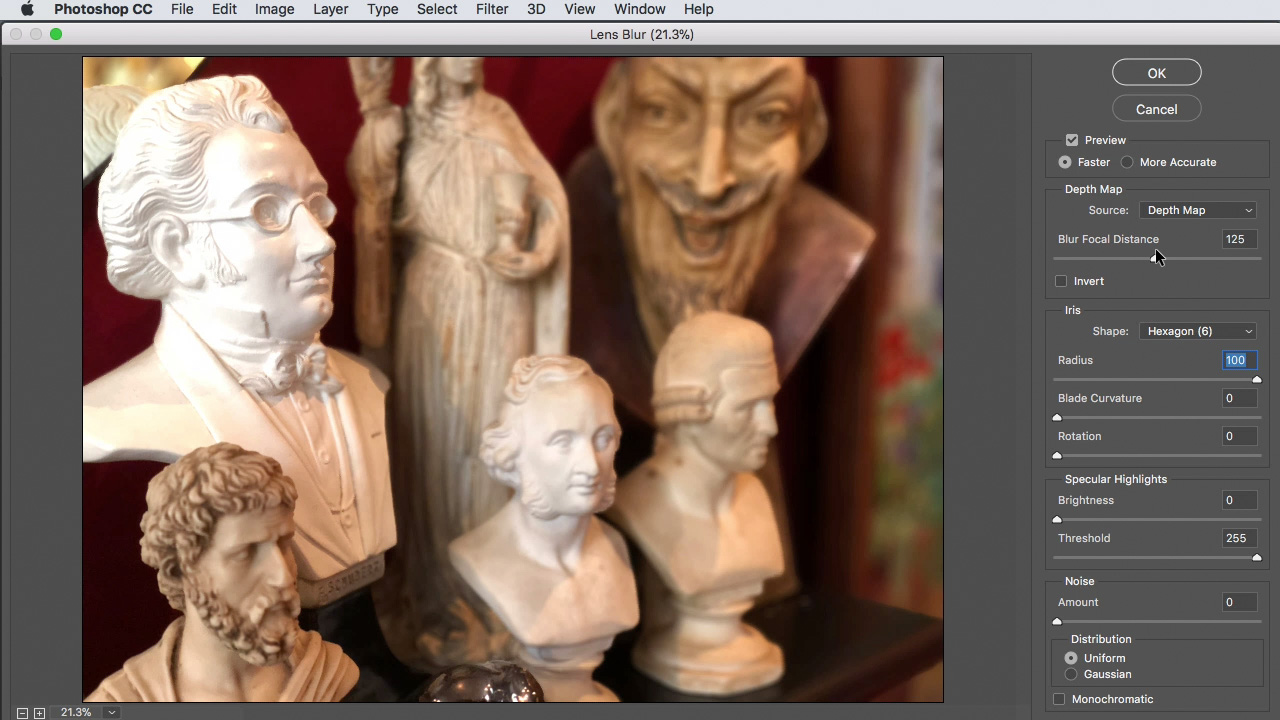
Set the blur amount
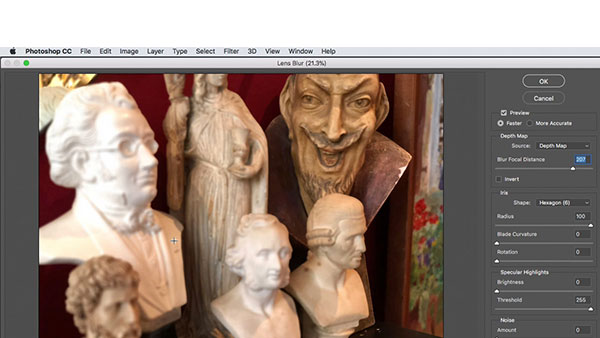
Make sure the Source is set to Depth Map (it will be by default), and drag the Blur Focal Distance slider. As you do so, parts of your image will come into focus, with the rest blurred out. It’s a bit hit and miss, and you have to drag until you get the best focus you can; use the Up and Down cursor keys to change the value by 1, holding the Shift key to change by a factor of 10 to get you close to the right value. In the example below, the bust on the left is in focus, those further away on the right are blurred.
Change the focus
You can change the focus to another part of the image by dragging the slider. Here, the bust on the far right is now in focus, and the bust on the left is blurred.

It’s a slightly cumbersome process, certainly. If you want an altogether more elegant way of doing it, download the free iOS app Focos to see just how easy it can be.
Check out the video version of this tutorial below, and get a link to download the original artwork at https://www.2minutephotoshop.com/how-to-change-depth-of-focus-with-an-iphone-and-photoshop-cc-2018/
This article was last modified on December 18, 2017
This article was first published on December 18, 2017
Commenting is easier and faster when you're logged in!

Recommended for you

Illustrator Basics: Using the Magic Wand Tool
Use the Magic Wand tool to select similar objects with just one click!

How to Create a Cinemagraph in Photoshop
Learn how easy it is to make a cinemagraph, where a portion of a still image is...

How to Remove Multiple Objects from Street Photos in Photoshop
This amazing tip for removing objects from busy photos won the Three Minute Max...