
Creating Synthetic Environments
![]()

Versions: 5, 5.5
Operating systems: Macintosh, Windows
Artificially creating scenes can be a challenge and one that’s called for frequently when working with stock photos. In this article, we’ll show you the techniques we used to give our conch shell image, shown in Figure A, a more natural-looking home, as shown on the cover. If you compare the cover image to a real photo of a shell on a beach, you’d be able to tell the cover is computer generated. While these methods won’t generate perfect reality, they’re still good for creating a convincing mood or effect. For this exercise, we’ll primarily focus on creating the sand and sea effects with the help of the Emboss and Plastic Wrap filters. First, we’ll mimic a sandy beach by generating the gritty texture of sand with the Add Noise and Emboss filters. Then, we’ll show you how the Plastic Wrap filter can be used to create the water swirling around the shell.
Figure A: We’ll create a convincing scene for our stock photo of a conch shell.
Getting Started
First, you need to get your image into position. Most stock object photos come with an embedded path to allow you to quickly remove the object from its white background. To do so, open the Paths palette and click on the Outline path to turn it on. Then, choose Make Selection from the Paths palette pulldown menu. In the resulting dialog box, select the Anti-aliased check box and set the Feather Radius to 1. Click OK and then press [command]C ([Ctrl]C in Windows) to copy the shell. Now, open a new document of the size and resolution you want to work with and then press [command]V ([Ctrl]V in Windows) to paste in the shell. Depending on the resolution of your stock image, its size could change quite dramatically. Rename the shell layer, Shell, and then perform any necessary transforms, such as scaling and rotation, to get the shell into the desired position.
Making Sand
Once you’re set with the shell, select Background and fill it with a tan sand color. We used R=194, G=163, and B=135 as our base sand color. To create the granularity of sand, choose Filter > Noise > Add Noise to start breaking up the flat color. We set our Amount to 19, the Distribution to Gaussian, and enabled the Monochromatic check box. This is important to do, otherwise your sand can become overly colorful. Click OK to apply the effect. Now, duplicate Background and name it Emboss. We’re going to give the background a more raised texture. To do so, choose Filter > Stylize > Emboss. We used the following settings: Angle to 170, Height to 3 pixels, and Amount to 200%. Once you’ve made your settings, click OK. Your background probably looks like static or TV snow. To make it look more like sand again, set the Blending mode of the Emboss layer to Overlay. This bumps up the grain of the sand a good bit, as you can see in Figure B.
Figure B: Use the Emboss filter to give your sand some texture.
Adding Contour
The sand looks pretty good, but it’s very flat. To give it a more natural look, we need to introduce some variety into its appearance. We’ll do this with some light and dark values and the help of the Emboss filter. Create a new layer and name it Contour. Fill the layer with black and then press the X key to set the Foreground Color to white. Select the Paintbrush tool and then choose a large, feathered brush. Paint light areas here and there on the black, as shown in part A of Figure C. The light areas become slight bumps while the dark areas become shallow valleys. Try to position the contours in relation to your object.
To get a gradual contour, you need smoother transitions between the colors, so choose Filter > Blur > Gaussian Blur to stretch out the gradients. We used a Radius setting of 60, as shown in part B of Figure C, but your setting will depend on the resolution of your image. Click OK to apply the effect.
Figure C: Add contour to your image in three steps.

We can also add a little more grain while we’re creating the contours. The sand looks pretty good, but not quite as grainy as we would like. To remedy this, apply the Add Noise filter to the Contour layer with the same settings you used before. Then, apply the Emboss filter to create the contouring. We left our Angle setting at 170 to keep the lighting consistent, but then we maxed out the other two sliders to create as much contour as possible, as shown in part C of Figure C. Depending on your image resolution, you may need to vary your settings to create gentle swells. Once you’ve finished with the sand, get the final effect by setting the Blending mode of the Contour layer to Overlay and its Opacity to 60%, as shown in Figure D. To make the rest of this exercise easier to manage, link the Contour layer, the Emboss layer, and Background. Then, choose Merge Linked from the Layers palette pulldown menu. Rename this new layer Sand.
Figure D: With very little effort we’ve made the sand grainy and contoured.

Shading the Shell
We now have perfectly nice sand and a perfectly nice shell but they aren’t interacting in any way. We need the shell to look like it’s sitting in the sand. We’ll do this by shading the left side of the shell and by placing a shadow under the shell. Creating shadows for objects can be tricky. The lighting on the shell was created in the studio, and here we are sticking the shell on an artificial beach that presumably has the broad light source of an artificial sun. For the most realistic images, you should always strive to match the lighting effects. In the case of our shell, relatively flat lighting was used. So, we need to add a little more dimension to the shell’s body and then create a shadow to seat it on the sand. First, we’ll start on the body. [command]-click ([Ctrl]-click in Windows) on the Shell layer to bring up its selection outline. Then, create a new layer, name it Shell Body Shading, and place it right above the Shell layer. Select the Lasso tool and hold down the [option] key ([Alt] key in Windows) to put it into removal mode. Draw a big selection around the parts of the shell that don’t need any shading. You can see our remaining selection in part A of Figure E.
Figure E: Trim off the unnecessary parts of the selection with the Lasso tool, fill with a gradient, and you have instant shading.
To make the shading, press the D key to set the default Foreground/Background Colors. Then, click on the Linear Gradient tool to bring up its options. Choose the Foreground To Background option from the Gradient pulldown menu. Now, click and drag within the selection to create a gradient similar to the one shown in part B of Figure E. This doesn’t look like it will make decent shading, but once you set the Opacity of the Shell Body Shading layer to 20% or so and set its Blending mode to Multiply, the shading should look quite similar to part C of Figure E.
Casting Shadows
To create the drop shadow, [command]-click ([Ctrl]-click in Windows) on the Shell layer to bring up its selection once again. Then, create a new layer and name it Shadow. Fill the selection with black and then deselect the shadow shape. Move the Shadow layer underneath the Shell layer. Depending on the shape and the angle of light hitting your object, you may need to skew, rotate, blur, erase, or lighten selective portions of the shadow shape. In Figure F, you can see the basic shadow shape we created and its results in the image. Once we had the basic shadow shape, we rotated it a little and set the Opacity of the Shadow layer to 60%. We then blurred the entire shadow slightly and blurred its left edge more significantly. We used the Eraser tool to remove any extraneous shadow edges.
Figure F: Creating a detailed shadow can really improve the realistic qualities of a photo illustration.

Establishing the Water Line
We’re almost ready to make the waves, but we need to define the water line first. To do so, create a new layer and name it Water Line. Then select the Paintbrush tool and a large, feathered brush. Set your Foreground Color to black and then paint in the curves of the water line, as shown on the left in Figure G. When you’re done, set the Blending mode of the Water Line layer to Overlay and the Opacity to 80%.
Figure G: Paint in curves in black and then set the layer to Overlay to create the water line.
Embedding the Shell
Now, that you’ve defined the water line, there’s one more effect you can do to make the shell sit more realistically on the sand. Currently, no sand is touching the shell at all, so you’ll want to make small overlapping areas of sand. To make the sand overlap the shell, be sure you have the Sand layer active in the Layers palette and then draw a small selection around the bottom-left part of the shell. Now that you have the right position for the sand, turn off the visibility of the Shell layer, Shell Body Shading layer, and the Shadow layer. Now, choose Select > Feather and enter a high Radius setting in the resulting dialog box. We used a setting of 15 for our image. Click OK and press [command][shift]C ([Ctrl][Shift]C in Windows) to copy information from both the Sand and the Water Line layers. Paste the new piece of sand and rename its layer Overlap. Position the Overlap layer above the Shell layer and position the sand so that it overlaps a small portion of the shell body. Now, set the Blending mode of the Overlap layer to Dissolve. This creates a grainy edge effect around the sand allowing it to blend in well with the surroundings without harsh lines or out-of-place feathered effects, as you can see in Figure H. You can repeat this effect in as many areas as is suitable for your particular image.
Figure H: Blend in pieces of sand by using the Dissolve Blending mode.
Making Waves
On first glance, the Plastic Wrap filter might not seem particularly useful. However, it makes excellent water and molded effects when controlled properly. We’re going to create our water in sections: water inside the shell and water around the shell. Now to make the actual water, duplicate the Shell layer and the Sand layer. Link and merge them and then rename the layer Water. Drag the Water layer on top of the Water Line layer and then choose Image > Adjust > Desaturate to remove all the unnecessary color. After that, choose Filter > Distort > Wave to generate some watery texture. Feel free to experiment with the settings. You can see our settings in Figure I. Once you have good, curvy shapes, choose Filter > Blur > Gaussian Blur to smooth out all the rough spots. We set the Radius of our blur to 14, as shown in part A of Figure J. Click OK once you’re sure all the tones have been smoothly blended. Finally, choose Filter > Artistic > Plastic Wrap. We set the Highlight Strength to 20, Detail to 9, and Smoothness to 7. Click OK. You can see our results in part B of Figure J. The areas with the most tonal transition develop the best wave patterns.
Figure I: Generate water-like curves with the Wave filter.

Figure J: The Plastic Wrap filter turns soft tonalities into sparkly curves, which incidentally makes great water.

Now you’re probably wondering how we’re going to make this look like water. You’ll see quickly once you set the Blending mode of the Water layer to Hard Light. Duplicate the layer and turn off the visibility of the copy for now. In part C of Figure J, you can see how we moved the curve off to the right to fit in with the edge of the water line. We then set the Opacity of the Water layer to 80% and used the Eraser tool and a large, feathered brush to remove hard edges and any portions of the water that we didn’t want. The water is washing up under the shell just like we wanted.
The rest of the water in the final image is assembled by duplicating the Water Copy layer and either flipping it horizontally or vertically and then erasing the parts we don’t need. To flip a layer, select it and then choose Edit > Flip Horizontal or Flip Vertical.
To have some of the water flowing over the shell, move the Water Copy layer above the Shell Body Shading layer. From there, you can make as many duplicates as necessary for the size of your image. Our final image consists of three sections of wave: behind the shell, in the shell, and over the shell.
Adding a Tint
Water refracts light differently than air. When you look at our simulated water, it looks unnaturally clear. To give it more depth, add a slight tint of greenish-blue. Create a new layer and name it Color. Position the Color layer just above the Water layer. Then, click on the Foreground Color to access the Color Picker. Choose a dark green-blue such as R=48, G=109, and B=77, then click OK. Press [option][delete] ([Alt][Backspace] in Windows) to automatically fill the Color layer. Since the position of your water layers can’t be moved, you’ll have to apply color to each section individually. To do so, link the Color layer with the Water layer and then [option]-click ([Alt]-click in Windows) on the line in between the two layers to group them together. Now, set the layer’s Opacity to somewhere between 5% and 15%, depending on how much of a tint you want. Repeat this process for each section of water in your image. You can see the effect of the tint in Figure K.
Figure K: Add more depth to your water with a slight tint.

Illustrative Style
While not attaining photo realism, we’ve shown you photo illustration techniques of a more realistic nature that are excellent for a lot of design purposes. From this article, you should have greater mastery of general assembly techniques as well as the Emboss and Plastic Wrap filters. Once you break down a project, you can see how generating certain types of artificial landscape isn’t as difficult as it may have seemed.
Copyright © 2000, Element K Content LLC. All rights reserved. Reproduction in whole or in part in any form or medium without express written permission of Element K Content LLC is prohibited. Element K is a service mark of Element K LLC.
This article was last modified on January 3, 2023
This article was first published on May 19, 2000
Commenting is easier and faster when you're logged in!

Recommended for you

Illustrator How-To: Shadowy Icons
Preparing Your Artwork and Creating a New Fill One of the easiest ways to make a...

A Film Technique for Your Digital Photography
Before Picture Elements (“pixels” for short) were a gleam in some IB...
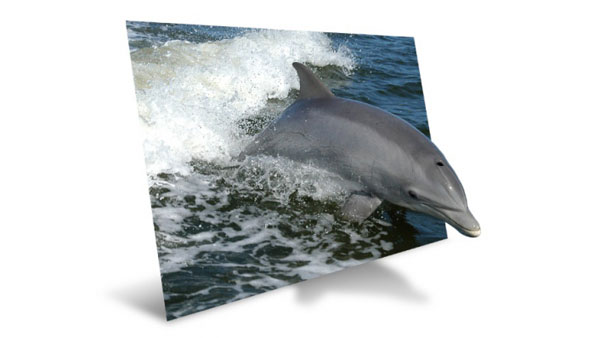
Creating an Out of Bounds Effect in Photoshop
Images where animals or people bust out of their background are very popular, an...