
Editor’s note: Don’t miss Steve’s extensive story on CC Libraries in Issue 83 of InDesign Magazine, which you can also read here if you’re a Premium Member.
In the past few years, Adobe has released a number of free mobile apps which are designed to capture or create artwork, colors and other assets. They integrate with Adobe desktop apps and use their file formats. In many cases, CC libraries provide the connective tissue between desktop and mobile applications. I used Adobe Capture CC app on my iPad to add color themes and shapes to the project.
Using Adobe Capture CC

Capture is a new app for iOS and Android introduced in October 2015. It combines three apps which have been around for at least a year or two—Adobe Color, Adobe Brush and Adobe Shape. If you’re new to using Adobe Capture, you can download it for iPad, iPad Pro, and iPhone from the App Store and for Android phones from Google Play. For a more complete description of Adobe Capture, see Take Your Design Workflow Mobile with Adobe Capture CC by Justin Seeley at CreativePro.com. For my project, I used it to capture some color themes and some vector shapes I could modify in Adobe Illustrator, then bring into InDesign.
Adding Color Themes. You open the Capture app and sign in with your Adobe ID, connecting you to your existing library assets, as well as your Creative Cloud Files, the Creative Market, and Adobe Stock. Tap the Color menu option, then tap the + icon. You can either point your camera at at scene to capture it, or you can pick a picture from another source.

I’ve used Adobe Capture CC to sample a color theme from a photo in my Camera Roll
To use the device’s Camera Roll or another source, click the square icon near the Capture button. Choose between Camera Roll, Creative Cloud, Market, or Stock to pick a source. I picked my picture from the Camera Roll.
Five interactive color circles appear on the image. If you’re using the camera, tap the screen to freeze it (not necessary for a picture from the Camera Roll). You can drag the circles around the scene to select the colors you like. Tap the Capture button to capture the colors.
Review the color theme you created, then give it a name. Finally, choose the CC library where you’d like to save it for your project and tap Save Color Theme.
Adding Shapes (via Illustrator CC). To capture a shape with the Capture app, tap the Shapes menu. Click the + icon. Again, you can use your camera or another source. You want a high-contrast image to work well as vector art. I had taken pictures of some black-and-white illustrations that I wanted to convert to vector art. Using the method described above, I picked one from my Camera Roll.
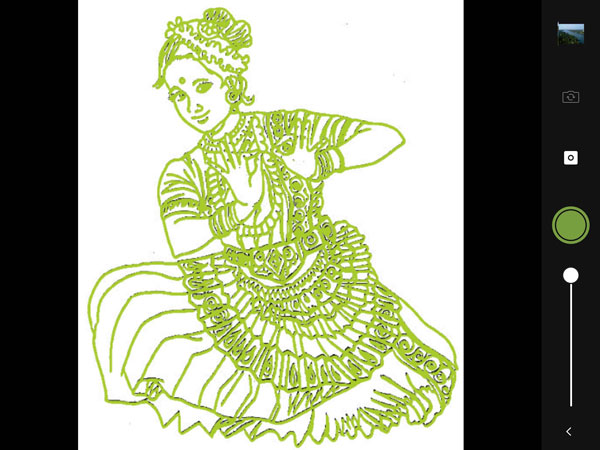
I’ve used Adobe Capture CC to create vector art from a drawing. I’ll use Adobe Illustrator CC to bring it into InDesign.
A slider next to the Capture button lets you add or remove details from the image. Tap the Capture button to capture. Tap Remove from Shape and drag your finger over parts of the shape you want to remove. Or, if you remove too much, tap Keep in Shape to add more to the shape. When you’re satisfied, click Next.
Then you wait for a couple minutes while the app converts your shape into vector paths. Review the shape, then click Next. Finally, name the shape and pick the CC library to store it, and tap Save Shape.
Switch to Illustrator CC and view the shape in your library. Drag the art into Illustrator. Here you can modify or color it as you wish. Save the file as an AI file and add back into your library for use in InDesign.
Adobe Comp CC

Another mobile app which is well integrated with InDesign CC is Adobe Comp CC. It can be used to create a preliminary layout (comp) which can be transferred to InDesign CC if both applications are logged into your Adobe ID. Comp CC gives you access to all your Typekit fonts and library assets while creating the comp. You can learn more about it in Erica Gamet’s articles, Adding CC Library Assets to Adobe Comp and Working With Text in Adobe Comp CC, as well as “InStep: Adobe Comp CC” by Conrad Chavez in issue #77 of InDesign Magazine.
This article was last modified on July 25, 2019
This article was first published on March 17, 2016
Commenting is easier and faster when you're logged in!

Recommended for you

Tip of the Week: Viewing Document History
Sign up for the InDesign tip of the week to get a new tip, roundups of new artic...
Speed Up Your Image Workflow With CC Libraries
Monica Murphy shows how to save a huge amount of time and effort when placing im...

Tip of the Week: Placing a CC Library Item at Specific Coordinates
How to place a CC library item or group at the same page position as the origina...