
Creating an Animated Christmas Banner in Photoshop
Learn how to make a simple banner that can display any text you like with subtle animated sparkles.

This article appears in Issue 26 of CreativePro Magazine.
Christmas is approaching, and it’s time to start thinking about livening up your website with a festive banner. Here’s a way to make a simple, lightweight banner that can display any text you like – complete with subtle animated sparkles.
Step 1: Set your text
The text here uses two fonts: Fortuna Dot for “Merry”, which you can download here, and Dancing Script Bold for “Christmas”, which you can download here. Set the first word in white, and the second in a warm yellow. 
Step 2: Add an outer glow
Select the first word. Choose Layer > Layer Style > Outer Glow, and add a glow of around 10px (depending on the size of your text). Click the swatch next to the radio button at the top to choose a similar warm yellow. 

Step 3: Add an inner glow
Select the second word layer, and choose Layer > Layer Style > Inner Glow. Set the color of the glow to white and the Source to Center, and increase the Size until you can see some of the original orange color showing at the edges of the lettering. I used a 5px glow size, but the size you choose will depend on the size of the text you’re using. 

Step 4: Add a red outer glow
While still in the Layer Style dialog for the second text layer, click the Outer Glow checkbox and move to that section. Rather than orange, choose a
strong red for the color, which will give the text the warmth of a glowing fire. Choose a Size that makes the word pop out. 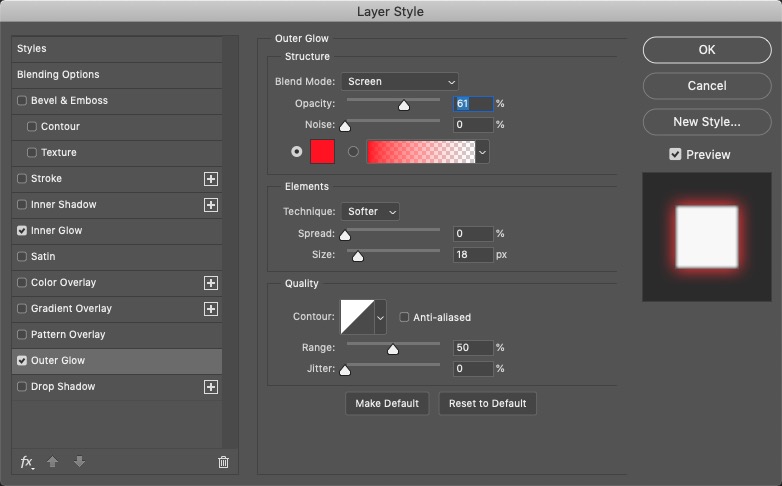

Step 5: Add some sparkles
You can bring the design to life by adding some animated sparkles. Here’s a simple sparkle you can download and use:  Drag the sparkle into your document and use Free Transform to shrink it to a small size. Change the mode of the layer to Screen, so all the black disappears. Make a couple of copies, rotate them so they’re not all at the same angle, and place them around your lettering.
Step 6: Animate the sparkles
Choose Window > Timeline, and in the timeline panel click the button marked Create Frame Animation. If the button says Create Video Timeline instead, click the arrow next to it to choose Frame Animation. Set the opacity of all the sparkle layers to 0 (shortcut: type 00 when the layer is selected). Make sure the speed (beneath the frame) is set to 0 sec. Then click the Duplicate icon at the bottom of the panel – the one to the left of the Trash icon, marked with a yellow ring below – and set the opacity of the first sparkle to 100% (shortcut: type 0 when the layer is selected). Your Timeline panel should now look like this: 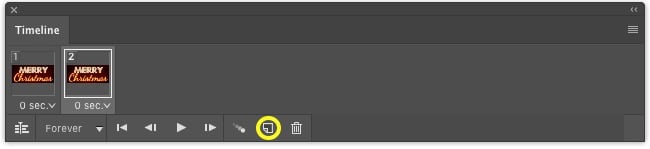 And your document should look like this:
Step 7: Tween the animation
To make the sparkle gradually fade into view, select both frames in the Timeline, and click the Tween button at the bottom of the Timeline panel – it’s the one to the left of the Duplicate icon. In the dialog that appears, add five frames between the existing ones:  When you’ve done this, your Timeline panel will now contain seven frames, like this:
  If you click the Play button in the Timeline panel, you’ll see the sparkle gradually fading into view.
Step 8: Fade out the sparkle
With the final frame selected, click the Duplicate button to make an eighth frame. Set the opacity of the first sparkle to 0, and the opacity of the second to 100%: 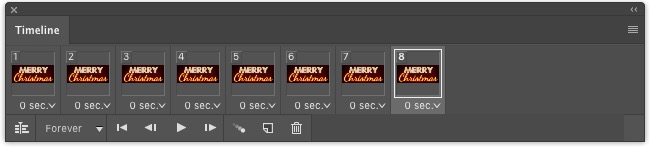 Now select the last two frames, and use the Tween dialog again to add five frames between them. Your timeline should look like this:
  When you press the Play button, you’ll see that the first sparkle fades into view; then, as it fades out, the second one will fade in at the same time.
Step 9: Repeat the procedure
Repeat step 8, adding a new frame and setting the opacity of the second sparkle to 0, and the opacity of the third to 100%. Tween between the last two frames as before. Finally, duplicate the last frame and set the opacity of the third sparkle to 0, then Tween between the last two frames to make the sparkle fade out. 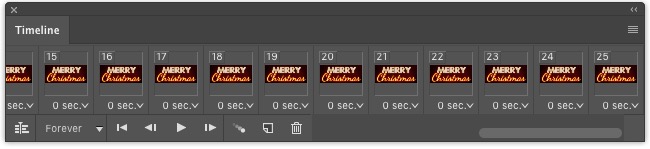
Step 10: Add a touch of red
To make the background less stark, paint the centre of it in red with a large soft brush, set to a low opacity. Your animation is now finished: use File > Save for Web to save it as an animated GIF, set to repeat forever. 
Commenting is easier and faster when you're logged in!

Recommended for you

Adobe Unleashes Creative Cloud 2015
This week (June 15) Adobe unleashed the latest version of Creative Cloud: Adobe...

How to Remove Multiple Objects from Street Photos in Photoshop
This amazing tip for removing objects from busy photos won the Three Minute Max...

How to Mask Hair Using Today’s Techniques in Photoshop
Using Photoshop features like Generative Fill and Select and Mask makes the job...