
Create Text Highlighting with a Custom Edge
Use this simple trick to create customizable highlighting to fit any piece of text.

A few days ago one of our customers, who publishes documents in 30-40 different languages, contacted me about a problem they were having with their product catalog. Within these documents they use a label where the text is highlighted (like the one you see in the image below) to indicate new products. The word “New” when translated into other languages might take up more space (in Italian, for example, “New” is “Nuovo”). Consequently, any time this customer downloaded a document in a new language from Redokun, they had to manually modify these labels to make them fit the new language. 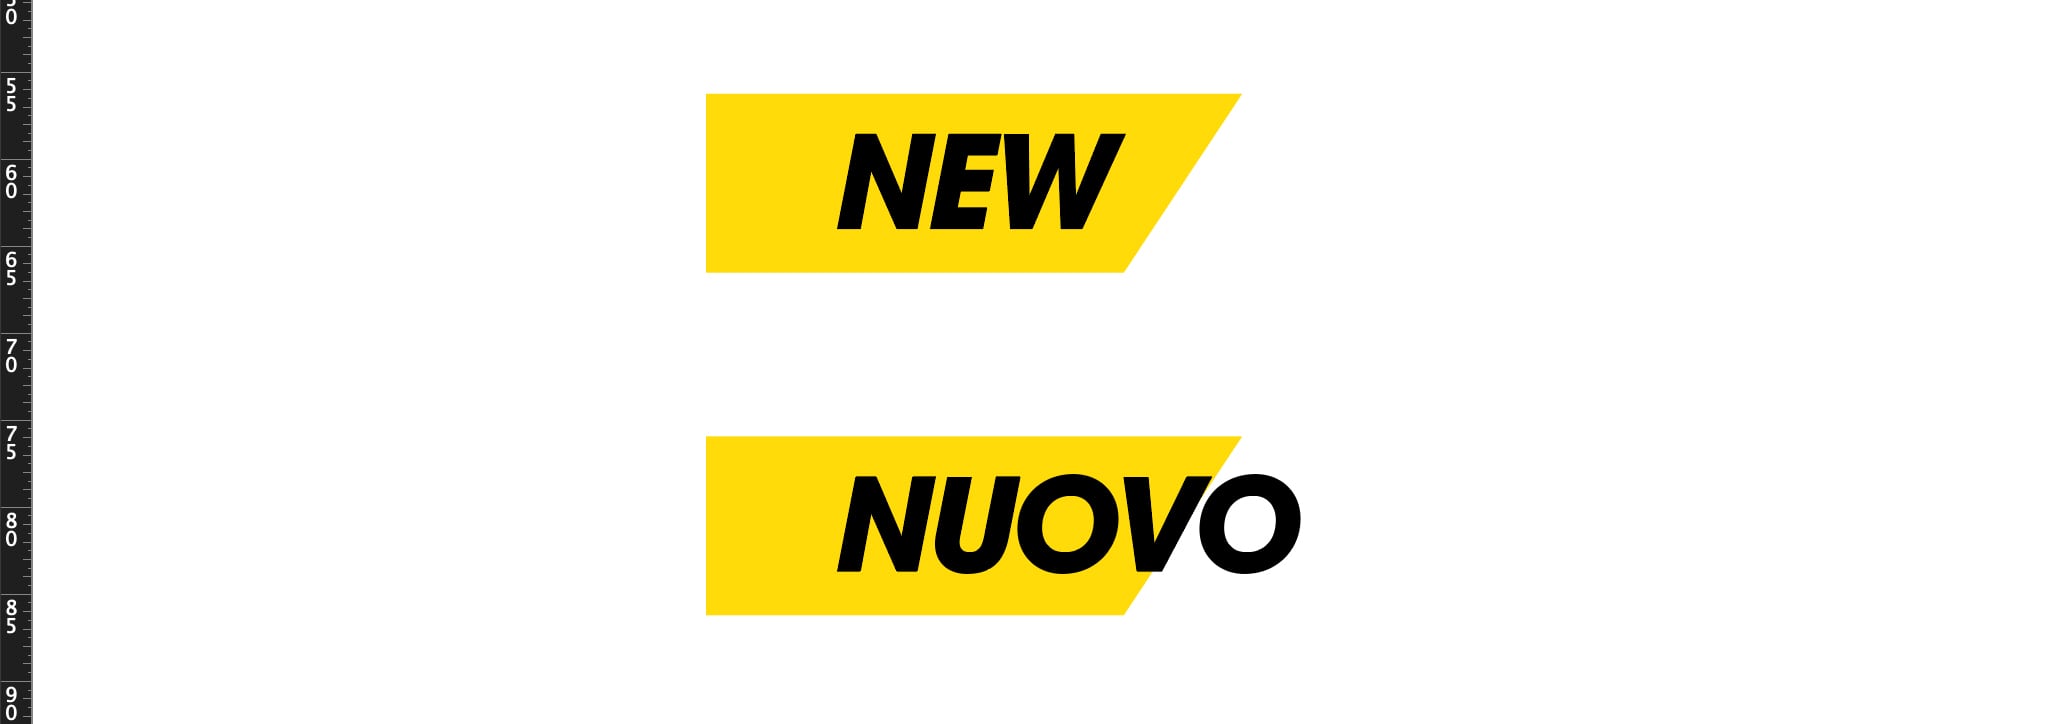 Imagine having to make this change in 30, 40 or 50 products for 30-40 languages. That is the type of job you don’t want to be doing in InDesign.
The final result
They wanted to automate this task. Every time the text changed, the highlight had to adapt. 
First test
InDesign is an amazing piece of software. Every shape you place in a document can be converted into a text frame. So, I tried to:
- Create a highlight shape;
- Transform the shape into a text frame by clicking on it with the “Type tool”;
- Activate the text-frame’s Auto-Sizing option so that the frame could automatically enlarge and adapt to its content (more on this later).
Unfortunately, the result was not the best.  With this method, when the text changed, the label adapted in width. But with this solution, I was facing the issue that is shown in the image above. The right side of the label didn’t stay consistent when the text frame width changed.
The solution
I had to come up
with a new solution. And luckily, this proved successful. So here is how I solved the issue, and how you can re-create the same label:
- Create two shapes (a rectangle and a triangle).
- Transform the rectangle to an auto-sizing text frame.
- Anchor the triangle to the rectangle.
Easy right?! Let’s see the process step-by-step.
Create two shapes (a rectangle and a triangle)
- The first step is to split up the more complex shape into two different objects.
This will allow you to make sure the text frame adapts its width automatically and at the same time, the corner will maintain the correct shape. 
Transform the rectangle to an auto-sizing text frame
Now we have to transform the rectangle into a text frame and then set it up so it adapts its width automatically when the text changes.
- Select the Type tool and click on the rectangle. This will transform your rectangle into a text frame.
At this point, I’d suggest you place some text inside and to apply the correct formatting to the text. In my case, I want it to look like this. 
- Right-click on the rectangle and select Text Frame Options.
- Click on Auto-Size on the top of the pop-up.
- Change Auto-Sizing to Width Only.

Anchor the triangle to the rectangle
The last step is to anchor the triangle to the text frame and make sure that it moves every time the text frame changes its width.
- Select the triangle.
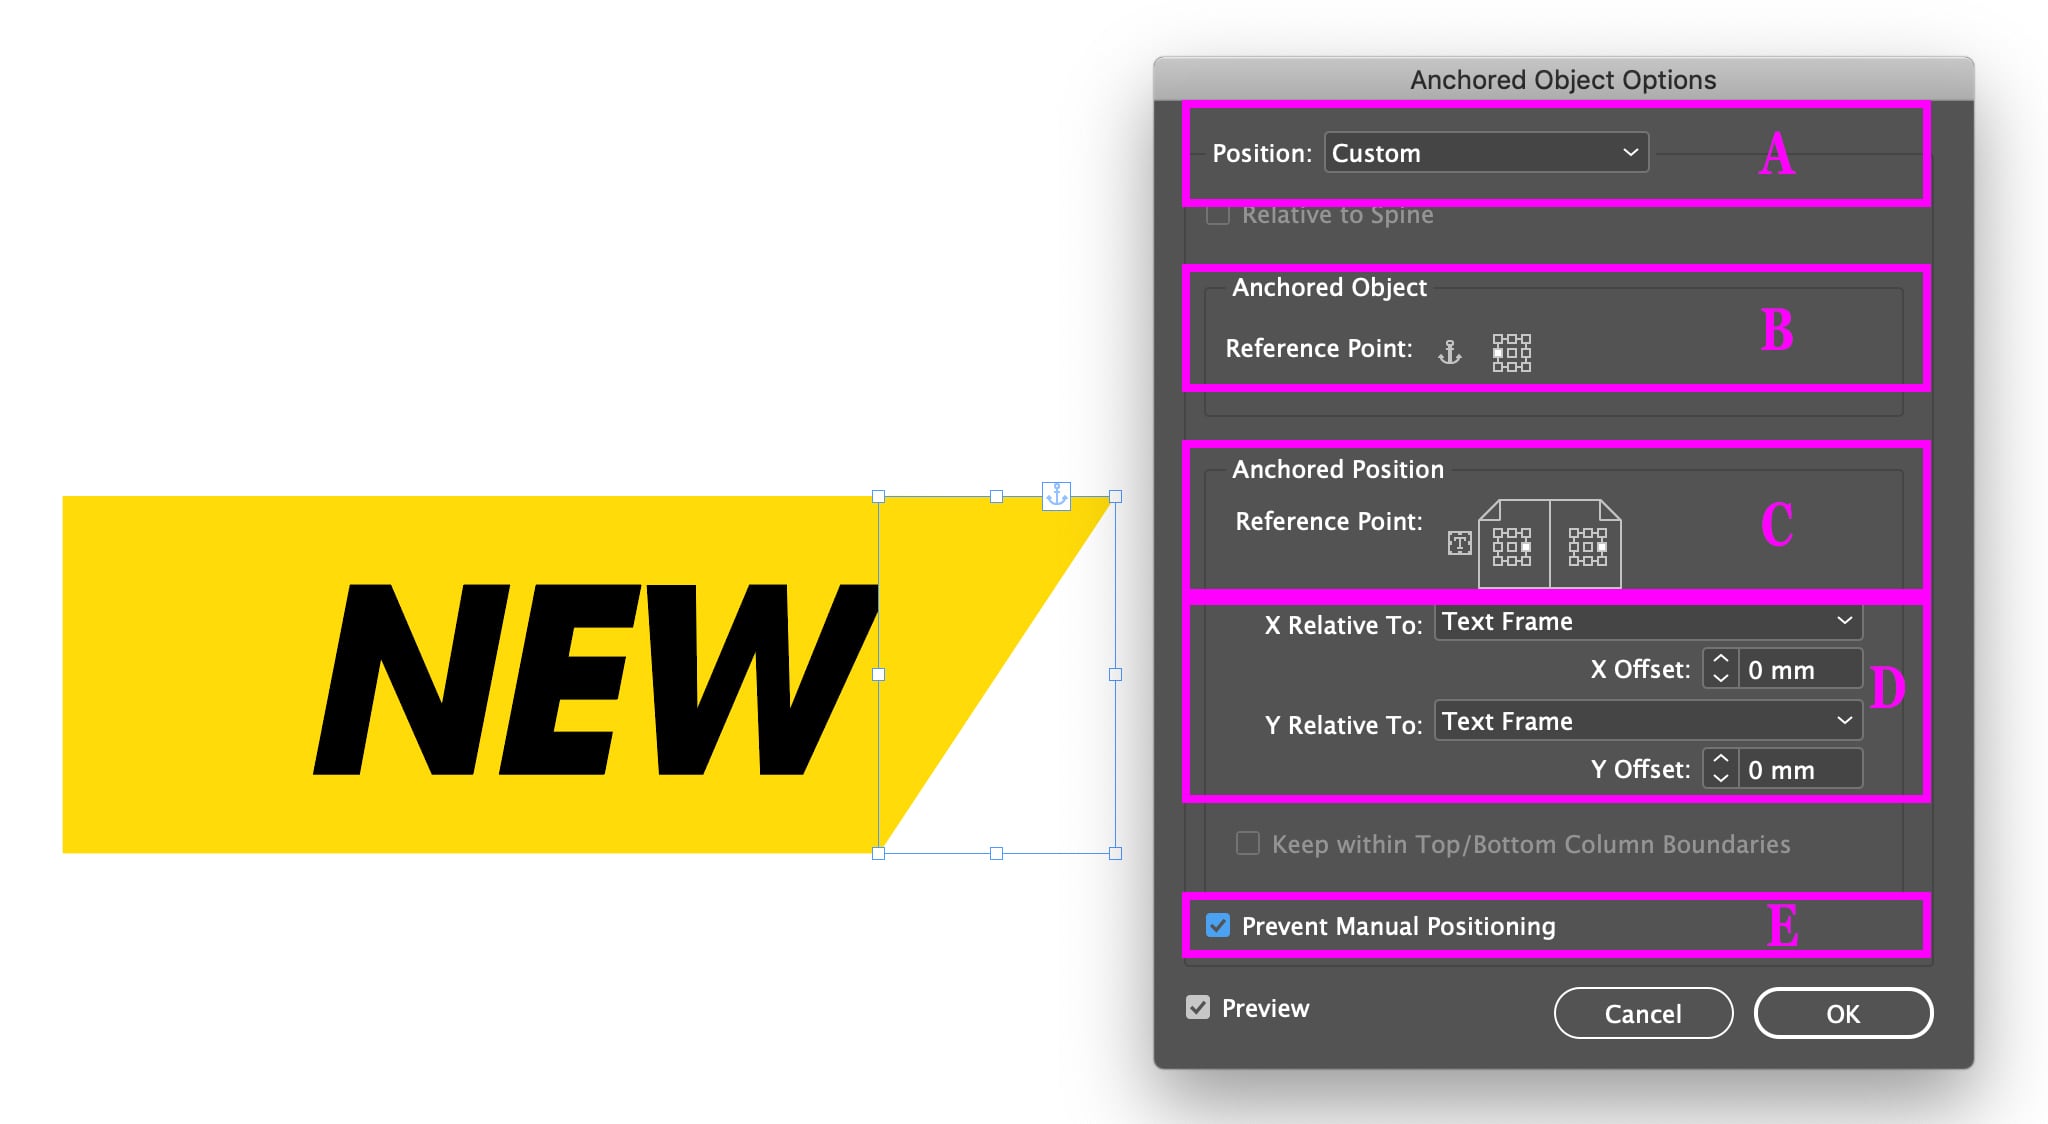
- At the top, you can see a little blue square. Press the Option/Alt key and click on the little square, now drag the square into the text frame. As soon as the mouse pointer meets the frame, you’ll see a black line that will follow your movements. That black line indicates where you are placing the anchor. Make sure to place it after the text.
 When you release, InDesign opens a new pop-up. This pop-up allows you to adjust how the anchored object (the triangle) should behave when the text frame changes size or position.
- Let’s change the options. (A) Set Position to Custom. (B) In Anchored Object change the Reference point so that InDesign will use the left-center point of the triangle. (C) In Anchored Position change the Reference point so that InDesign will use the right-center point of the rectangle to position the triangle. (D) Change both the options for X and Y to Text Frame and 0 mm, in this way, the triangle will be attached to the text frame. (E) Finally, activate Prevent Manual Positioning to make sure nobody can manually change the position of the triangle.
 If you look closely at the image above, you’ll notice that the triangle is cutting away a bit of my text. To change this, we have to add some space on the right side of the text frame. You can do this by changing the Right Indent, in my case, I’ll add 1 mm.
Conclusion
InDesign is an amazing tool, full of functionalities that can help you simplify and automate most of your daily tasks. As you probably noticed from the example in this post, discovering all the features and learning how to use them correctly might save you a huge amount of time. Nowadays, there are a lot of great, cheap (below US$100) options for learning InDesign. Here is a list of my favorite InDesign courses that you can use right away to improve your skills!
Commenting is easier and faster when you're logged in!

Recommended for you

InDesign Tip: Anchoring Graphics Between Paragraphs
To add a graphic separator between paragraphs, anchor the graphic as the first c...

InDesign How-to: Anchor Corners to a Frame
See how to anchor graphics to a frame's corners so they stay in place, even as t...

Variable Fonts in InDesign
A concise Q&A guide to navigating InDesign 2020’s newest tool for type.