

If the landscape photos you’re working with aren’t quite what you need, supplement nature with Adobe Photoshop. You can combine elements from two different photos and create a new image that’s perfectly suited for your particular project.
In this tutorial, you’ll learn how to combine the middle ground and foreground of one picture (number 1 in the animation below) with the background of another. You’ll then further refine the composited image by adding a slight reflection to the foreground water so that it’s in step with the image’s new composited sky (number 2 in the animation below).
Step 1
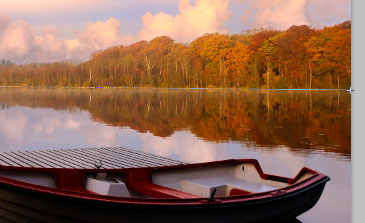
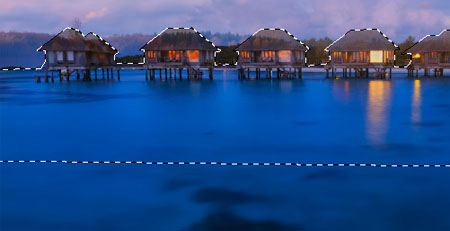
First, open a landscape photo with a dramatic sky. I chose “Autumn morning sunshine,” a photo that was featured as a free download from iStockphoto.

Copyright iStockphoto/David Wiberg
Step 2
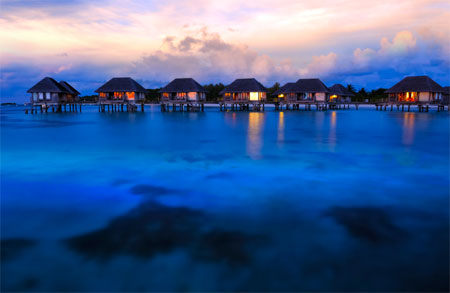
Next, open a landscape photo with a different lighting level in the sky. I chose “Maldivian water bungalows at dusk,” another recent weekly free photo from iStockphoto.
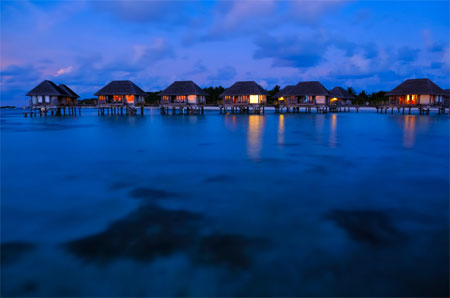
Copyright iStockphoto/Salawin Chanthapan
Step 3
Before you layer one photo on top of the other, you need to be sure their horizons align. Instead of manual trial and error, let Photoshop’s Ruler tool, which can automatically determine the correct angle a photo needs to rotate for a perfectly aligned horizon.
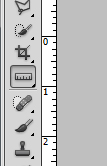
In Photoshop CS5, click-and-hold the Eyedropper tool to access the Ruler tool. In previous versions, the Ruler tool may be in a different toolset; just click-and-hold a few tools to find it.
Step 4
In the first photo, click-and-drag with the Ruler tool along the horizon. It’s okay if it’s not level; in fact, if the horizon is not level, neither should this line be.
Step 5
Go to Image > Image Rotation > Arbitrary. Notice that the angle necessary to straighten the line made with the Ruler tool is already entered. For my example, it’s .57 degree counterclockwise. Click OK to rotate it.
You may notice that the background color is visible around the edges after the rotation. If that’s the case in your image, use the Crop tool to remove the background color.

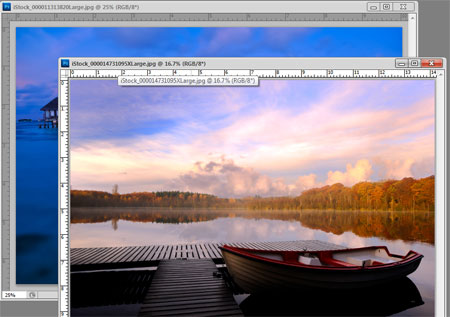
Step 6
Both photos should still be open. If they appear as two tabs in one window, separate them into two windows. You can either go to Window > Arrange > Float All in Windows, or click-and-drag the tab of one of the photos.
Step 7
Select the Move tool (V) and click-and-drag the photo with the brighter sky on top of the other photo. Another way to do this is to select the brighter sky photo with the Marquee Selection tool and copy and paste it onto the other photo. This will result in two layers: the Background layer, which is the original photo, and the new moved layer, which is now Layer 1.

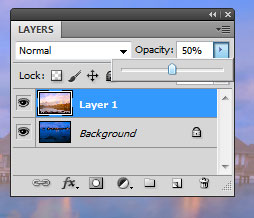
Step 8
You need to be able to see both layers while you’re compositing, so go to the Layers panel and lower the Opacity of Layer 1 (the top layer) to 50%.
Step 9
Depending on the photos you’re working with, you may want to resize the top image. In my example, the top layer is a little too large. To resize, first go to the Options bar and check Show Transform Controls, then select the Move tool and click-and-drag a corner of the selected layer image to resize it. You can also use the Move tool to reposition the top layer so that the horizons are aligned.

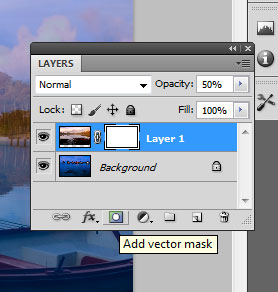
Step 10
To hide parts of the layer, you need to add a layer mask to the top layer. (Masking is better than erasing because it doesn’t permanently remove any pixels). Click the Add Layer Mask icon on the bottom of the Layers panel.
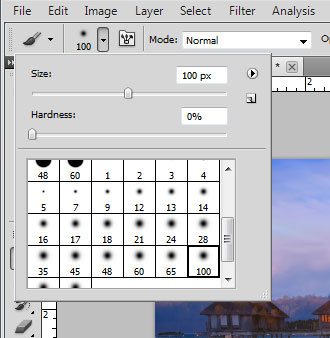
Step 11
Click the Brush tool in the toolbar and select a soft-edged brush.
Step 12
Making sure that you’ve selected the mask on Layer 1—not the actual pixels of the layer—paint the areas below the horizon and some of the edges black. Stay a bit away from the horizon for now. Note: You can press left and right bracket to adjust the size of the mask brush while you brush, and click the Eye icon on the Layers panel next to Layer 1 to toggle the opacity of the layer to occasionally see through to the Background layer. As seen in this example, I’ve masked out the foreground but left some of the background unmasked for now.

Step 13
With one of Photoshop’s selection tools, select an area from the Background layer with definitive edges that you don’t want masked out. For example, I used the Polygonal Lasso tool to select the beach huts, since I want those huts to appear in the final composited image.
Step 14
Select the Brush tool and paint black on the mask of Layer 1 again. This time only the area selected will be affected, giving you a definitive edge.

Step 15
Next, bring the Opacity of Layer 1 back up to 100% and mask out any other areas that need to be removed for a composite that looks realistic. For instance, I masked out trees that don’t look as tropical as the middle ground and foreground. Note: Be sure to go to Select > Deselect if you want to affect pixels outside of the selection.
You have now created a new image by compositing the brighter sky from one photo with the foreground and middle ground of another.

Step 16
There’s one more step when your composite includes water, as my example does: The foreground water should have a slight reflection of the sky.
With Layer 1 selected in the Layers panel, press Cmd-J (PC: Ctrl-J) to duplicate the layer. After making sure Show Transform Controls is selected on the top Options panel, click-and-drag the top border of the newly duplicated layer and drag it down to the bottom of the photo. This will create a reflected image.
If the border edges are too drastic, simply mask out the edges with a soft brush. Experiment with the new layer’s layer blending modes. I set the Layer Blending Mode to Overlay and the Opacity to 80%, but your composite may require different settings.
This article was last modified on January 6, 2023
This article was first published on June 30, 2011
Commenting is easier and faster when you're logged in!

Recommended for you

CreativePro Tip of the Week: Using the Navigator panel in Photoshop
This CreativePro Tip of the Week for Using the Navigator panel in Photoshop was...

3D Printing With Photoshop CC
Adobe has been building increasingly sophisticated 3D modeling tools into Photos...
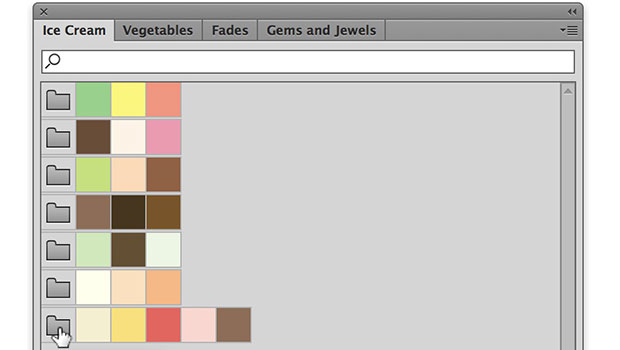
Working with Illustrator’s Color Libraries
Illustrator has more options for adding colors to a document than just mixing co...