

This InDesign tip on Applying Seamless Shading to Consecutive Paragraphs was sent to Tip of the Week email subscribers on March 29, 2018.

Sign up now and every week you’ll get a new tip, keyboard shortcut, and roundups of new articles, plus exclusive deals sent right to your Inbox!
Just scroll down to the bottom of this page, enter your email address, and click Go! We’ll take care of the rest. Now, on with the tip!
If you’re using InDesign CC 2015 or later, you can apply shading to paragraphs. However, depending on the font and spacing you use, you may see a gap in shading applied to consecutive paragraphs.

- Use a different font or decrease the space between paragraphs.
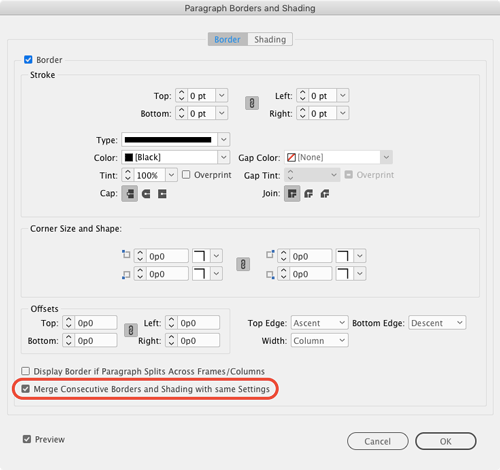
In the Paragraph Borders and Shading dialog box, do any of the following:
- Increase the Offsets values.

- Set the Top Edge of the shading to align to the Leading.

Add a border. If you don’t want the border to be visible, make its Stroke width zero. Then (and this is the key), select the option to Merge Consecutive Borders and Shading. This is a new option in InDesign CC 2018.1.
This article was last modified on July 20, 2021
This article was first published on April 3, 2018
Commenting is easier and faster when you're logged in!

Recommended for you

Tip of the Week: Fill and Stroke Shortcuts
This InDesign tip was sent to Tip of the Week email subscribers on March 14, 201...
Tip of the Week: Three Text Tips
Sign up for the InDesign tip of the week to get a new tip, roundups of new artic...
Tip of the Week: Justify Text With Last Line Aligned Right
Sign up for the InDesign tip of the week to get a new tip, roundups of new artic...