
An Adventure in Book Jacket Design
A start-to-finish romp through the process of illustrating and designing a book cover—from paper to screen to print
This article appears in Issue 1 of CreativePro Magazine.
When you’re a professional graphic artist or designer, you get used to certain questions from friends, students, and fellow artists. People want to know, “Did you do that with paint, or is it digital?” In my case, the answer is always, “Well, sort of both. It’s complicated.” Then they want to know, “What hardware or software did you use?” Again, my response is a rather cryptic: “All of them!” Although the process may not yield a simple, clean answer, it’s not an unsolvable mystery, either—just a tale of teamwork by some plucky problem-solvers, each contributing what they do best.
My favorite assignments are young adult book covers. These types of jobs give me the opportunity to illustrate the characters, create a custom typeface, and design the layout of the jacket itself. Along the way, I will travel from traditional pencil and pen on paper, to my iPad and laptop, and through several design programs, until eventually a finished product appears on the shelves.
I’ve designed dozens of book covers in this manner, for publishers big and small, authors famous and unknown (Figure 1). I like to imagine that there are young people all over the world being drawn into a world of reading, literature, imagination, and learning, thanks in part to my graphic work. That connection—real or imagined—is what makes it all worthwhile.
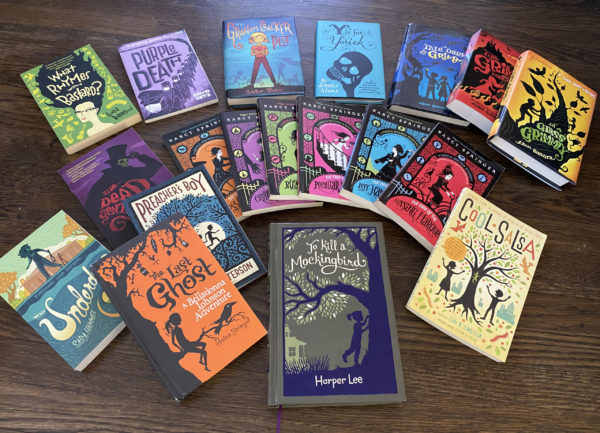
Figure 1. A selection of books Hugh has designed for various publishers over the years
For this article, I’ll walk you through my creation process for a really fun book cover I designed for The Underdogs, a middle-grades mystery published by Macmillan. I’ll discuss my sketching process briefly, but since I would imagine my audience already has their own style (or their own hired artists), we’ll quickly jump right to the fun stuff: adding color to finished linework and building that out into a full book jacket design.
Starting Out
Just as with any “get rich quick” advice—where the first step is “just get $1 million in starter cash”—I’m skipping some of the hard part by simply saying: You’ll need some nice artwork to start with. Whether you create your own art or contract with a talented artist, the choice is yours.
My own illustration technique is pretty simple: Start with sketches, find something that works, and then ink it (Figure 2). Of course, “find something that works” is harder than it may sound. Truly, the hard part for me is finding a rough image I can confidently show my client. Once the client selects a pencil sketch, I proceed to ink and digital.
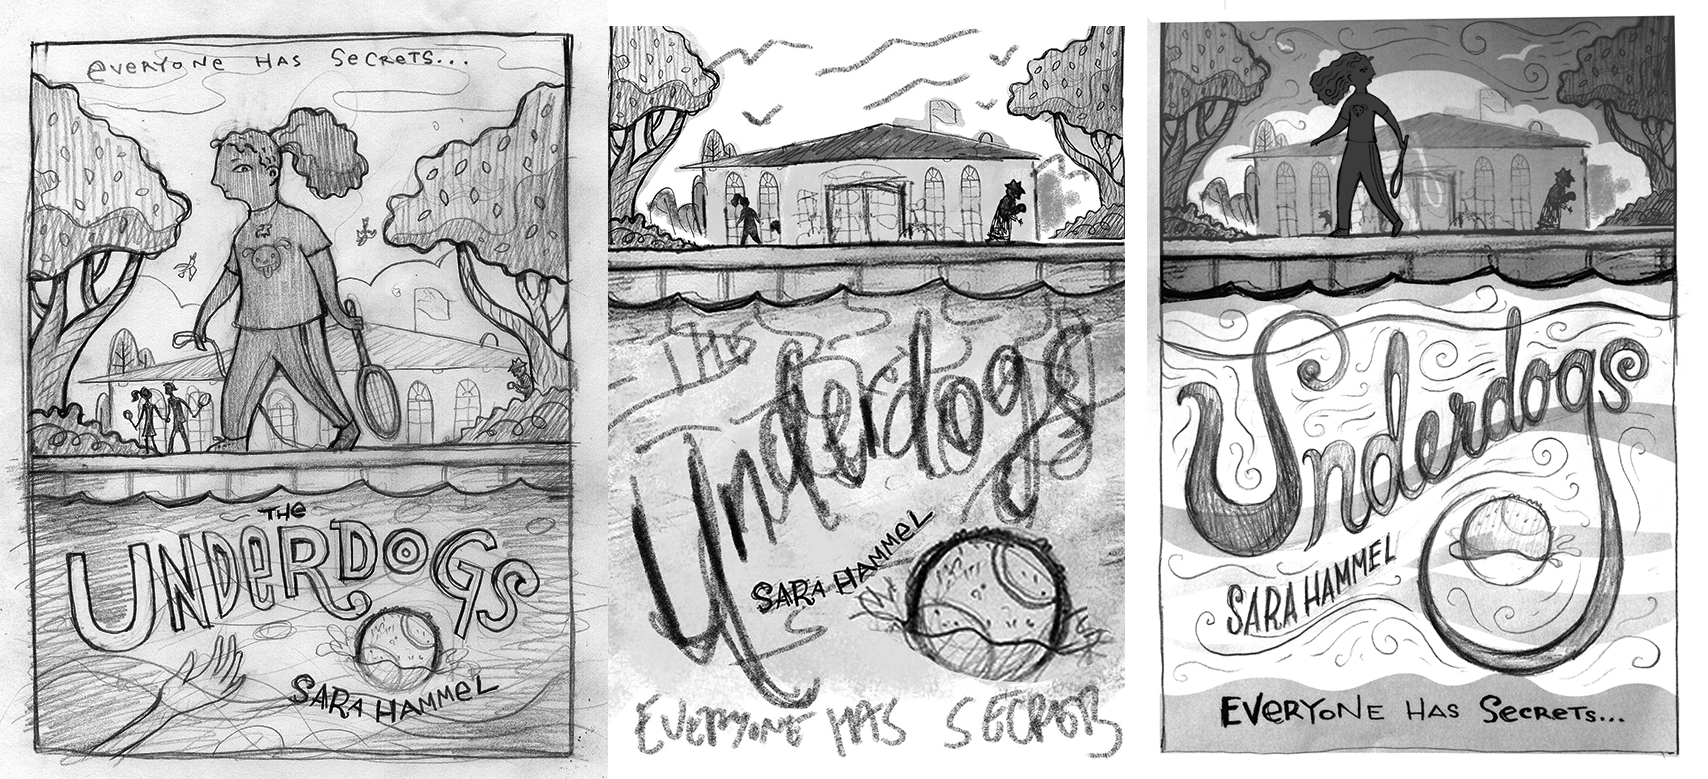
Figure 2. Pencil sketches are a great way—and the only way for me—to try out multiple ideas quickly. I start every project with dozens of them.
I know many artists love to ink their work on an iPad. Perhaps due to my advanced age, I am not one of them. I’m a holdout for the feel of pens and brushes on paper! Yes, the Apple Pencil is a thing of beauty, and it’s true that the ink brushes in programs like Procreate on the iPad are near-perfect analogues to the real thing. But for me, the fact that the iPad allows me to undo every mistake makes for a maddening experience; I draw the same line, over and over, and it never seems right.
So, I start with a line drawing on paper, where mistakes are part of the process, and scan that into Photoshop (Figure 3). Which raises the question: What resolution is best? All you professionals know that 300 dpi is the industry standard, but I advocate for much higher resolution for this type of work. There are several reasons: First, you can afford those extra pixels; even a mediocre laptop these days can handle large files. Second, you want the flexibility to scale some details up slightly if necessary, and extra pixels will allow you to do so without too much degradation. And third, you never know when your client is going to ask you for a giant, poster-size version of your work for use in a billboard campaign, right?
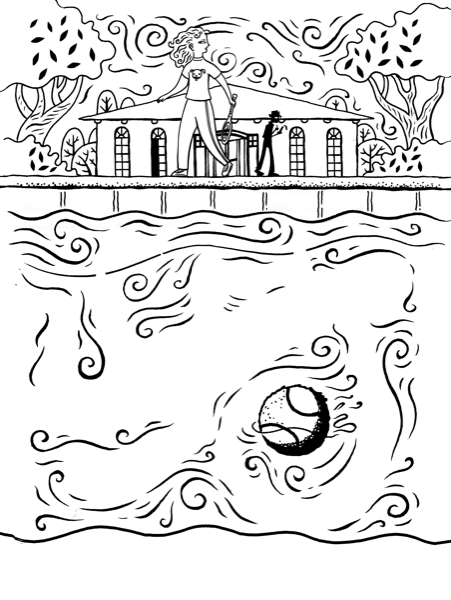
Figure 3. A pen-and-ink drawing makes a nice starting point. Color easily can be added digitally.
Some illustrators swear by super-high resolution—1600 ppi or higher—which they turn into a bitmap image, thereby removing all gray pixels and reducing the art to either black or white. When the color mode is changed to RGB, the original artwork remains in this simple, binary mode, and some artists really like this simplicity for ease of use.
But personally, I like the smoothness that antialiasing and gray edge pixels bring to the art. So, I’d propose starting with a grayscale image, between 600 and 800 ppi for a project like this. With your up-to-date hardware, you’ll never even notice the extra file size.
Of course, as any digital artist learns right away, the scanner often picks up a lot of unwanted dirt from the image or the scanner bed, and your bright white paper never reads as true white. So, you have to use your Photoshop 101 techniques (think: Levels and/or Curve adjustments) to up the contrast and get your image to the right level of cleanliness. I try to do this in such a way that I still have some nice antialiasing along the edges; as I mentioned, it helps create a smooth line (Figure 4).

Figure 4. When you zoom in, you can see how the gray pixels along the edges of the lines (antialiasing) help create a smooth look from a distance. Later in the article, you’ll learn how to keep these pixels even when making extensive changes to the image.
Adding Color
With a clean scan in hand (whites are true white, blacks are true black), it was a relatively simple process to add flat color. First, I converted the grayscale image to RGB. I double-clicked the background to make it a movable layer and renamed that layer Black Lines. Next, I made a layer called Color above that, and set the blending mode to Multiply, so that the color on that layer cleanly overlaid the black lines beneath (Figure 5).

Figure 5. The blending mode for the Color layer is set to Multiply. This makes the black lines visible beneath it.
I usually start with a set of colors I like. In this case, I found some retro artwork with a color palette I admired and sampled it (some might say “shamelessly stole”) for inspiration. I added several colors to my color swatches for reuse based on this inspiration (Figure 6).
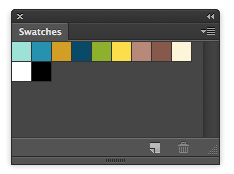
Figure 6. A set of limited colors was used for the art, each saved as a unique swatch for future use.
For this artwork, most of the areas I wanted to color were closed shapes. I selected the Black Lines layer, used the Magic Wand to select an area, then jumped back to the Color layer to fill that selection with flat color. Sometimes, I make a duplicate of the Black Lines layer, which I might call Black Lines TEMP, and I might edit this layer with some simple lines to close any open shapes, making those areas selectable with the Magic Wand. But you have to remember to dump that TEMP layer when the time comes!
Figure 7 shows how my artwork looked at this stage. Maybe it was starting to look something like final artwork? (Pro Tip: Do not show your client the artwork yet, unless you want to get fired.)
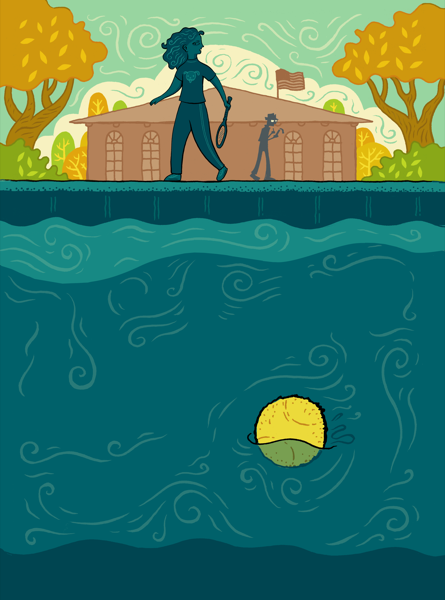
Figure 7. The cover art so far. It’s got final color applied but is missing many of the elements that will tie it all together.
Employing the “Delete White” Trick
Next, I employed a more advanced trick for colorizing black-and-white line art. I call it “delete white,” and as the name implies, it involves the removal of all those white pixels. The advantage of this technique should become clear as we go.
To start, I hid the Color layer in the Layers panel, so that only the black lines were visible. Then, I went to the Channels panel, where I loaded the gray channel by Command/Ctrl-clicking it (you could also click the Load Channel As Selection button at the bottom of the panel).
The screen came alive with marching ants, as the white areas were active and selected. Next, I pressed Delete/Backspace and then Command/Ctrl+D to drop the selection. The white areas were replaced by that pale gray transparency grid.
Note: At this point, not only were the white pixels transparent, but the formerly gray pixels were now semi-transparent, while any true black pixels remained opaque. This is why loading the channel is far superior to alternative methods, such as using the Magic Wand, to select white pixels. You want those edge gray pixels to remain and to be semi-transparent.
To get a feel for why this simple technique is so awesome, try locking transparency by clicking that little transparency lock button at the top of the Layers panel. Now, the transparent pixels cannot be edited. So, if you grab a large brush, load it up with a color of your choice, you can paint freely over an area, changing those black lines to blue or green or red (Figure 8). And those semi-transparent edge pixels will change as well! You can also use that Option+Delete/Alt+Backspace command I mentioned earlier to change all the opaque and semi-transparent pixels at once. This is a great method for colorizing your lines. It really enhances an image, allowing some lines to recede and some to come forward, some lines to read as shadows, others as highlights.

Figure 8. The white pixels on the Black Lines layer have been deleted, and transparency is locked in the Layers panel, so you can paint with color on the lines with any type of brush you please.
Drawing Type in Illustrator
One of my great joys in life is drawing type. I’ve done it since I was a child when I copied my Star Wars poster over and over. Now that I’m adult, I try to convince all my clients to let me indulge this childhood habit for their projects. This has an added advantage: Because I create the type, the entire cover remains under my control. I generally am not disappointed by design decisions made by someone else when I see the final product.
When people ask me how to draw type in Illustrator, I often say, “Just go with the flow. Don’t fight it, man.” This may sound like a poor impersonation of your favorite spiritual guru, but in fact it is literally technical advice. Let me explain.
I usually start with a loose pencil sketch, which I place on a layer and lock, so that I can trace over the top using Illustrator’s Pen tool (Figure 9). If you’re familiar with drawing with the Pen tool, you know that you don’t click and drag to create a line, as you might with a brush tool. Instead, with this tool each click generates a point, and each drag generates a handle connected to that point. The length and angle of that handle will determine the direction of line when you create the next point along the path.

Figure 9. The sketch was placed in Illustrator, Opacity reduced to 10 or 20 percent, and then the type was traced using the Pen tool.
If that sounds like a backwards way of drawing, well—yes, it is. And it takes a lot of time and patience to, if you’ll pardon the pun, get a handle on it. But once you master it, the Pen tool produces accuracy and delicacy you can’t achieve any other way.
But back to that notion of “going with the flow.” I find it is best to draw as few points as possible, each with a long handle, and to add those points at roughly the mid-point of a curve. So, in tracing out a large letter U, I want to add points along those sloping edges, less so on the peaks of the different curves (Figure 10).

Figure 10. The areas where points should be placed are indicated with a dot. In the version on the right, you can see where the actual vector points ended up.
Making a Sharp Point
When drawing with a freehand tool, such as the Paintbrush tool in Illustrator, it’s intuitively easy to make a sharp turn. You just move your cursor in a sharp cut. But to do this with the Pen tool is a bit less intuitive. You can do it by drawing a line and clicking a second time on the most recent point you have made. This will leave the first section of the line intact but ensure that your next line segment can jump off in any direction (Figure 11).

Figure 11. A vector corner point
In teaching the Pen tool to students, I often find that for some reason, their instinct is to drag the handles at a roughly perpendicular angle to the direction of their line. This is exactly wrong! Try this instead: Drag your handles out in the same direction of the flow of your line, moving with it, not against it. Go with the flow! Don’t fight it!
One element you’ll find when you work with letterforms in vector art is a compound path. A letter such as an O is actually comprised of two vector shapes: one big circle shape and one smaller circle punched out of it, like the hole in a donut. To draw type forms, then, you need to know how to make this sort of compound path, which allows the background to show through the donut hole.
Perhaps the easiest (but not the only) way to do this is to use the Pathfinder panel. If you draw both shapes, with the smaller, inside shape on top, you can select them both, then open that Pathfinder panel and choose the option labeled Minus Front (Figure 12). Voilà! You have your donut in one vector shape, and your art visible through its hole.
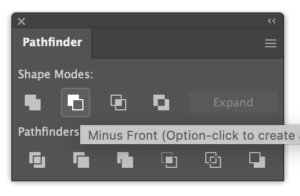
Figure 12. The Pathfinder’s Minus Front shape mode
Placing Illustrator Artwork into Photoshop
With the type finished, I headed back to Photoshop to place my book title, author name, and tag line as vector in my Photoshop file. As an early adopter of the Adobe Creative Suite, I can still recall how painful it was at one time to combine vector art and pixel art, so for me it’s always a thrill to find this process to be so easy nowadays!
When cutting and pasting art from Illustrator to a Photoshop file, Photoshop asks you whether you want the art to be interpreted as a Smart Object, Pixels, a Path, or a Shape Layer. Each one has its purpose, but for my money, Smart Object is the hands-down winner. I use a smartphone, I have a smart cat—so naturally I want a Smart Object as well!
Seriously, though, the advantage of this mode of pasting is that the artwork remains on a layer that can still be edited by its original, vector drawing program. Just double-click the layer in Photoshop, and up comes Illustrator, eager to serve. This editing technique can make last-minute changes much less stressful. Late in the process for this cover, for example, the client asked me to add a stroke to the title text. A double-click in Photoshop, a quick addition in Illustrator, and I was done.
At the same time, should you need the artwork to be interpreted as pixels, that option exists too. I wanted both the word the in the title and the author’s name to appear semi-submerged in the water of the pool, and doing that with pixels would be easier and faster. So, I copied and hid those Smart Object layers, chose Layer > Rasterize > Smart Object to access those pixels, and then used the Lasso tool to select the top half of each word. With that selection active, I chose Layer > New > Via Cut to place half of each word on its own layer. I then reduced the opacity of the bottom half of each word, just enough so that it appeared submerged. Note: I didn’t toss those Smart Objects! They were just hidden at this point.
Building Out the Full Cover
One of the reasons I decided early on to become an artist was that I mistakenly believed that a creative career would insulate me from the need to know or practice mathematics. Imagine my surprise when I realized that numeric calculations are key to every successful creative exercise! My youthful hopes were dashed.
On the other hand, I now have computers to do most of the heavy lifting, and if I make a mistake in my calculations, I can always use my Photoshop skills to add an extra quarter inch here or there.
In the case of this book cover, the client had informed me at the start that the final front cover would be 5.75 × 8.5, or a 2:3 ratio, which is one of the standard hardcover book jacket dimensions. So, I created my artwork for the front cover at this ratio, with plenty of extra bleed, just in case.
I also knew that the jacket would include a back cover, a spine, and side flaps, and I planned to create these by duplicating elements of the front cover, with edits to allow for text and other info. However, these specifications came to me late in the process, and I had to incorporate them after the final front cover was mostly completed.
The client had helpfully supplied a “mechanical” PDF, specifying all the crop and bleed marks. So, my solution was to paste that mechanical into my Photoshop document, thus avoiding any onerous mathematical calculations. Of course, I had to re-crop the image, dragging the edges of the crop far out to the left and right, in order to accommodate this extra space. I scaled the mechanical a bit (making sure to do so proportionally!), so that it cropped the front cover in the preferred manner.
Next, I took all my existing artwork layers and gathered them into a single group (Command/Ctrl+G). Then I copied that group several times—once for the back cover, once for the spine, once for the back flap, and once for the front flap. I shifted the positions of those groups, masked the groups as necessary, and then made the required edits. I also added some extra figures, created space for type, and made some other slight changes, such as making the transitions appear seamless (Figure 13).

Figure 13. The artwork for the front cover was organized into a layer group, and that art was duplicated and edited to create the spine, back cover, and front and back flaps. A mechanical guide provided by the client supplied the precise measurements for each section.
Bringing the Cover into Procreate
Doesn’t this all sound easy? In reality, the project was rather tricky, with lots of places where my best-laid plans seemed to have failed to yield the desired results. In many places, my wobbly lines were not lining up, some of the spaces I opened up for type looked too plain, and I had some areas that needed help—lots of help!
At this point, I wished I could draw directly over my digital art. If only I had a tool, some sort of incredible digital device, that would enable me to ditch the mouse, ditch the Wacom tablet, and just draw with a pen, directly onto the color artwork. It would make my life so much easier!
Happily, I did have such a tool. And you might, too. It’s called an iPad, and while I prefer to do the heavy lifting on my desktop computer, I find the iPad and Apple Pencil are indispensable for making edits and finishing up artwork.
I saved my PSD with layers as a backup file I could easily tweak if necessary, and then saved a flattened copy and transferred that new file over to my iPad. There are many drawing programs for iPad, and truth be told, they each have their advantages and areas of specialization. I feel most comfortable in Procreate, where the brushes behave almost like real brushes, and where many of the behaviors are familiar to Photoshop natives.
Procreate has a brush called Dry Ink that I enjoy working with. It’s beautifully responsive and creates a smooth line, but it also has a bit of added texture that roughens the edges of the lines and keeps my digital art from becoming too clean, or too slick.
I used the Dry Ink brush to clean up the points of transition in the cover art, as well as to add extra leaves in the top section and extra swirls in the pool section. I made my last edits, and then brought the file back to my desktop computer for final output.
Adding Spot Varnish Vectors
Many book covers these days use spot varnish to add some interest to a design. Most often, that means a matte varnish for some areas, and a gloss varnish for others—it makes select areas appear shinier, and as the hand slides over the cover, the contrast between the different surfaces creates an enhanced tactile experience.
For this book, the printer required the final output to be a PDF exported from InDesign. So, I placed my final artwork into an InDesign document that used the same specs as the PDF mechanical (same overall dimensions and same bleed). I was almost ready to hand this off to the client, whose in-house design department would add text for things like the plot summary and author’s bio on the inner flaps, place the barcode, and create the final output. But first, I needed to set up the gloss varnish, which would be applied to the title text, the author’s name, and the tennis ball that appears in the foreground.
The printer had requested that the spot varnish be created from vector art. I had created the type in Illustrator and had not edited the shapes in Photoshop, so those vector lines really came in handy. I was able to place that Illustrator file into a new layer in InDesign, and specify that for the type spot varnish.
The tennis ball was a bit more work. I had to return to my Photoshop file, select all the pixels for that shape, and I then turned those into vectors. To do that, I opened the Paths panel, clicked the Make Work Path From Selection button, saved that path as Path 1. Then, from the File menu, I chose File > Export > Paths to Illustrator. This created a new vector file in the shape of the tennis ball, which I placed in InDesign and nudged into position (Figure 14). And that was it—I delivered the packaged PDF to the client and moved on to my next project.
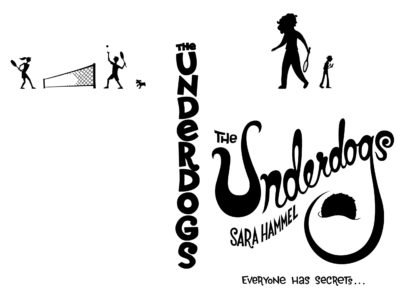
Figure 14. The spot varnish was provided as vector art, in a layer placed in InDesign. Areas that appear black were printed in gloss varnish, and everything else was printed in a velvet matte varnish.
For more on working with varnishes and other special printing processes, check out this post by David Blatner as well as Claudia McCue’s article Beyond CMYK in Issue #137 of InDesign Magazine.
The Payoff
I got my check from the publisher a few weeks later, and truth be told, I forgot all about this job for a while after that. It had turned into a much larger job than anticipated, as many jobs do, and perhaps I simply wished to put this period of stress and difficulty in the back of my mind. Let it go and move on—that’s what graphic artists do!
But a few months later I got a box in the mail from an unrecognized address. I opened it up, and inside were several copies of the hardcover book. As I held the copies in my hand, opened the books and flipped through the pages, I couldn’t find a single thing I wished I had done differently. This was the true moment of payoff—after all the hours of thinking and doing, I got to hold a beautiful, finished product and savor the feeling of a job well done (Figure 15).

Figure 15. The final cover in hardback
CreativePro Has You Covered
For more on the subject of books and their covers, check out these posts at CreativePro.com:
- Premium Book Cover Templates
- Designing Books
- InDesignSecrets Video: Laying Out a Book Cover
- Make It Look Like a Book in the Acrobat PDF
- InDesign Magazine Issue 42: Book Design Basics
- The Book Cover Archive
Commenting is easier and faster when you're logged in!

Recommended for you

Distilling the Story: The First Step to a Great Presentation
Learn how choosing the correct story can put you on the path to creating a succe...

Hyperlinks: Now you see ’em. Now you don’t!
One of the last things I mentioned during my Interactive PDF session at the rece...
How to Export Basic HTML Out of CS2
Let's say you have a magazine, annual report or newsletter you've done in InDesi...