
AI in Ai
Improve your vector art workflow with new artificial intelligence features in Adobe Illustrator.

This article appears in Issue 27 of CreativePro Magazine.
It’s been nearly impossible to avoid news about artificial intelligence–powered tools in the creative industry this year, and like most major tech companies, Adobe has been hard at work investing in this technology and rapidly integrating it into our favorite Creative Cloud applications, including Illustrator.
There are four notable AI-powered features new to Illustrator that you can start experimenting with today: Text to Vector Graphic, Generative Recolor, Retype, and Mockup. While most of these features are still in beta, now is a great time to try them out and get familiar with their possibilities and limitations.
Text to Vector Graphic
Arguably the most interesting (and perhaps most controversial) of Illustrator’s AI features comes in the form of text-to-vector image generation. A brand-new generative image model powered by Adobe Firefly, Text to Vector Graphic allows you to type a word or phrase directly in Illustrator, and then it instantly generates a set of vector images based on your prompt (Figure 1). The tool currently offers four types of image generation: Subject, Scene, Icon, and Pattern.

Figure 1. Simply draw a blank rectangle, open the Text to Vector Graphic section of the Properties panel, and type in your prompt to generate vector images.
- Subject mode works well for creating isolated clipart-type images or character art.
- Scene mode is helpful for creating background art and landscapes.
- Icon mode generates simplified line art designs with limited color palettes.
- Pattern mode (as you probably guessed) generates repeating seamless patterns.
One of the
most interesting options in the Text to Vector Graphic tool is the ability to select a reference artboard with sample artwork as a style reference for your generated art. You might expect this would allow you to add multiple samples of your own artwork as a reference and attempt to generate new art in your personal illustration style. But in practice, this feature still needs some work (or training to use some Generative AI lingo). The results can be unimpressive. But since this is the first publicly available beta version of the tool, I expect we will see significant improvements in the not-too-distant future.
Here are some limitations to look out for when using Text to Vector Graphic. Currently, the generated artwork has a path structure very similar to the results of an image trace. This means that paths are generally not very clean with many extra nodes and imperfect curves (like they were drawn by someone who had never been instructed in how to use the Pen tool). Furthermore, editing the generated artwork can be somewhat difficult as the shapes are cut out instead of being whole, layered shapes as you would expect from manually constructed vector art (Figure 2).
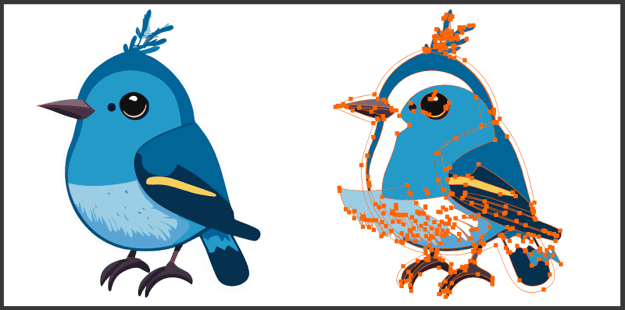
Figure 2. Watch out for messy paths, extra nodes, and shapes that are cut out rather than layered.
In its current form, Text to Vector Graphic is probably not a tool you would use to generate final art for a client. Not only does the generated art require a significant amount of manual cleanup, but there are also copyright concerns, as the laws around AI-generated images are still being worked out in the courts.
Warning: Adobe has set the policy that artwork created with features that are in beta may not be used in commercial work. For more on this topic and other legal issues surrounding Generative AI, check out the recording of Kathryn Goldman’s session from the recent CreativePro Design + AI Summit (registration required).
What the Text to Vector Graphic is useful for at this point is having a brainstorming buddy right inside Illustrator. You can use it to create a custom, vector-art mood board in your document and quickly generate ideas to reference or colors to sample.
Generative Recolor
If you struggle with choosing colors, or just need to save time recoloring complex artwork, Generative Recolor may become your new best friend.
Getting started
With some artwork selected, choose Edit > Edit Color > Generative Recolor (or just click Recolor in the Contextual Task Bar). In the panel that opens, you can choose from sample prompts or type your own custom prompt to start generating new color palettes that you can apply to your artwork with just a click. Each time you generate new color schemes you’ll get a few variations to choose from along with a small thumbnail preview of how selected artwork would look with the new colors applied to it (Figure 3).

Figure 3. With Generative Recolor, you can choose a sample prompt or use your own to apply new palettes to existing artwork.
Tip: If you like to maintain more control over the recoloring process, you can easily switch between the Generative Recolor and the classic Recolor Artwork to fine-tune individual colors, shift hues, or adjust brightness and saturation.
Instant inspiration
I love Generative Recolor, because as a designer, I know that it’s easy to get stuck in a rut when it comes to color and reusing the same familiar palettes. But with Generative Recolor, you can instantly shake things up by creating multiple color schemes that you may never have thought to try. Being able to save and preview multiple palettes also gives you the ability to compare and curate color ideas at a glance and apply these schemes to your art with one click. What might have taken hours to edit manually or even have been a tall task with the Recolor Artwork window is now nearly instant and automatic.
Applying brand colors
Beyond generating and “trying on” new color schemes for your art, I’ve seen this new time-saving tool used in some very practical and innovative ways. One great example is quickly customizing full-color illustrations, whether original artwork or licensed stock, to include specific brand colors for a particular client. You can also quickly convert any full-color vector image to a brand-friendly limited palette or monochromatic color scheme to better fit brand guidelines and enhance design cohesion (Figure 4).

Figure 4. You can easily add brand colors from the Swatches panel by clicking the plus button in the Colors section.
Limitations
Current limitations of Generative Recolor include its inability to affect objects with freeform gradient fills, blends, and placed or embedded raster images. One other interesting quirk to note is that pure black or pure white fills and strokes will not be recolored, however, any shades of gray will be replaced by new colors. This is particularly useful if you prefer to work in grayscale while creating an illustration and experiment with different color palettes once the linework and composition are done.
Retype
At one time or other, we’ve all been handed a vector file with outlined text or provided with a raster image only and expected by the boss or client to go hunting for the font to update or recreate text. This used to be a very frustrating process. You could try various websites for identifying fonts, but this usually came with mixed results and the inconvenience of having to leave Illustrator to search for answers.
Now, using the power of AI, you can try to locate a mystery font directly in Illustrator with the new Retype feature, currently in beta. Retype attempts to identify fonts in either bitmap images (like JPGs) or in vector type that has been converted to outlines. Retype scans your document, and when it finds element it identifies as type, the tool uses AI to compare the letter shapes to fonts installed locally and to fonts in the Adobe Fonts library. To use Retype, simply select the raster or vector object and choose Type > Retype (Figure 5).

Figure 5. Retype attempts to identify text in your selection in raster images or outlined vector type and match it with a typeface that is locally installed or part of the Adobe Fonts Library.
If Retype can’t find the exact font present in the sample art, it will provide you with a list of similar fonts from Adobe Fonts that you can instantly activate. If you find a match (or a substitute that works for your purposes), you can go one step further and use Retype to convert the rasterized or outlined type back to live text with a single click. In the case of a raster image, Retype will even attempt to alter the background of the image to fill in the space behind the revivified text.
As with other experimental features, there are a few caveats to be aware of. Retype will struggle to identify any font that has been significantly modified or customized. It may also have a hard time with stretched text or images that contain multiple fonts within the same word. Some nonstandard display fonts with unusual features may not be properly identified as text elements at all. Finally, as with most other font-identifying applications, the tool does best with clean black text on a white background.
All things considered, Retype is a very convenient place to start your font hunt without having to leave Illustrator, and the added convenience of instant conversion back to live type is a great bonus.
Mockup
If you’re more comfortable working in Illustrator than in Photoshop, you may be very excited about this final member of the new AI-powered toolset. Mockup enables you (not surprisingly) to create mock-up images directly in Adobe Illustrator.
To create a mock-up, you can start with any raster image that contains a suitable surface to apply your graphics to. This can be a picture of some blank product packaging, a blank device screen, an empty storefront window, or the like. Next, select both the artwork you want to apply as well as the base raster image, go to the Object menu, and choose Make > Mockup (Figure 6).
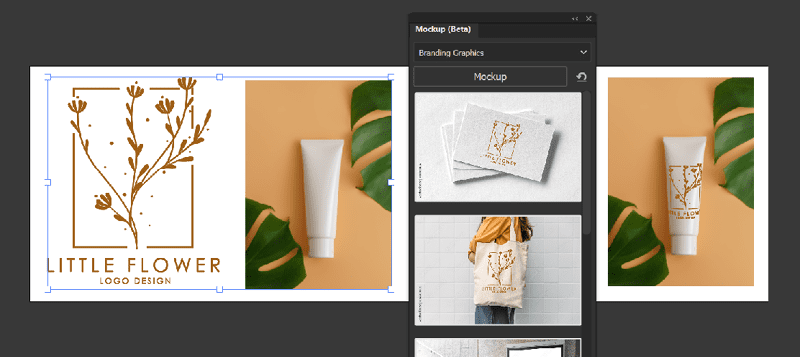
Figure 6. Mockup allows you to generate a mock-up product images very quickly.
Currently, this feature won’t work if your art contains certain elements such as gradient meshes, graphs, freeform gradients, raster images, or clipping groups. The quality of the results you get depends greatly on the base image you start with. In my tests, simpler images with just a few surfaces seemed to produce the most accurate mockups.
Explore, Experiment, and Innovate
Now is the perfect time to dive into the fresh possibilities offered by the Generative AI features in Illustrator. Set aside a little time for experimentation and discovery, and you’re sure to find new ways that these features can ignite your creativity and streamline your workflow.
Commenting is easier and faster when you're logged in!

Recommended for you

How to Fix SVG Images That Look Blurry in InDesign
How to edit code to improve the appearance of SVG images placed in InDesign.

CreativePro Video: Using the Touch Type Tool in Illustrator
In this week’s CreativePro video, Mike Rankin demos how to adjust type with Illu...
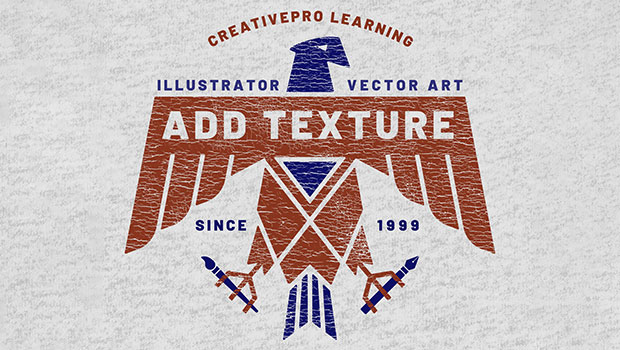
How to Add Texture to Illustrator Artwork
Add character, style and a unique look to your illustrator creations