

This InDesign tip on adding text to a story was sent to Tip of the Week email subscribers on December 21, 2017.

Sign up now and every week you’ll get a new tip, keyboard shortcut, and roundups of new articles, plus exclusive deals sent right to your Inbox!
Just scroll down to the bottom of this page, enter your email address, and click Go! We’ll take care of the rest. Now, on with the tip!
Did you ever think you were done pouring the text in a story, only to have someone send you additional content in the form of a separate text file? Most users would place the content from the new file in a new text frame, cut it, paste it into the existing InDesign story, and format it.
But not you! As a subscriber to the InDesignSecrets Tip of the Week, you know a better way (or you will by the time you finish reading this email). It’s very simple to add the new text to the existing story and format it instantly.
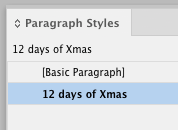
Deselect everything in the document. Then go to the Paragraph Styles panel, and select the style you want to format the new text.
Put your cursor in the story where you want the additional text to go.

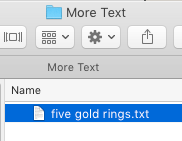
Choose File > Place, or press Command+D/Ctrl+D. In the Place dialog box, make sure that the option for Replace Selected Item is turned on.

Then select the file with the new content and click Open.
The text is placed at the point in the story where your cursor was and takes on the formatting of the style you selected.

This article was last modified on July 25, 2019
This article was first published on December 26, 2017
Commenting is easier and faster when you're logged in!

Recommended for you

InDesign Tip: Page Guides vs. Spread Guides
Here’s the trick for creating guides on just one page or the whole spread...

How to Create and Work With Guides in Illustrator
Learn how to create simple Illustrator Ruler Guides, how to make almost any path...
Tip of the Week: Precisely Positioning Column Guides
This tip was sent to Tip of the Week email subscribers on February 12, 2015. Sig...