


Have you ever tried to crop a PDF file, cutting out part of a page? It’s pretty darn easy! You use Acrobat’s Crop feature to crop it down to just the public data you want visible. Or, you could take that PDF and place it in InDesign, crop it there, and export a new PDF.
Guess what? The private data is still there. You can’t see it, but if you export the file in some other format, or use Acrobat’s content analysis features, it’s easy to find!
The frustrating truth is that Acrobat can crop a PDF, but the stuff outside the cropped area doesn’t truly go away. It is just masked, or hidden. Technically, cropping a PDF in Acrobat just changes its “crop box” rectangle, instructing software to display only what is within. The original art is all still there, hidden from view and not all that difficult to find for someone who knows what they’re looking for.
So what’s to be done? Here are two methods you can use to truly delete data that is outside the visible PDF. (If the information is truly confidential, please see “Don’t Crop It, Redact It” below.)
Hidden Information Lurks Within
In case you don’t remember (or don’t know) how to crop a PDF in Acrobat Pro:
1. Select the Edit PDF tool and then select Crop Pages from the Edit PDF toolbar above. Drag out a cropping rectangle:

2. Double-click inside the cropping rectangle to open the Set Page Boxes dialog box:
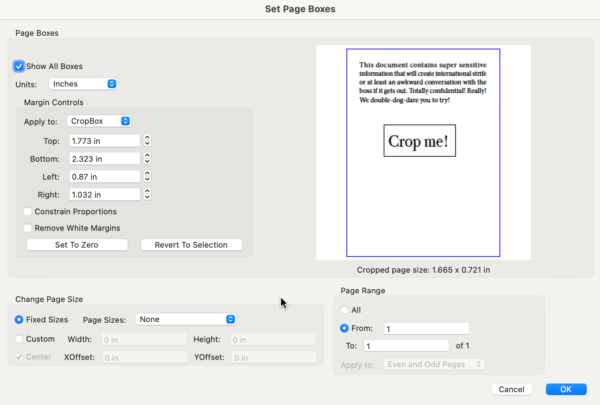
3. Click OK, and you get what looks like a fully cropped PDF.
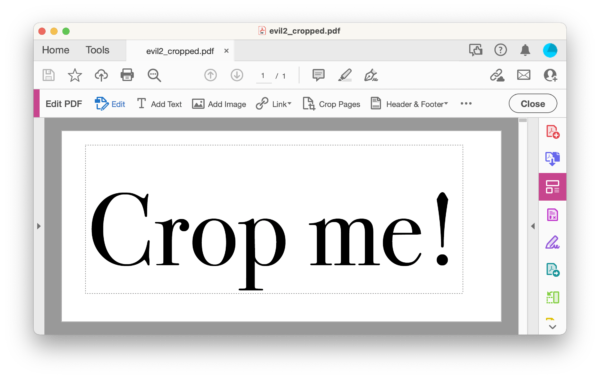
But as I said, the stuff out in the periphery is still there. If you open that dialog box again, you’ll see it out there.
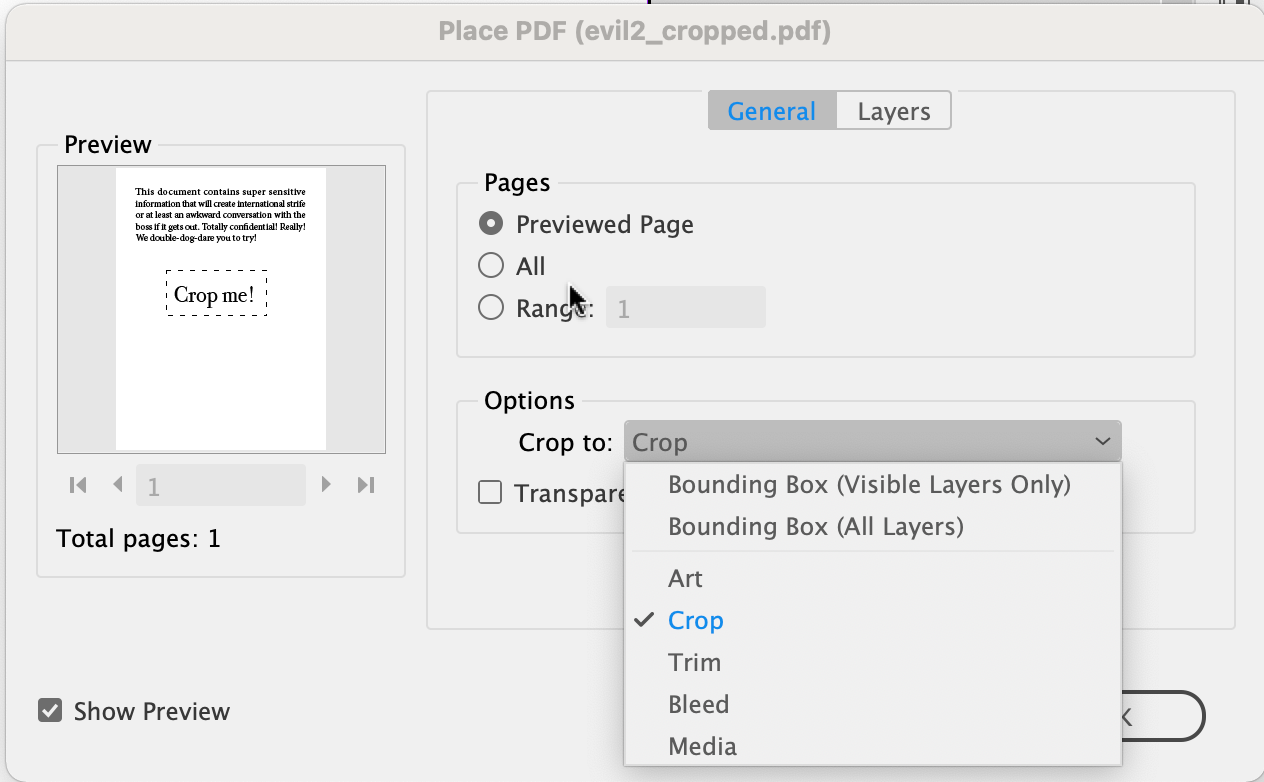
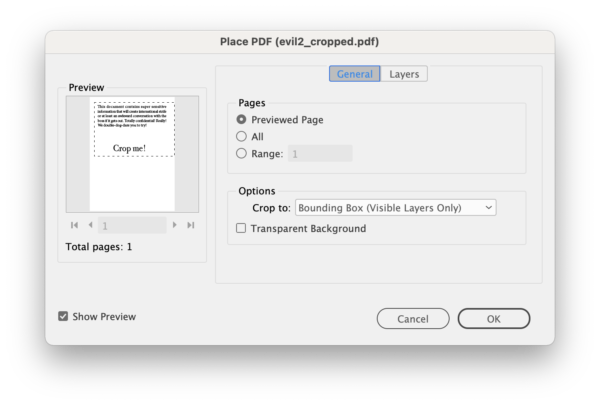
Or, if you place it in InDesign and use the Show Import Options dialog box, you can see it there, too. Selecting Bounding Box (Visible Layers Only) under the Crop to option shows all the data you cropped. (You can place your cropped file with Crop to set to Cropped—of course!)
So here’s the trick: Open the Protection tools and click Remove Hidden Information. Acrobat will process the data and provide you with a set of “hidden” information in the Results pane on the left. Then click the Remove button:

When it’s done processing, all that cropped data is gone! Not just text… even if you had image data out there, it gets cropped out.
Flatten Transparency
Here’s another way to crop a PDF, using InDesign instead of Acrobat.
First, place the PDF on a page in InDesign, and crop the graphic frame down to view just the shape you want. (It doesn’t even have to be a rectangle.) Next, apply any sort of transparency to the PDF. For example, you could set it to 99.9% opacity. Finally, export the page as a flattened PDF — that means Acrobat 4 (PDF 1.3) compatibility, such as you get when you choose the PDF/X-1a:2001 preset.
The trick here is that when the PDF gets flattened as part of the export process, InDesign leaves out all the stuff outside the cropping area!
(Of course, the annoying part is that the PDF gets flattened, which means any other transparency on the page or in the PDF is no longer around. That shouldn’t be a problem, but it’s frustrating for those of us who like to keep transparency effects unflattened.)
It sure would be helpful if Adobe Acrobat simply had a “really truly crop everything out” feature available with the crop tool. But in the meantime, keep these solutions in mind!
This article was last modified on April 5, 2023
This article was first published on October 20, 2014
Commenting is easier and faster when you're logged in!

Recommended for you

How to Fill Text with Images in Photoshop
The next time you need to place an image inside text in Photoshop, try one of th...
Pantone 2.0: After 45 Years, the Sequel to PMS
On September 5, 2007, Pantone announced an entirely new spot-color-matching syst...

Remove.bg: A Worthy Alternative to Photoshop’s Select and Mask
Get to know this web-based app that performs instant photo cutouts with a remark...