



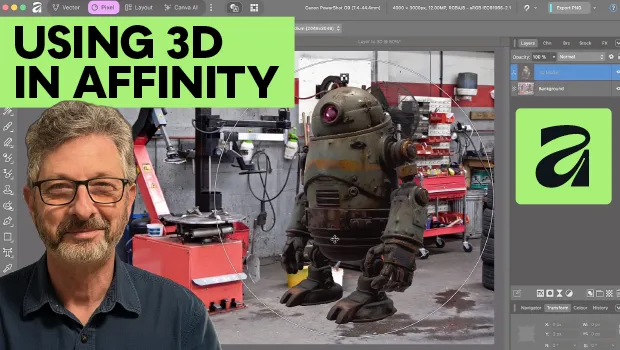
In this Affinity how-to video, Steve Caplin demonstrates how to import and create 3D models. He shows how Mac and Windows users can place 3D file formats into their documents and control their orientation. Then, Steve highlights using Canva AI inside Affinity to convert 2D layers into 3D objects.
Subscribe to the CreativePro YouTube channel for more helpful design tips!
Photoshop may have dropped support for 3D some years ago, but you can now use 3D directly inside Affinity, which can both import 3D models and create 3D models from layers. Let’s see how it works. I’m Steve Caplin for CreativePro, the essential resource for design professionals, and I’m going to show you how to use 3D directly inside Affinity.
Affinity now has the ability to work with 3D objects in two distinct ways. The first is to place 3D objects into your document. To do this, you go to the File menu and choose Place 3D Model.
On a Mac, Affinity can work with GLB files as well as OBJ, STL, PLY, USD and Alembic. On Windows, at the moment, it can only work with GLB files. Choose your file and go to Open, and the object appears in your window.
You can move it around, you can scale it, just like any other placed layer. To change the orientation, double-click it, and now this circle appears around the object, and that is the only 3D control that you have. And if you start dragging it around, you can see at first it seems rather difficult to orient it how you want.
The solution is, if you go to the left or right edge and you drag, you can now rotate it around the vertical axis. If you go to the top or bottom, you rotate around the horizontal axis. And you can rotate anywhere to fine-tune it.
Let’s position this robot facing into the room. Hold Option or Alt, and as you drag, you can move the light around the object. To move it around, switch back to the Move tool, and now you can scale it and move it as you like.
Obviously, this would look a lot better with a shadow underneath it, and we have to add those manually. So we’ll make a new layer underneath our 3D object, go to the Brush tool, and at a low opacity, we can paint in the shadow just underneath its feet. The other 3D innovation is the ability to turn any layer into a 3D object.
And we can do that with this document here. I’ve got a background of a street and a cutout of a car. Now, this only works with a subscription to Canva.
It’s not included in the base model of Affinity. To make the 3D object, go to Canva AI, and then choose Layer to 3D Model. And you’ll get this dialog popping up, offering a choice of AI quality.
Well, actually, the choice is only one. Presumably, they’ll add more models in the future. And it’s warning you that Layer to 3D uses up some of your AI credits.
Click Create, and now wait while Affinity turns that layer into a 3D object. It can take several minutes, so we’ll skip ahead. And here’s that car turned into a 3D model.
For some reason, Affinity likes to make it smaller when it builds the model, but as it’s a 3D model, we can scale it without loss of quality. Let’s do that now. We’ll go back to the Move tool and make it bigger.
Double-click it to get the rotation circle. And now we can rotate it and position it as we want on this street. Now, unlike in Photoshop, we don’t have the ability to change the perspective of our view.
But, also unlike in Photoshop, we can hold the Option or Alt key, and we can adjust the lighting on our 3D model. And you can see how it’s picking up the shine very nicely on this model of a car. Of course, to make it look realistic, we need to add a shadow on the ground beneath it.
We’ll go back into our Pixel Studio, make a new layer underneath the car, and once again, we can use the Brush tool to paint in a soft shadow. And those are the new 3D tools in Affinity.
Well, I hope you enjoyed this video. If you did, be sure to give it a like and subscribe to our channel. And for thousands more how-to articles and tutorials, visit our website, creativepro.com, and become a member today.
Thanks for learning with us.
This article was last modified on October 6, 2026
This article was first published on October 6, 2026
Commenting is easier and faster when you're logged in!

Recommended for you
Find All Your Current InDesign Keyboard Shortcuts
You probably know that you can create your own keyboard shortcuts in InDesign, b...

Heavy Metal Madness: Of Evil Witches and Dancing Pickles
If I was marooned on an island that celebrated only one holiday, I sure hope it...

dot-font: Czech Mates
dot-font was a collection of short articles written by editor and typographer Jo...