


Closed Captioning in Premiere
Add captions to your Premiere video to ensure everyone benefits from its audio tracks—even search engines.

This article appears in Issue 60 of CreativePro Magazine.
Closed captions can make your video content accessible to deaf and hard-of-hearing viewers, allow your audience to watch in various environments, boost retention of viewers watching on mute, and improve search engine optimization (SEO). Sound good? I’ll explain how to add closed captions in Premiere, right after we clarify what they actually are.
What Are Closed Captions?
A lot of people use the terms closed captions, open captions, and subtitles somewhat interchangeably, but each type of onscreen text has a its own purpose and benefits.
Closed captions
Closed captions generally contain both the text of the dialogue and a description of the music and sound effects (Figure 1). Closed captioning was originally intended to make television accessible to hearing-impaired audiences. Currently, viewers also use it when content is harder to hear due to sound mixing, speaker quality, compression, actor delivery, or competing environmental noise.

Because closed captions are a separate file that provides the audible content of a video in text form, you can add them to improve search engine optimization (SEO) by revealing keywords and conveying the full, unabridged content of your video.
Open captions
Open captions are similar to closed captions, but their main difference is permanence. Users can close closed captions, whereas open captions are a fixed part of the video and always visible (Figure 2).
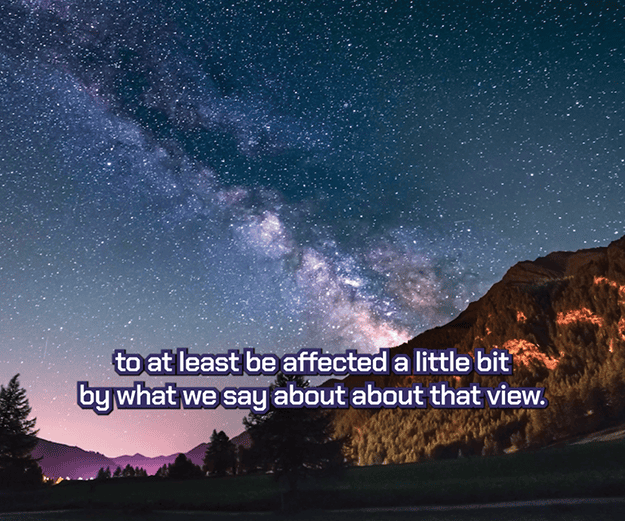
All viewers regardless of device or video player can see open captions. Because open captions are a part of the pixels in the frame, you, as the designer, can determine their formatting and placement.
Subtitles
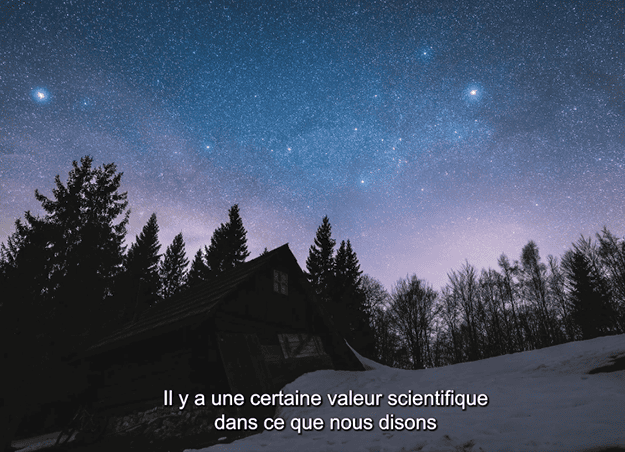
Subtitles translate the content into a different language (Figure 3). Creators may change the dialogue depending on the length of the translation or localized meaning. In the French subtitles for the movie Project Hail Mary, for example, the mission that’s the subject of the film is called Projet Dernière Chance (“Last Chance Project”) because a “Hail Mary” is an American football reference.
How to Generate Closed Captions
The best time to add closed captions is after you edit your Premiere sequence. The process includes:
- Assembling the text of the dialogue, a description of the music, and a description of the sound effects
- Styling that text
- Exporting
The most important content of the closed captions is the dialogue, so first prepare the transcript.
Generate the transcript
Premiere can generate a transcript of your video’s dialogue for you, either automatically or when you manually instruct it to.
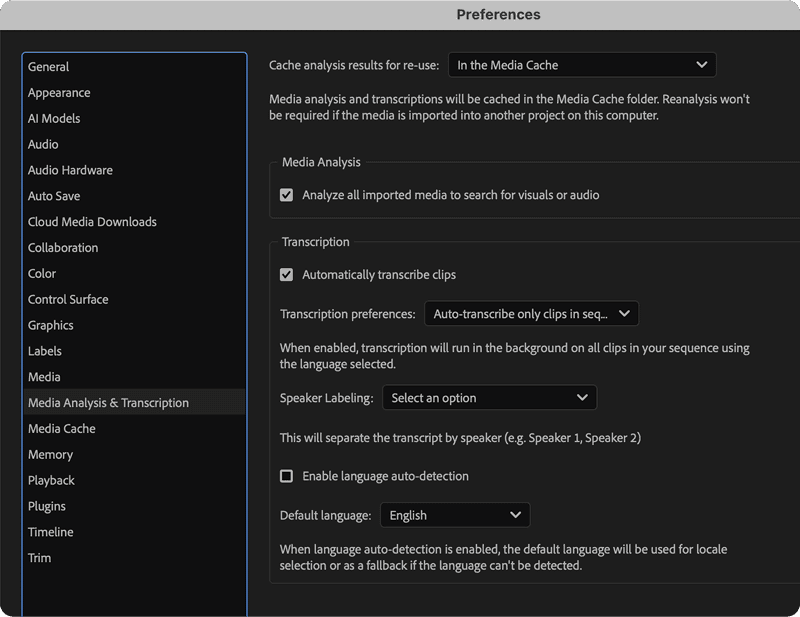
Automatic transcription is turned on by default, and you can adjust its settings in the Media & Transcription preferences. To do so, choose Edit > Preferences > Media & Transcription (Windows) or Premiere > Settings > Media & Transcription (macOS). In the Transcription section, you can toggle Automatically Transcribe Clips, as well as specify whether Premiere auto–transcribes all imported clips or just the ones you’ve put in a sequence (Figure 4). From the Speaker Labeling menu, you can choose to separate the transcript by speaker. If you do, the first speaker will be identified as Speaker 1, the next as Speaker 2, and so on. If you don’t, then a speaker will be identified as Unknown.
If you want to manually instruct Premiere to transcribe dialogue from a clip, make sure the Automatically Transcribe Clips option is off, then:
- Open the Text panel (Window > Text), and choose the Transcript tab.
- Select the audio clip in its sequence or double-click it in either the Project panel or timeline to open it in the Source Monitor.
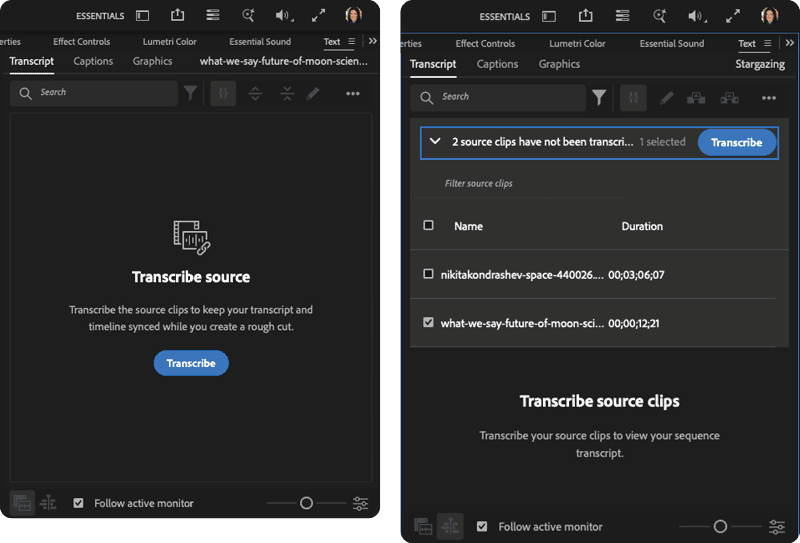
- Click the blue Transcribe button in the Text panel’s Transcript tab (Figure 5).
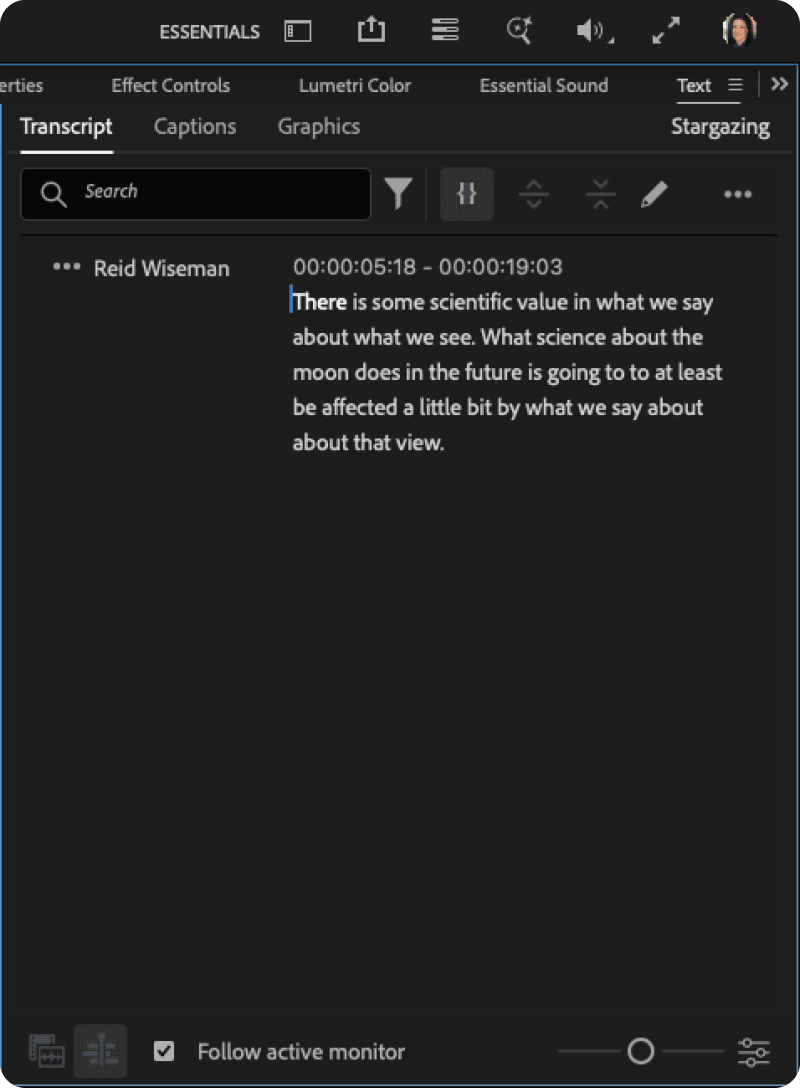
After the transcription, Premiere displays the text in the Text panel’s Transcript tab separated into two columns: the speaker name and what the speaker says. Directly above each transcribed block is a timecode range that indicates the In and Out points of that dialogue (Figure 6).
Edit speaker names
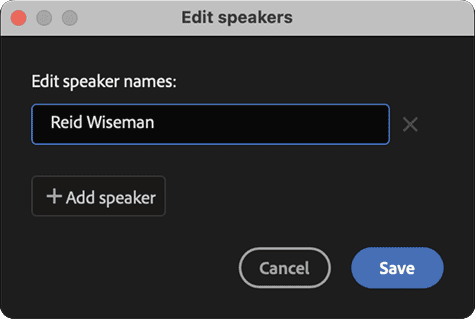
You can edit the default speaker names or add names at any time (Figure 7).
To edit a speaker name:
- Open the source clip. Open the audio clip in the Source Monitor by double-clicking it in the timeline or the Project panel.
- Once the source clip is open in the Source Monitor, three dots appear to the left of the speaker’s name in the Text panel’s Transcript tab. Click the three dots or speaker name, and choose Edit Speaker Name from the menu that appears.
- In the Edit Speakers dialog box, enter a new name for the speaker.
To add an additional speaker, click the + Add Speaker button and enter the speaker’s name.
Convert the transcript to captions
At this point, you have a transcript, but the text won’t appear onscreen until you convert it to captions. To do so, choose the Captions tab in the Text panel and click the Create Captions From Transcript button (Figure 8).
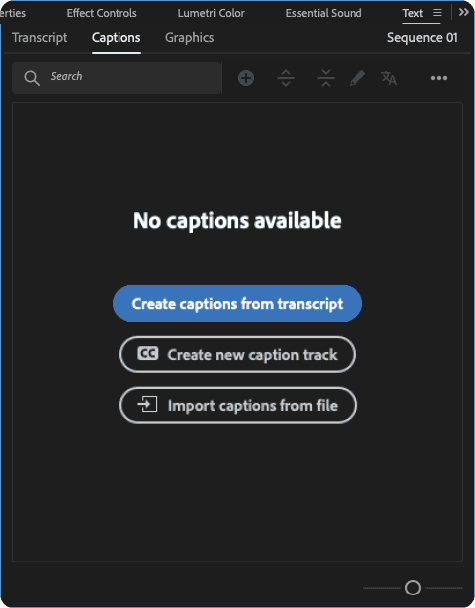
Once the generated transcript is converted to captions, Premiere adds a new Subtitle track to the timeline above the video tracks. Each block of text from the transcript appears there in sections that correspond to its timecode range.
Run a spell check
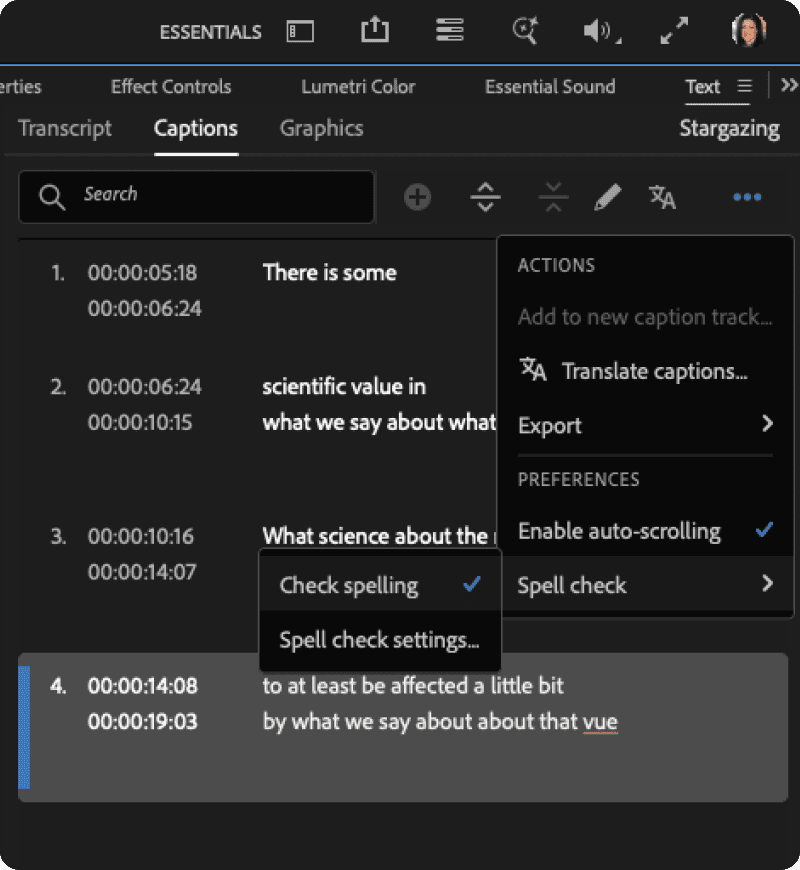
Although Premiere does a great job generating a transcript, it’s possible that it could get some words wrong or misspell names. To catch errors, run a spell check: Click the three dots in the upper right of the Text panel’s Captions tab and choose Spell Check > Check Spelling, or choose Edit > Spelling > Check Spelling. A checkmark next to Check Spelling indicates it’s on; misspelled words will be underlined in red (Figure 9). Scroll through the captions to proofread them.
Edit the captions
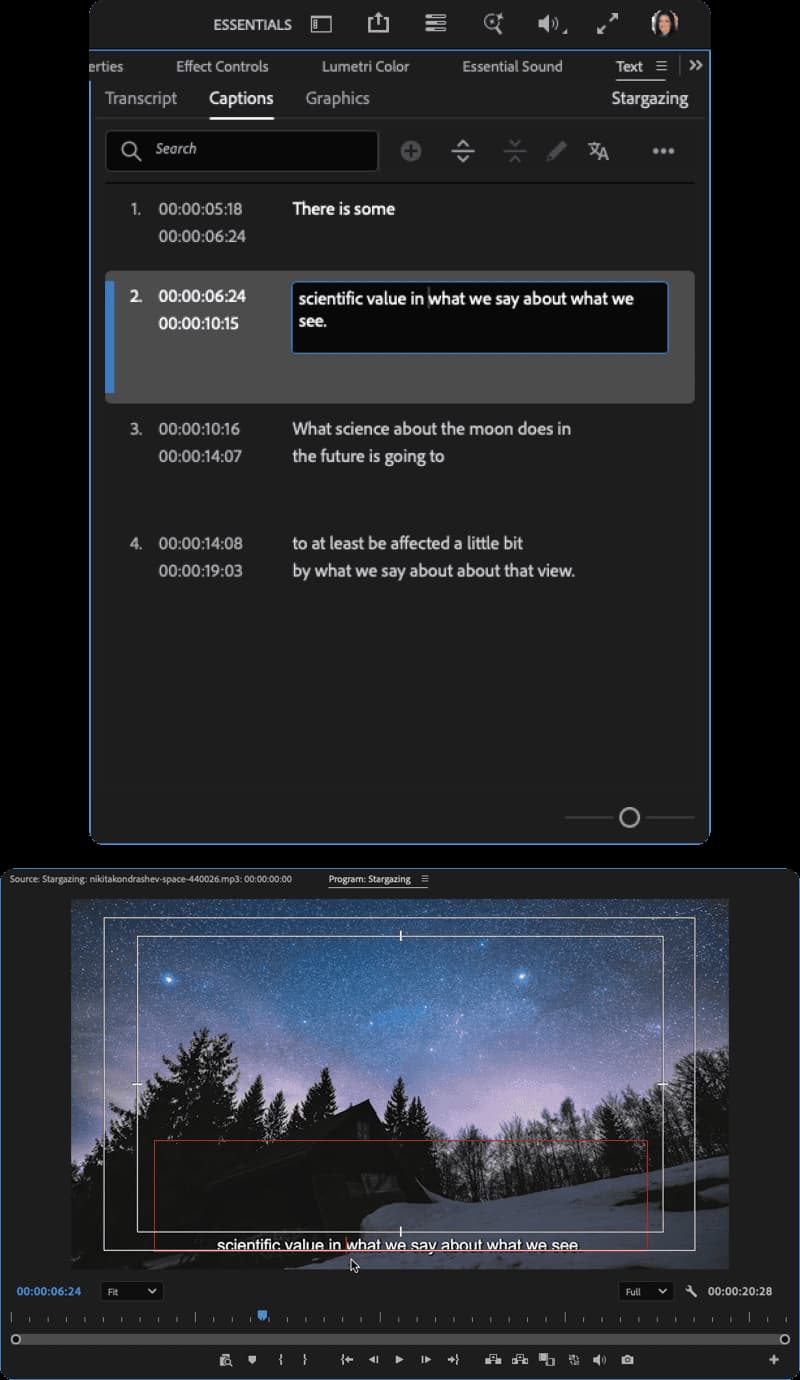
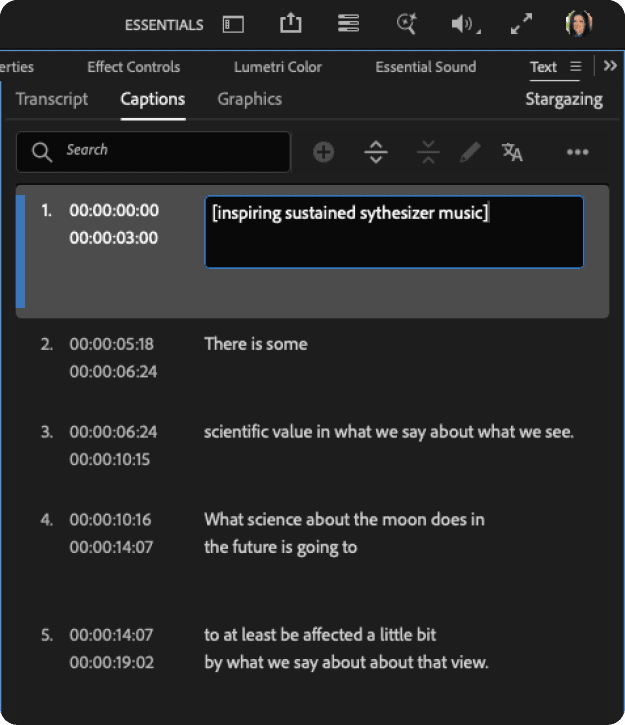
You can edit your captions in multiple ways (Figure 10):
- In the Captions tab, double-click the text in a block.
- In the Captions tab, select a caption and click the Edit Active Text button (the pencil icon, which is fourth to the right of the Search bar).
- In the Program Monitor, double-click the captions with the Selection tool or select the captions with the Type tool.
- From either the Subtitle track in the timeline or the Program Monitor, select the caption. Then from the Properties panel, click the three dots and select Add Or Edit Captions. Premiere takes you to the Captions tab of the Text panel to edit.
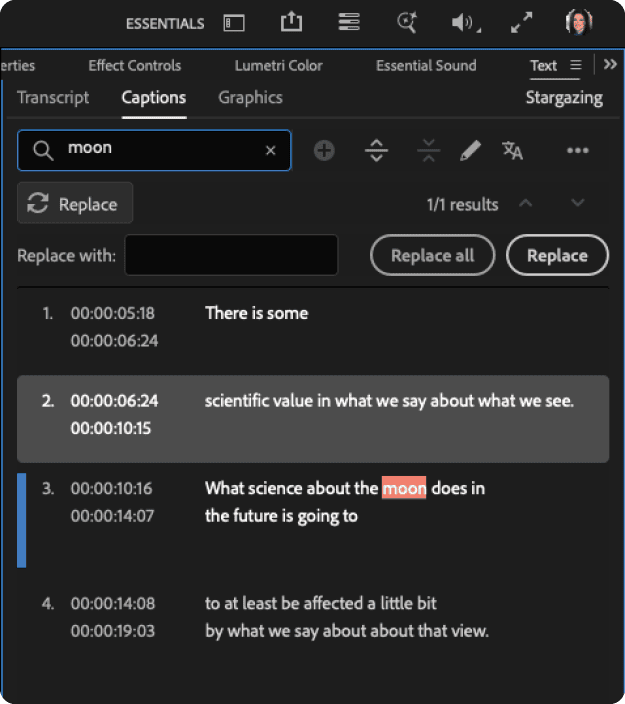
You can use the options in the Captions tab to help you search for words or phrases in the captions. If your search yields results, the Replace option appears along with the number of instances found. You can move through the results by clicking the up and down arrows, enter replacement text, and choose whether to replace all instances found or only the currently selected one. (Figure 11).
Add the music and sound effects descriptions
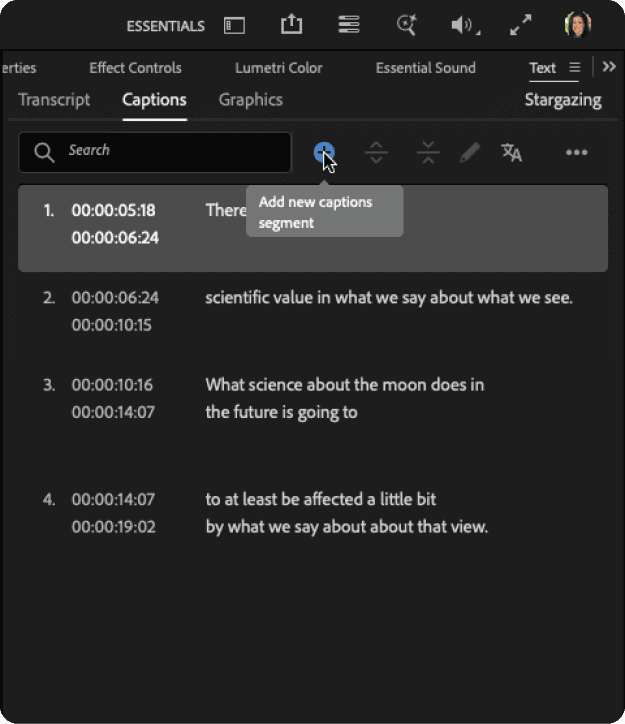
Descriptions of music and sound effects, as well as song lyrics need to be added manually. To do so, go to the beginning of a music or sound effect clip in the sequence timeline. If there’s already a caption, edit it to add the music or sound effect description using the methods described in “Edit the captions.” If there isn’t a caption, add one by clicking the Add New Captions Segment icon (a circle with a + inside), which is the first icon to the right of the Search bar in the Captions tab of the Text panel (Figure 12).
When you add these descriptions, make them lowercase and put them inside brackets. Music descriptions often start with a single musical eighth note symbol, which you can make by pressing Alt+1+3 on the numeric keypad (Windows) or Control+Command+spacebar (macOS) (Figure 13). For more tips, see the accessibility-compliant caption guidelines.
How to Style Captions
When you convert your transcript into captions, the Create Captions dialog box appears. Here you can select a caption preset to format and style your captions (Figure 14).
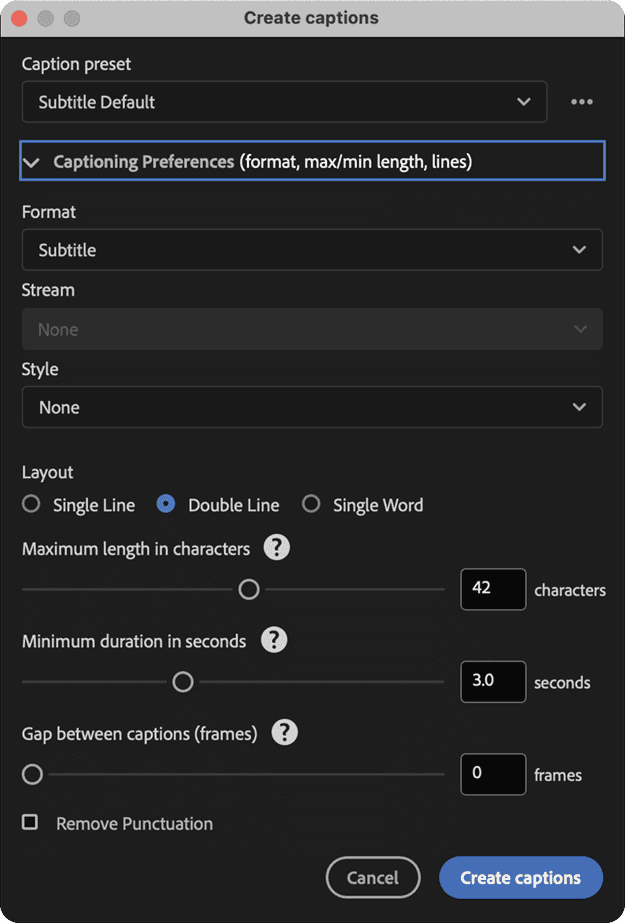
Unless you know that you need to use a different setting to meet a specific technical requirement, leave Caption Preset set to Subtitle Default. This preset assigns the Format option to Subtitle, which is designed for use with modern platforms.
The Style setting enables you to select a text style that you previously created. For more information about how to create a text style in Premiere, please see my CreativePro video, “Adding and Styling Text in Premiere.”
The Layout section is where you can determine if the captions should appear as a single line, a double line, or a single word. You can set the maximum length in characters, a minimum duration in seconds, and a gap (or pause) between captions. You can also remove punctuation.
Warning: Because closed captions aren’t burnt into the pixels like open captions, it is possible that the styles you set could get overridden by a video player. However, styling captions is still helpful. It can determine placement on the screen so that important content isn’t covered, and some players will try to use your styling. If style overrides become too problematic, you could always convert your captions to open captions later.
How to Export Your Video with Captions
After you’ve created and styled your captions, you’re ready to export them with your video. In Export mode, go to Settings, then toggle on Captions and expand its options. For the Export Options menu, choose Create Sidecar File to export closed captions. For open captions, choose Burn Captions Into Video (Figure 15).
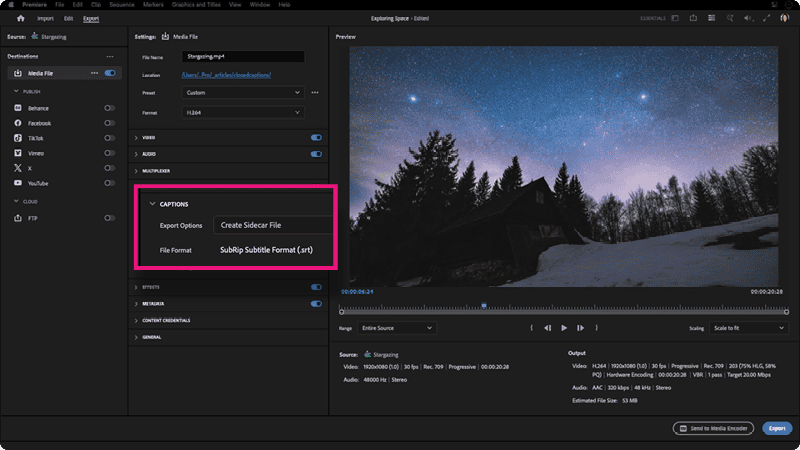
Depending on the platform where you expect your video to play, you may want to keep Include SRT Style turned off to make sure your captions are displayed properly. If you added styling and you know the video player supports it, then select it. Finally, click the Export button (lower-right corner).
Ready for Everyone
Whether you’re creating social media content, training videos, or films, captions can help more people get more from your content. Now that you know how to create, style, and export them, your videos are ready to be read.
Commenting is easier and faster when you're logged in!

Recommended for you
How to Fix Missing Content Problems in Premiere
Learn what the media warnings in Premiere mean and how to address them
Create an Animated Looping Logo in Premiere
This looping animated logo tutorial from Myra Ferguson is perfect for Premiere b...

InDesign How-to: Change the Date Format in Captions
Learn where you can go to customize the date format InDesign uses for Static and...