
Affinity for Photoshop Users
From real-time previews to added adjustments, Affinity special effect and lighting filters offer a lot at no cost.

This article appears in Issue 54 of CreativePro Magazine.
Who doesn’t like free stuff? Free stuff that offers more control than familiar tools? That’s exactly what’s available, thanks to Canva, the owner of Affinity.
Since 2025, the three applications that previously comprised the Affinity suite—Publisher, Photo, and Designer (the analogues of InDesign, Photoshop, and Illustrator)—have come bundled in a single free application. (Advanced AI features, however, require an annual subscription.)
Photoshop users realize some particular benefits. While the convenience of being able to apply pixel, design, and vector tools directly to a current document is of obvious benefit to Affinity users, free access to Affinity special effect and distortion filters is a huge boost for Photoshop users. Affinity can both read and write native Photoshop documents, plus it offers some unique image filters, plus its versions of many familiar Photoshop filters sport a vastly better interface.
All this adds up to Affinity being a useful tool for Photoshop users.
The sections that follow detail the benefits of a variety of Affinity filters. You can also find details on passing files back and forth between the applications in the sidebar “Exporting to Photoshop.”
Distortion Filters
Affinity and Photoshop include many distortion filters that accomplish the same effects, but the Affinity approach makes working with them very much easier.
Displace filter
The Photoshop Displace filter is clumsy, to say the least. You have to guess the horizontal and vertical strength, select a texture file, and hope for the best. There’s no preview, so be ready to undo and repeat with different settings until you get the result you want.
Affinity, on the other hand, enables you to adjust the strength of its Displace filter with a live, real-time preview. Simply choose Pixel > Filters > Distort > Displace to get started.
Almost all Affinity filters include two additional preview modes: a split view with After on the left and Before on the right (Figure 1) and a side-by-side view showing both After and Before states in full.
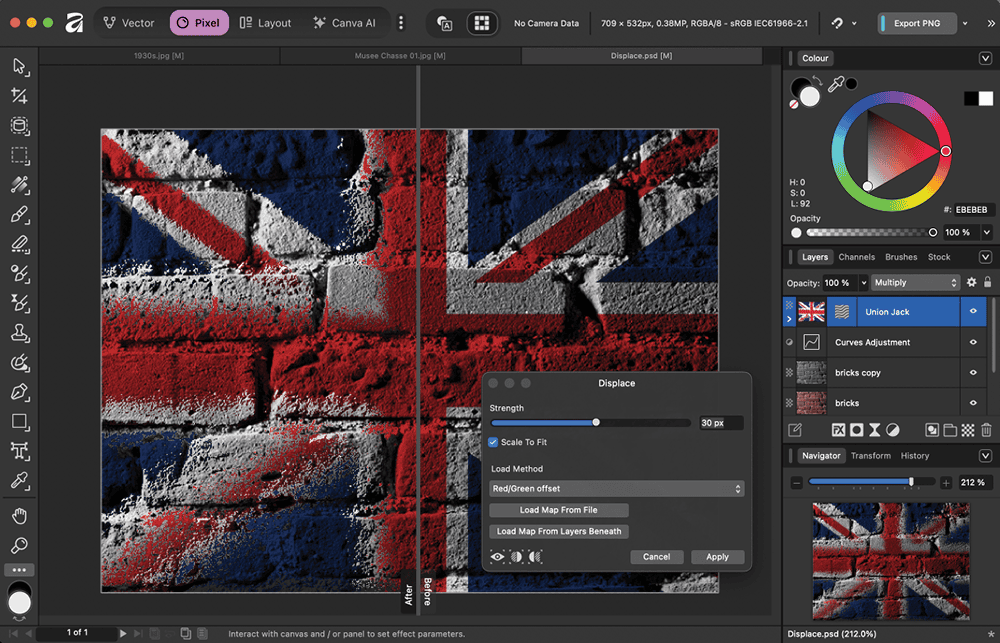
You can load a displacement map from a file or choose Load Map From Layers Beneath to use the next visible layer for the displacement. You can still access the Layers panel while the Displace dialog box is open; you can turn layers on and off, and only the uppermost visible layer will be used.
Spherical filter
The native Spherize filter in Photoshop operates on the entire canvas (or an active selection), with only a tiny preview window. Affinity’s Spherical filter works directly on your current layer with Intensity and Radius sliders (Figure 2).
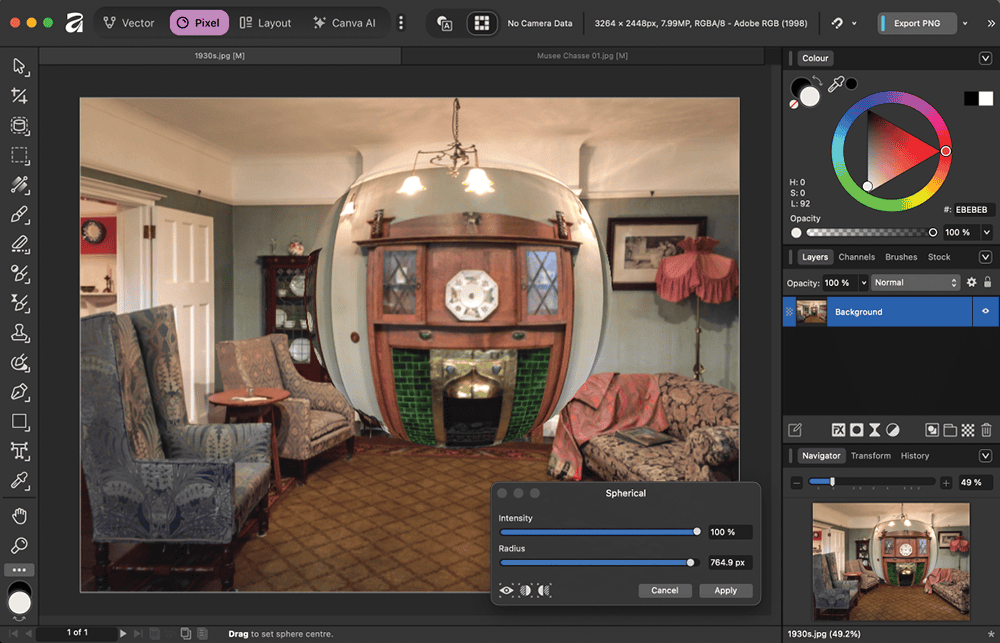
Best of all, you can drag the spherized area around the canvas in real time, positioning it exactly where you want it. Although the slider goes up to a maximum radius of only 1024 pixels, you can type in a larger value in the number field if you wish.
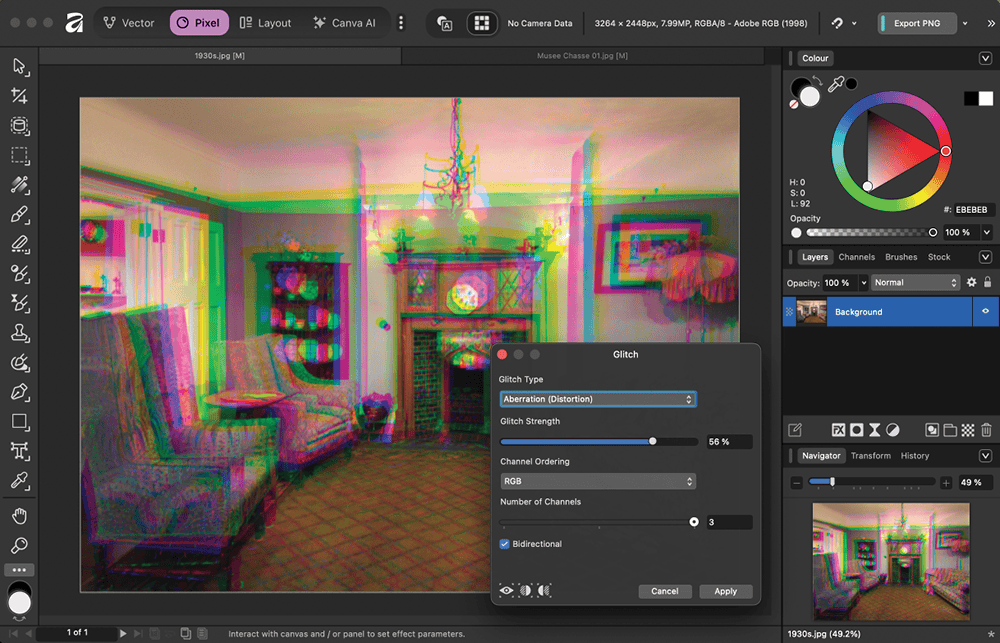
Glitch filter
The Glitch filter provides a wide range of fully customizable distortions, including Aberration, Shred, Slice, Waves, Scramble, and more. You can control the Strength and number of channels, as well as the option of making the distortion bidirectional (Figure 3).
Mirror filter
The Mirror filter allows you to set the number of mirrors, as well as both the input and output angles (Figure 4). You can drag around the canvas to see the Mirror effect change as you work, so no guesswork is required to get perfect results.

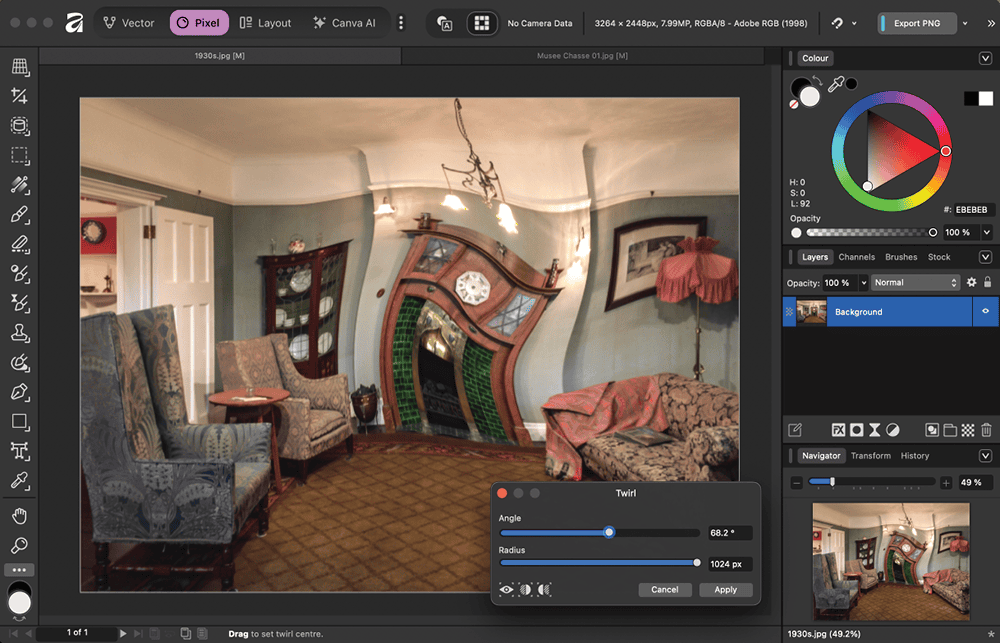
Twirl filter
Once again, Affinity improves on a native Photoshop filter by giving the Twirl filter a real-time, full preview (Figure 5). You can set both the angle and radius, plus you can drag the filter around the image to distort exactly the area you require. Again, the slider goes up to only 1024 pixels, but you can type a larger value in the number field.
Shear filter
The Photoshop Shear filter hasn’t been updated in decades, which means you must still work with a tiny thumbnail preview. The Affinity version of Shear gives you a full-size preview directly on the artwork, as well as enables vertical and horizontal distortion (Figure 6).

Lighting Filters
Photoshop used to include a sophisticated Lighting filter before the removal of its 3D capability. Affinity provides almost that same functionality, again directly on the canvas (Figure 7).
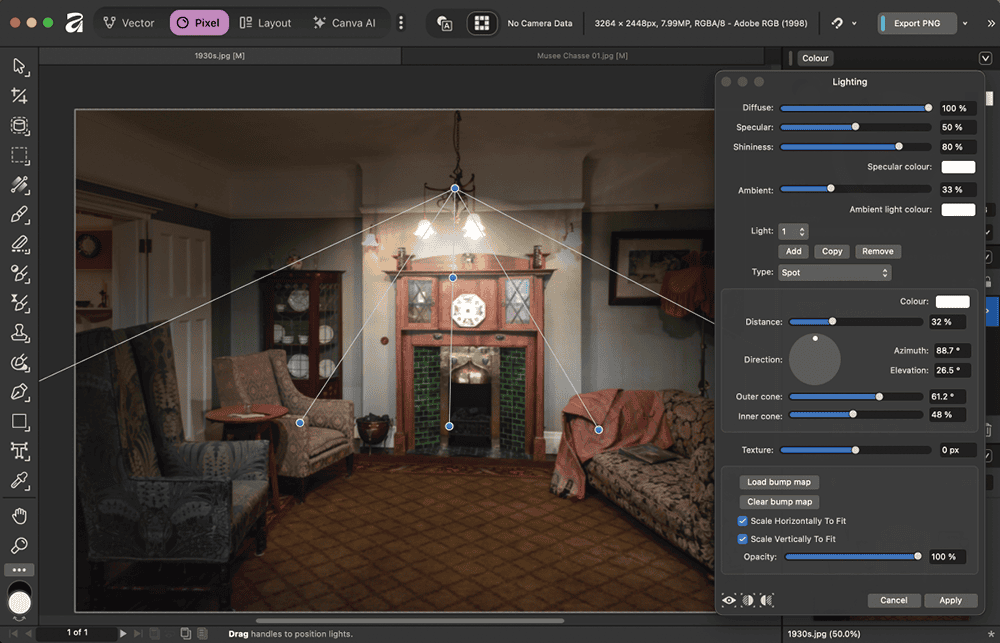
You can create multiple light sources, adjusting the inner and outer cones, direction, distance, and elevation via head-up controls on the image, or through sliders and numerical values if you prefer. You can also select Spot, Directional, or Point light sources; the latter is a great way to make a simple glow with immediate real-time feedback.
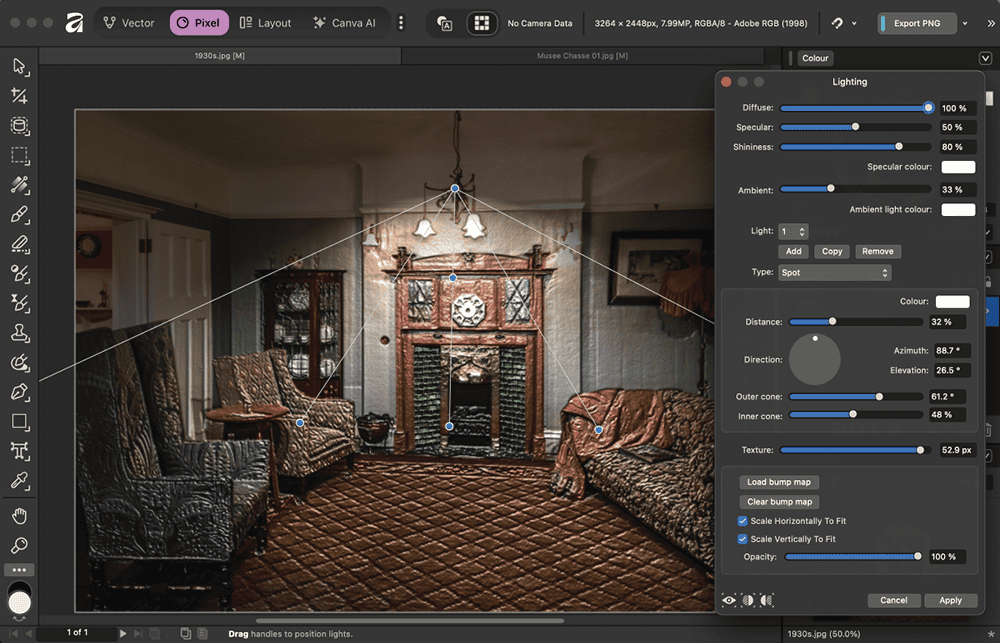
Need a bit of texture? You can choose to load a Bump Map to your lighting effect, but for a quick embossing effect, use the Texture slider. Dragging the slider gives a real-time view of the effect, as seen in Figure 8.
Blur Filters
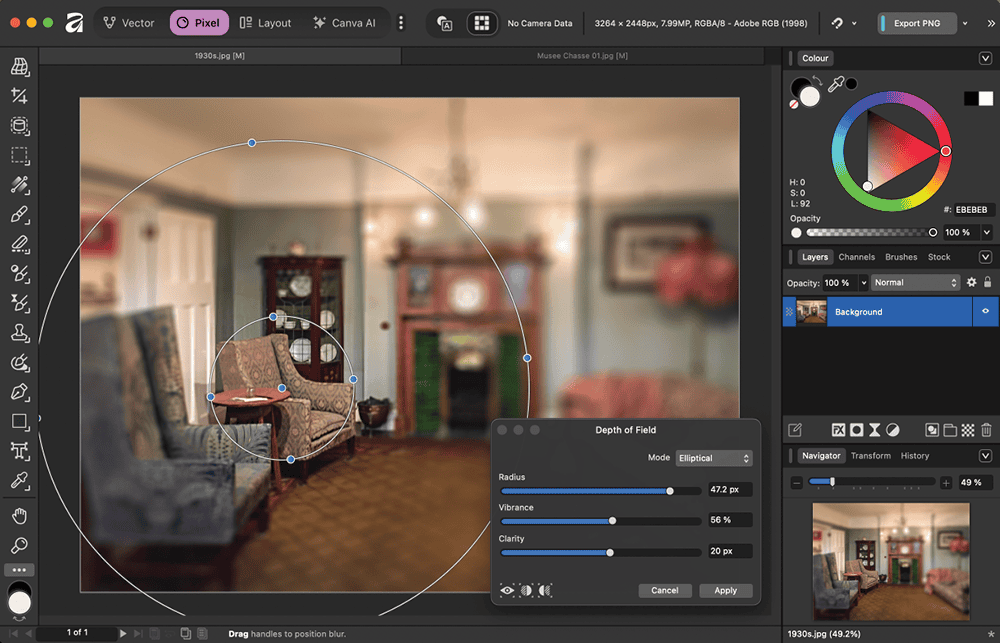
Photoshop now includes a range of sophisticated Blur filters—Field Blur, Iris Blur, Tilt-Shift, Path Blur, and Spin Blur—but these appear in a separate dialog box in the Blur Gallery.
Affinity provides direct, on-canvas versions of several of these blurs, the most interesting being the Depth Of Field Blur (Figure 9). Here you can set not only the blur’s radius but also adjust the result’s vibrance and clarity. Head-up controls, as well as sliders and numerical fields, enable you to fine-tune the result.
Color Filters
The Photoshop Pixelate filters either offer no preview (such as Color Halftone, for which you have to guess the pixel radius and individual color angles) or a take-it-or-leave it approach (such as Fragment and Facet, which offer no options).
Affinity improves on this approach with full-size, real-time previews. They appear under Pixel > Filters > Colors.
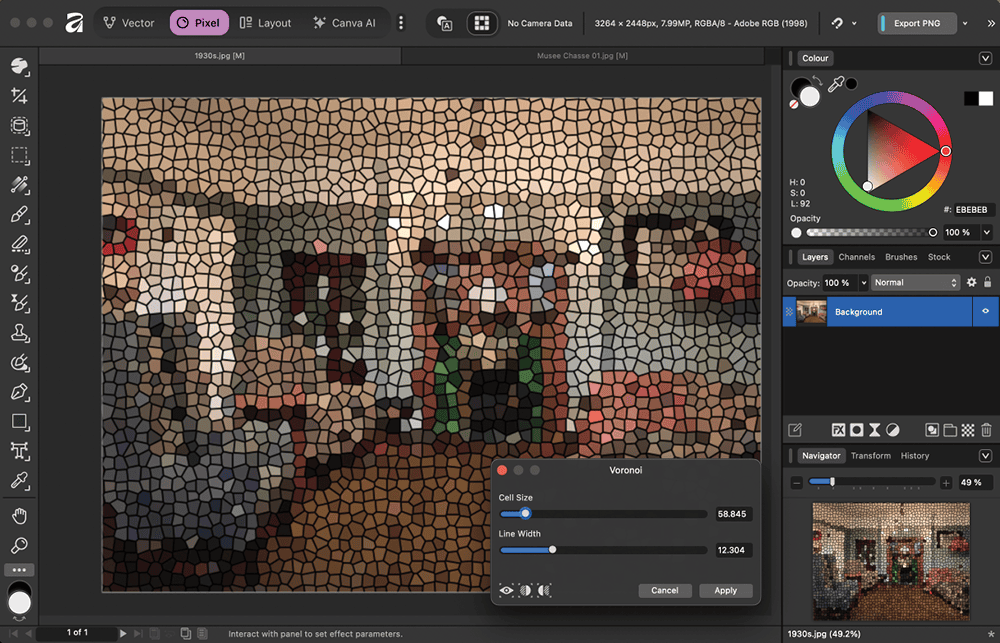
Voronoi filter
The Voronoi filter (Pixel > Filters > Colors > Voronoi) breaks an image up into irregular shapes, each filled with a solid color that’s an average of the colors in that location (Figure 10). As well as choosing the cell size, you can also set the width of the lines that divide the cells.
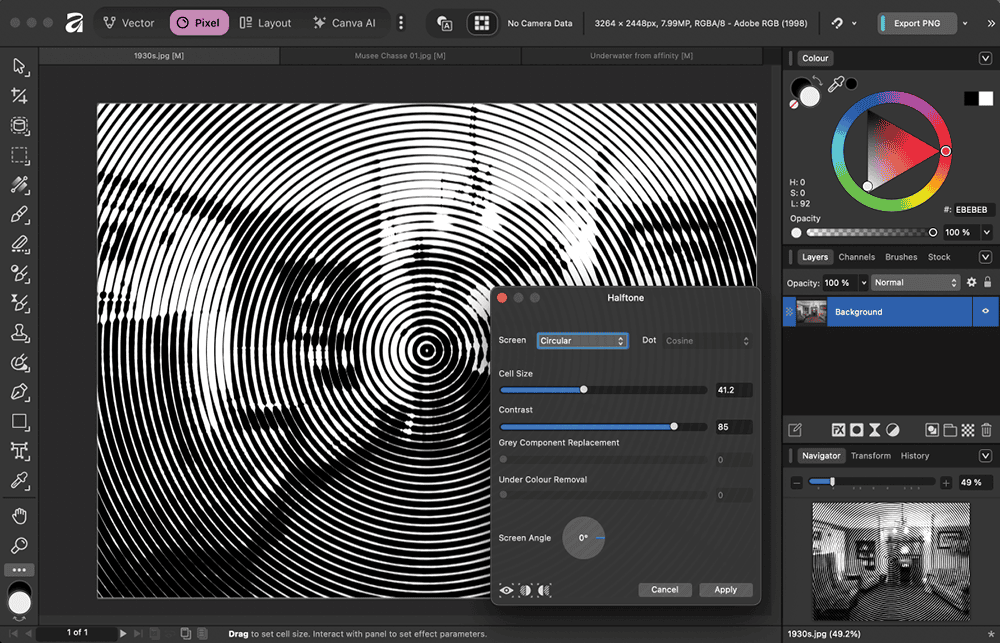
Halftone filter
With a full-size preview, the Affinity Halftone filter (Pixel > Filters > Colors > Halftone) lets you set the cell size with a simple slider (Figure 11). You can also adjust contrast, screen angle, and other parameters.

You can choose standard color halftones, or you can choose either line or circular (Figure 12) screens, both of which are monochrome.
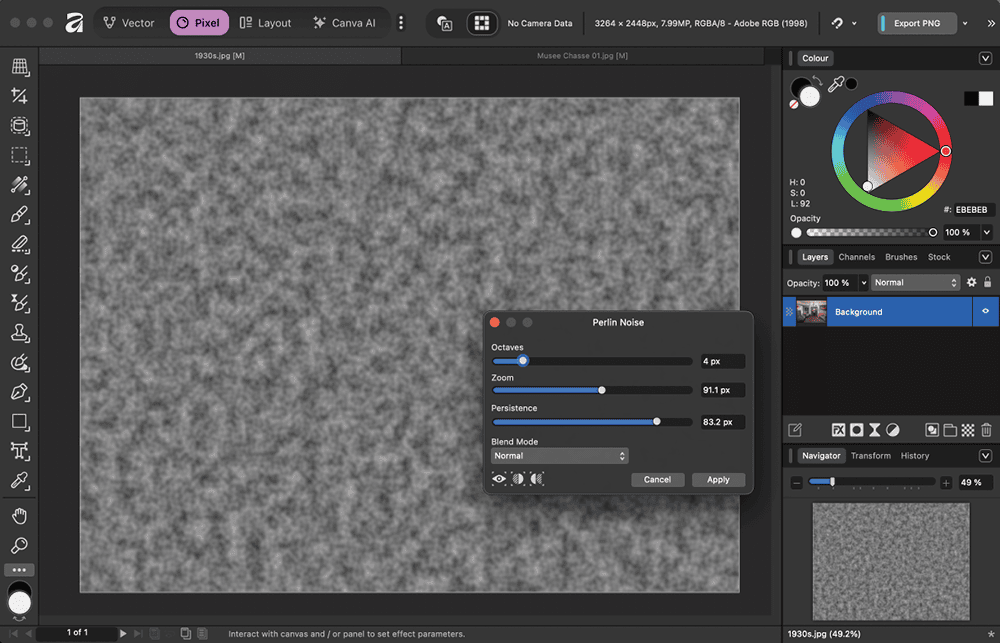
Making Clouds
The Photoshop Clouds filter is a one-shot effect, using the foreground and background colors to create a simple random pattern. With its Perlin Noise filter (Pixel > Filters > Noise > Perlin Noise; Figure 13), Affinity lets you do something similar but see exactly what you’re going to get. Dragging the Octaves and Persistence sliders lets you change the complexity of the texture; most useful of all is the Zoom slider, which allows you to set its scale.
Free to Try
Although Affinity being free for all may not be enough to tempt diehard Photoshop users from their favorite image editor entirely, the fact that many Affinity filters and effects perform better with more flexibility than their Photoshop counterparts is enticing. The real-time, full-size previews and additional customizations are worth a look.
And because Affinity can both read and write native Photoshop documents, you can come and go as you please, using the best of both applications to create and fine-tune special effects and distortions for your images.
Commenting is easier and faster when you're logged in!

Recommended for you
Creating Colored QR Codes During a Data Merge
How to use transparency effects to make QR codes with any color, including gradi...

How to Copy Transparency Effects Between Groups
If you’re a regular reader of InDesignSecrets, you probably know I enjoy c...

Creating Fluffy Text with AI in Photoshop
How to create a fun text effect that looks like fluffy fur on a grass background...