


This article appears in Issue 51 of CreativePro Magazine.
Vectorizer.ai is a fast and easy-to-use web-based tool designed to quickly transform raster images into high-quality vector graphics. You might be wondering: What’s the point? Why not just use the Image Trace tool built into Illustrator or one of many other similar apps? Vectorizer.ai offers several innovative options that make it well worth exploring, such as a unique visual interface for reducing and combining colors, some super useful grouping options, and an excellent outline mode for creating quick cutting files. Let’s take a look at what sets Vectorizer.ai apart from the crowd.
Convenience, Speed, and Usability
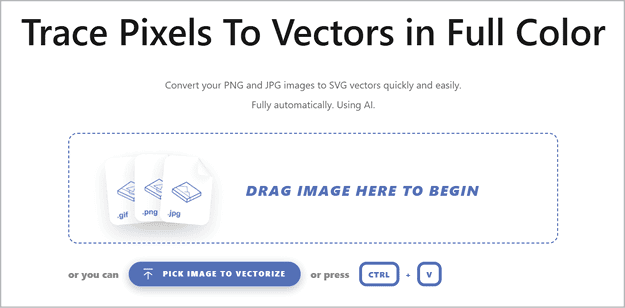
Vectorizer.ai is entirely web-based (Figure 1), so there’s never anything to install, update, or configure. Just open the site, upload your image, and start vectorizing instantly. You can even paste in an image, making it convenient for working on the fly from your cloud storage on any device.
Unlike with many other tools, you don’t need to choose or set any options before uploading your image and seeing the traced preview. Rest assured, however, that you can choose specific download settings and details of the trace before you download the final file.
Once you get vectorizing, one of the first things you’ll notice is how quickly the tool delivers a preview result. Even with the more complex images that I tested, results were super speedy, with simple traces being nearly instant. Because everything is processed remotely using high-performance GPUs and multi-core CPUs, the tool generates results in seconds. This is great news if you happen to be working on a modest machine without a powerful processor or graphics card.
Workflow Overview
The Vectorizer.ai workflow is a bit different, especially compared to more complex desktop options like the image tracing in Adobe Illustrator or Inkscape. The seeming lack of options up front may throw you off at first, but once you get into the flow, the process is very smooth and user-friendly. You’ll find you have just as many controls and options as other tools, but they are organized in a more easily digestible way with a minimalist, modern interface.
Vectorizer.ai currently supports JPEG, PNG, WEBP, BMP, and GIF as input files up to 3 megapixels and 30MB in size. 32-bit ARGB transparency, both full and partial, is also fully supported. You cannot currently use the tool to remove an image background, so use another application to alter or remove the background first if necessary for your specific image.
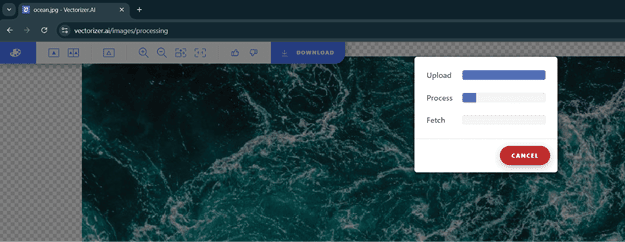
After you upload an image, Vectorizer.ai provides a progress screen that shows the live status of the trace result (Figure 2).
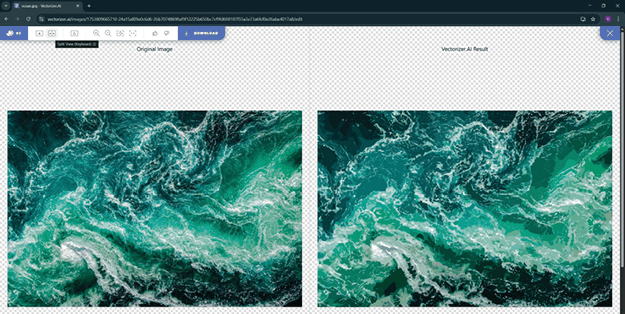
When the image finishes processing, you’ll see a zoomable preview of the final result and a toolbar with a few options for changing the preview setup, providing feedback on the trace, and entering the color Palette interface (Figure 3).
Standout Features and Output Options
If you’ve ever been frustrated with the tedious process of trying to understand and choose the correct settings while using other image trace tools, you’ll appreciate the refreshingly simple interface and very clear, concise documentation of Vectorizer.ai. It offers several options that are often hidden, overly complicated, or entirely missing in other vectorizing apps. Let me highlight a few of my favorite features.
Visual palette editor
Easily my favorite feature when testing Vectorizer.ai was the interactive Palette Preview interface (Figure 4).
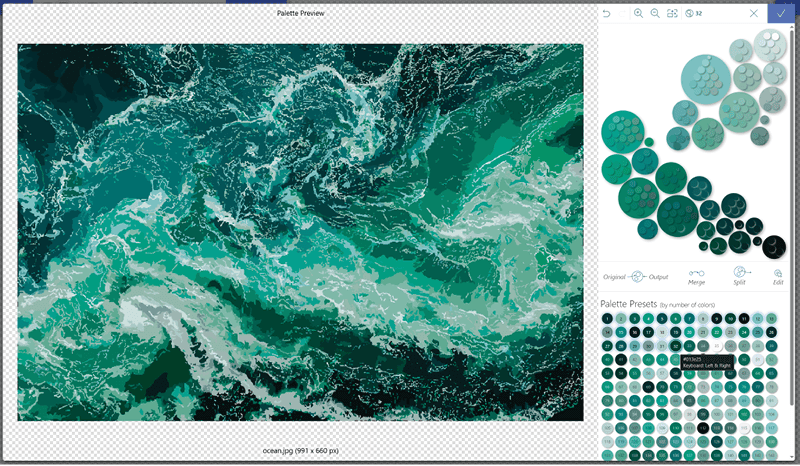
From the Palette Presets section, you can choose the exact number of colors you’d like the final file to have, plus the full-featured color picker gives you full control over which colors get merged or split, as well as the ability to edit individual colors or groups. To preview where certain colors or color groups appear in your traced result, click them (Figure 5).
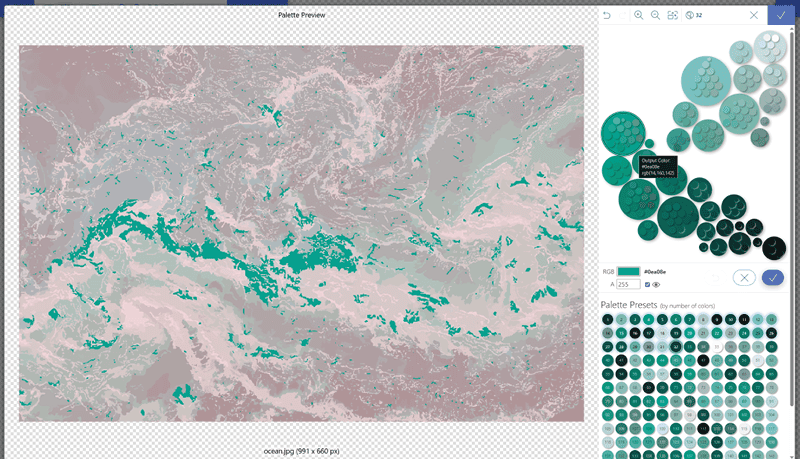
The controls in this section were super intuitive, with easy dragging of color swatches to different groups and instant updates on the preview of the traced image. The Undo and Redo controls make experimenting with color edits painless, because you can easily return to previous configurations if you make changes that don’t quite work.
Although the preview may appear pixelated, this is not representative of the actual image trace result. The lower resolution enables Vectorizer.ai to provide instant previews of new palettes while you experiment with color combinations and reductions—no waiting for the image to be reprocessed into vector paths.
Once you have a palette you are happy with, click the blue check button (top right) to accept the palette changes, and the image will be retraced with your new colors applied.
File export options
After your colors are sorted, click the Download button (top) to access many options to customize your final vector output (Figure 6).
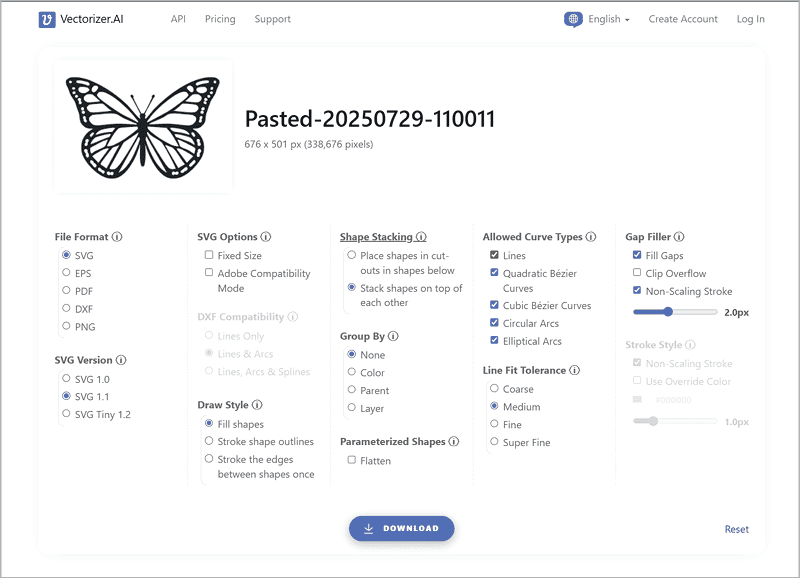
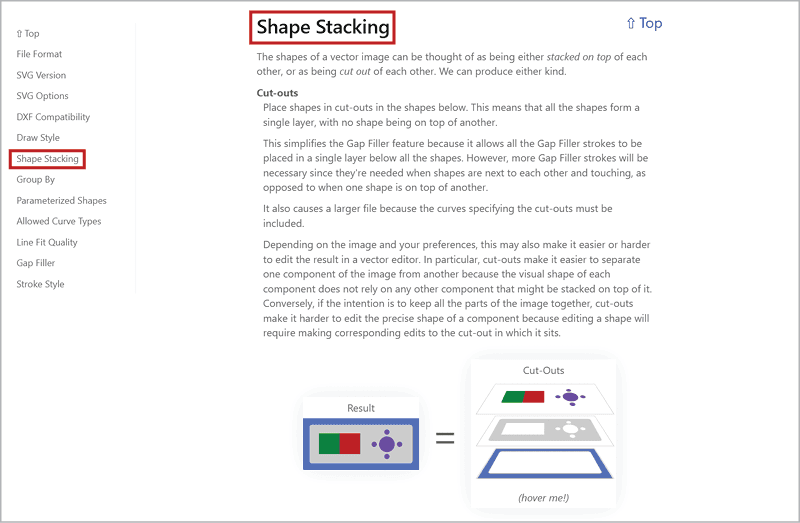
If you need help or want to learn more about any of the output options, click the title of the section or the small Info icon, and you will be taken directly to the documentation. Each section includes handy visual guides and clear explanations to help you determine the best settings for your use case, even if you’re new to vector conversions (Figure 7). Once you have the information you need to make your choice, clicking the Top shortcut will take you right back to your trace result so you can continue working.
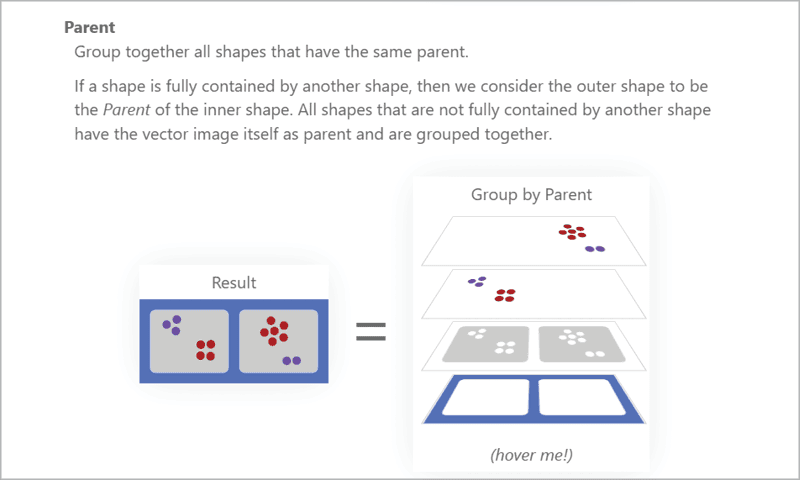
Grouping modes
Although the two stacking modes are fairly standard, the grouping modes offer some convenient options that are lacking in other tools, such as the ability to group the traced elements by color and the ability to group objects by parent element (Figure 8). When a shape is fully contained by another shape, for example, you can instruct Vectorizer.ai to group the spots or texture elements inside the parent shape automatically. This saves you the time and hassle of having to individually select each element if you need to move, scale, or edit the resulting vector file.
Parameterized shapes and symmetry detection
One of the more helpful features in Vectorizer.ai is the ability to identify certain parameterized shapes, such as circles, ellipses, rectangles, triangles, and stars, even when those shapes are rotated or modified to include rounded corners. This allows for more perfect geometry in your resulting trace, and depending on the export format you choose and the program you use to edit the vector files, easier editing of these shapes.
The tool also has built-in detection for symmetry and will attempt to model both mirrored and rotational symmetries in your images. To test the parameterized shape detection and symmetry modeling features, I uploaded a simple scene with star, rectangle, and ellipse shapes, as well as a perfectly symmetrical cloud icon.
When I opened the generated SVG file in Illustrator, the ellipse and rectangle shapes were fully recognized and labeled correctly in the Layers panel, which gave me access to Illustrator’s extra shape controls and corner widgets for easy editing (Figure 9). The rectangle with rounded corners and the randomly rotated ellipse were also properly detected.
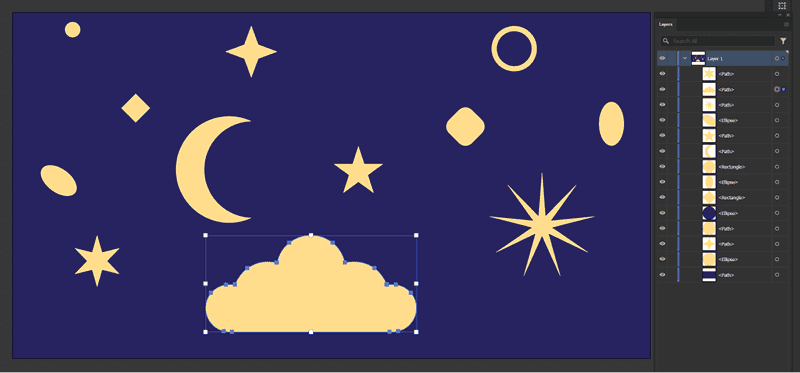
Although the star shapes did not get labeled as such in Illustrator or trigger the new star shape smart controls, the shapes themselves did come through with perfect geometry and symmetry. Finally, the symmetrical cloud icon came through with not only perfect geometry, but also perfectly symmetrical anchor points and paths, which would make editing this shape and creating variations much easier.
Stroke settings
When combined, the Stroke Style and Draw Style sections offer another time-saving set of options. I found both the ability to switch from filled shapes to stroked outlines and the ability to set the stroke width and color (Figure 10) very helpful. When tracing hand-drawn doodles or other images for practical one-color applications like vinyl cutting or laser engraving, these settings can definitely save you a few cleanup steps that you’d normally have to do manually in your vector graphics application.
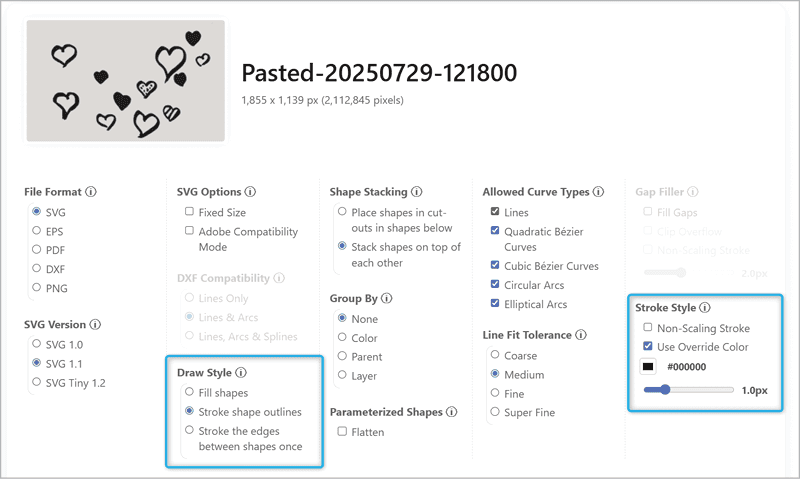
Although Vectorizer.ai supports non-scaling strokes, many Adobe apps, including Illustrator, do not officially support them. You can manually turn off the Non-Scaling Strokes option in the Stroke Style section, but as a nice bonus feature, Vectorizer.ai also offers the handy Adobe Compatibility mode for SVG files. Check this option in the SVG Options section to automatically make sure that your SVG output will be as compatible as possible with all of your Adobe applications—no need to remember which settings might cause issues or to manually adjust them.
Honorable mentions: Allowed Curve Types and Gap Filler
When it comes to the nitty-gritty details of your SVG output, you can get extremely specific by allowing or disallowing certain types of curves and defining exactly how to handle any gaps in the traced image results (Figure 11). Gap-filling in particular offers extremely granular control with four individual solutions to choose from and the ability to set the exact stroke width for the options that include a scalable stroke.

Testing the Tool and Pricing Options
Vectorizer.ai offers an Unlimited Web App plan for $9.99 USD per month for web app use. Those wishing to incorporate this technology in scripts, software, or more complicated workflows can choose from API plans, in which Vectorizer.ai also offers powerful integration options that allow for easy development of custom tools and workflows, perfect for high-volume vectorizing power users with specific output requirements.
If you’re interested in taking a test drive before you commit to a paid plan, the tool allows you to upload any image and view the tracing preview so you can see whether the trace quality will work for your project. You can also test all of the export options and download free vector files using any of the images in the provided examples gallery, which allows you to ensure compatibility with your vector editing software.
Overall, the speed and convenience of being able to vectorize images quickly on any computer combined with the unique features in Vectorizer.ai feel worth the price, especially if vectorization is a common part of your daily workflow. The robust Palette editing interface and the excellent recognition of geometry and symmetry stood out as impressive time-saving tools. Being able to accurately trace a design that includes polka dots or halftones could to save hours of cleanup work and be vital to meeting tight deadlines in production environments.
Commenting is easier and faster when you're logged in!

Recommended for you

Using Special Characters in Nested Styles
How to use Find/Change to grab a special character for Nested Styles in InDesign

The Digital Art Studio: Recoloring a Scan with Illustrator
How to recolor Illustrator images with a new color palette—and do it quickly.
Create Vector Graphics for Presentations with Vectorizer.ai
Turn raster graphics into vector files that scale beautifully in your presentati...