
Using the Pathfinder Commands in InDesign
These often-overlooked tools can yield surprising results

This article appears in Issue 17 of InDesign Magazine.
Every good chef seems to have an assortment of little gizmos and gadgets, designed for specific tasks, that find their way to the back of a drawer and are often forgotten about. Like those special tools, the Pathfinder commands in InDesign are often either forgotten about, or considered too sophisticated for use by non-artistic types. Yet these series of icons on the Pathfinder panel— can slice and dice and combine paths in unique ways that add vastly to the repertoire of the InDesign chef. When combined with InDesign’s other incredible features for mixing up text and graphics, Pathfinder can help you further push the creative edge.
Like Illustrator, each InDesign Pathfinder option creates compound paths in different combinations, often creating a “cookie-cutter” effect. As for their basic operations, we’ve all seen countless examples of simple shapes illustrating the effects, such as those shown on left (Figure 1). Admittedly, these may not be all that appetizing, and most of us rather move on to another menu item. But when these functions are applied more creatively to objects including images and text, the results can be pleasantly surprising.
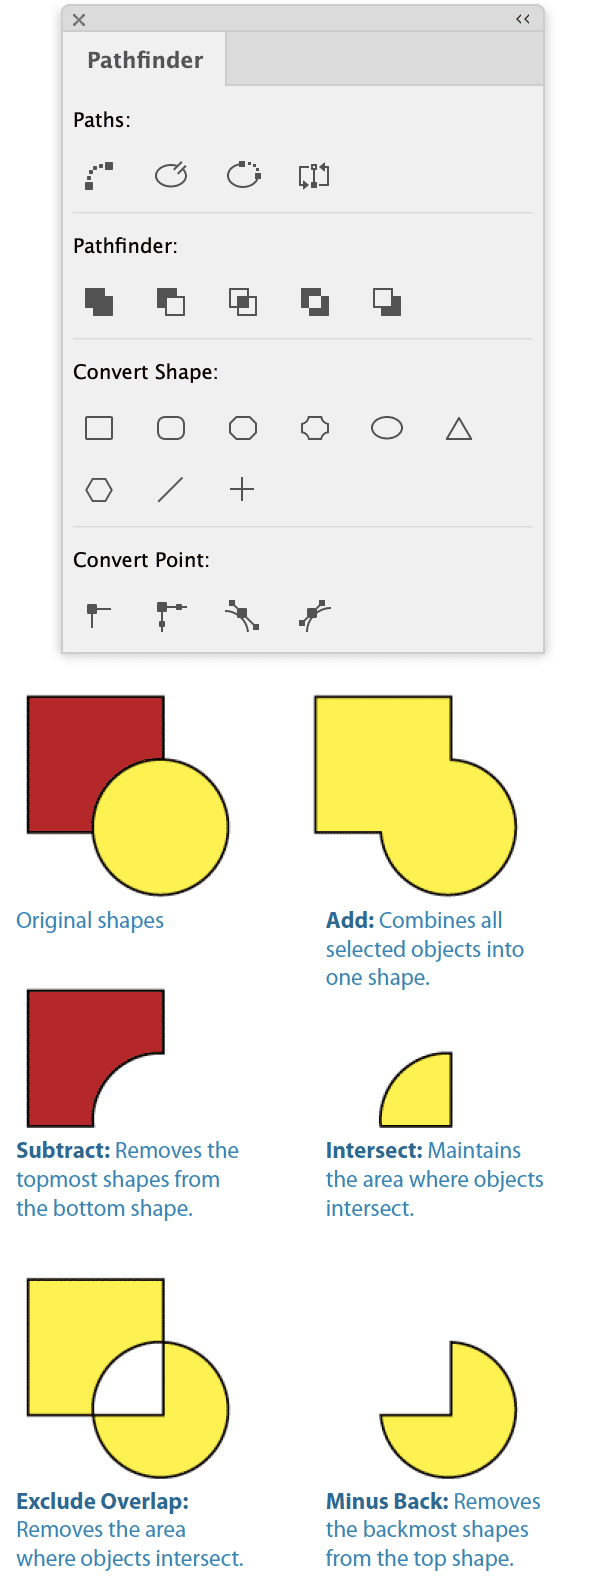
Figure 1: The basic Pathfinder operations.
keep in mind is that stacking order matters, since the commands work on a topmost or backmost item in some pre-defined way. Applying the Pathfinder commands will usually cause the object to take on the attributes of the topmost item, such as fill and stroke. The only exception is the Subtract command, where the final shape takes on the attributes of the backmost item. As for the content, it depends on the nature of the selected frames. When Pathfinder commands are applied to text frames, only the shape of the frame is usually affected, not the text itself. In order to alter the text characters, first convert the text outlines (Type > Create Outlines), then apply one of the Pathfinder commands. If a frame contains an image, it may be deleted, depending on the selection and the command, thus making it all the more useful to create a copy of your selected objects before proceeding. As mentioned, you can apply Pathfinder to commands to multiple shapes, but they do not work when the topmost items are grouped. They also do not work with open paths, such as lines. Instead of a line, though, you can use a really thin rectangle, with a height as small as p.0001. Experienced creative pros who have long been familiar with Pathfinder commands in Illustrator may wonder about the difference in using these commands in one application vs. the other. It’s true that the commands’ basic operations work the same in both programs, but Pathfinder commands in InDesign let you use these powerful tools in conjunction with InDesign’s other capabilities for combining text and graphics in powerful ways. On the other hand, in Illustrator, the result of applying Pathfinder commands is a live, editable object that maintains each separate object until you click the Expand button. In InDesign, the objects are always converted to a new shape and are no longer editable individually. Following you will find two of my favorite recipes that use Pathfinder commands Add and Subtract. Use them to mix up your own ingredients, and may they inspire you to experiment on your own with other Pathfinder commands to whip up an abundance of delectable designs!
Setting Text at an Angle
It’s easy to rotate a text frame to any angle. But what if you want to maintain the frame position and rotate the text inside the frame? Pathfinder to the rescue! First, draw the frame that will be used to hold the text; it need not be a text frame. Next, draw a small text frame and type a small amount of text in it so you can see the angle at which it will appear. Position the small text frame so it is on top of the first text frame. Rotate it to the desired angle. 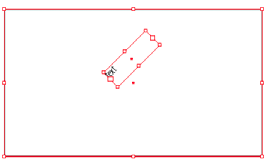 Make sure the small, rotated text frame appears completely inside the larger frame. Select both shapes, and click on the Pathfinder Add icon. Voila! Now you can place or type any text you wish.
 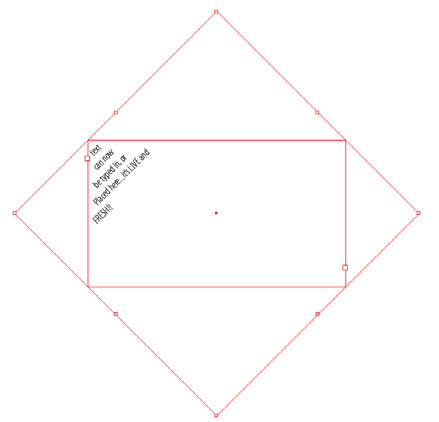 You can resize or reshape the containing text frame using the Direct Selection tool.
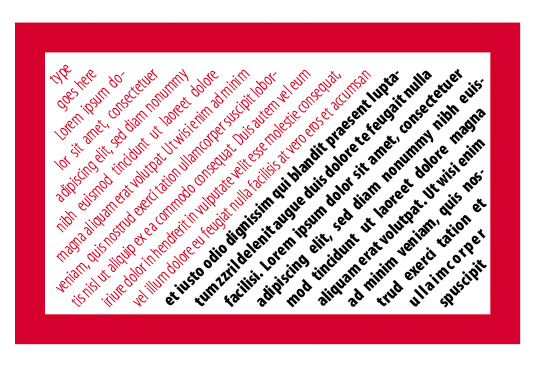
Cookie-Cutters on Steroids
One of the most interesting and powerful Pathfinder commands is Subtract, which removes the topmost objects from the back object. To create the examples shown here, we used two slightly different approaches. To create the first example, upper left, make a series of lines using narrow rectangles and form them in the pattern of a brick wall. Position the brick wall pattern above the illustration. Select both the pattern and the illustration and apply the Subtract command. The image can be repositioned within the brick wall pattern by selecting it with the Direct Selection tool. 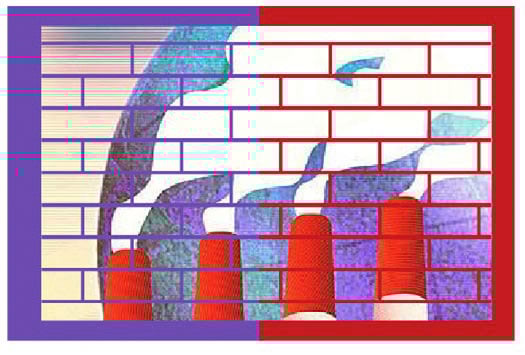 To create the sample on below, convert the text you’ll be using to outlines (Shift-Command/Ctrl-O). Move the outlines on top of a rectangle filled with color, in this case yellow, then apply the Subtract command. Position the resulting shape above images as desired and the images will show inside the text outlines.
  Tip: When using multiple lines of text outlines, select each line using the Direct Selection tool and Shift key before applying Pathfinder commands.
Commenting is easier and faster when you're logged in!

Recommended for you

What PowerPoint for the Mac Can Do (That the PC Can’t)
The top 5 advantages that the Mac version of PowerPoint has over its Windows cou...

Scanning Around With Gene: Books That Fit in a Purse
When I was growing up, one of the staples of the supermarket checkout line was a...

dot-font: Working with the Logo
dot-font was a collection of short articles written by editor and typographer Jo...