
Live Paint in Illustrator
Illustrator’s Live Paint feature transforms the work of coloring graphics into play.

This article appears in Issue 8 of CreativePro Magazine.
I love coloring books. I find it very satisfying—even therapeutic—to fill in areas of a line drawing with color, bringing it to life.
You might not know that you can do the same thing with Adobe Illustrator! Its Live Paint feature lets you color your artwork in a way that cleverly recognizes any area you want to paint, including strokes, open paths, and areas created by overlaps.
Tip: Live Paint is not unlike the Shape Builder tool. For more info on that tool, see “Using Illustrator’s Shape Builder Tool” on CreativePro.com.
Ready to discover everything Live Paint can do?
Starting Out with Live Paint
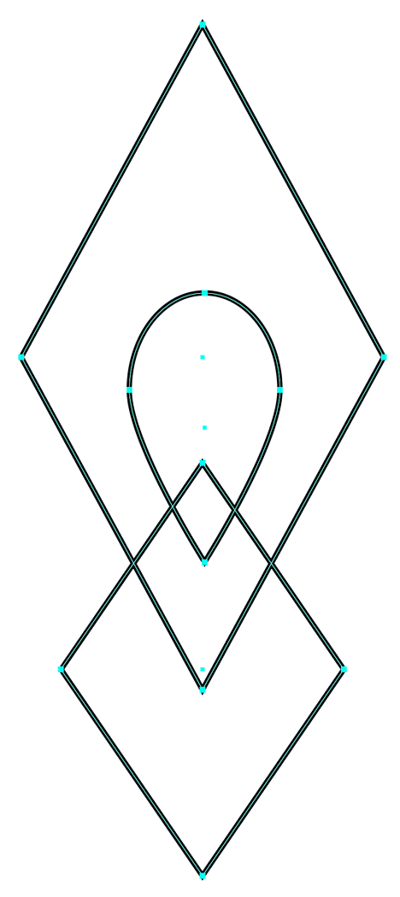
Figure 1. Overlapping shapes…
To get started with Live Paint, first draw a few overlapping shapes on your artboard with your tool of choice and, if you wish, apply fills and strokes. For my example, I created three unfilled, stroked shapes (Figure 1), then selected Object > Repeat > Radial and set the value in the Control Bar to 12 to make a geometric design (Figure 2).

Figure 2. …create the basis of a geometric design.
Now select the Live Paint Bucket tool from the Toolbar. Hold down the Shape Builder tool, and you’ll find two Live Paint tool choices—Live Paint Bucket and Live Paint Selection Tool—directly underneath (Figure 3). The default key shortcut for the Live Paint Bucket is K.
Live Paint works only on regular and compound paths. Select the shapes you drew earlier and click them with the Live Paint Bucket tool to convert them into a Live Paint group (more about this special group below). A Radial Repeat design like the one I drew needs to be expanded first, as will live text and shapes in a clipping mask. For a primer on expanding artwork, see Monika Gause’s article in Issue #7. Illustrator displays a warning when you click shapes that it cannot convert into a Live Paint group (Figure 4).
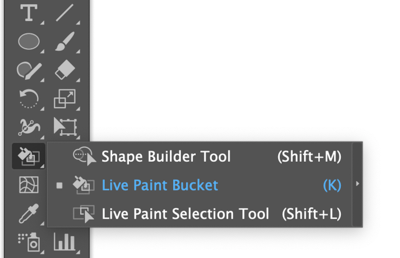
Figure 3. Access the Live Paint Bucket tool in the Toolbar.
Click OK, and choose Object > Expand to enable Live Paint to work.
You can also turn a group of paths into a Live Paint group by using the keyboard shortcut Command+Option+X/Ctrl+Alt+X, or choosing Object > Live Paint > Make.
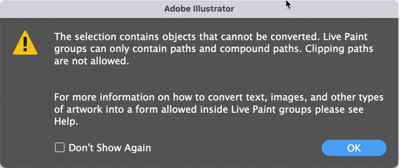
Figure 4. Illustrator will warn you when you ask it to create a Live Paint group, which it can do only with regular and compound paths.
Coloring the Live Paint Group: Fills and Strokes
As you hover over your newly created Live Paint group, any region that is recognized by the Live Paint Bucket is outlined in red by default. You can change the outline color and width by double-clicking the tool to bring up the Live Paint Options dialog box. The little pointer in the upper-left corner of the Live Paint cursor—not the paint bucket—indicates which area you’re about to fill (Figure 5).

Figure 5. A Live Paint group, outlined by default in red
Above the pointer is the currently active color swatch, as well as the swatches to either side of it. You can use the arrow keys on your keyboard to navigate among the swatches. Click once in an outlined region to fill it with the center swatch color.
Move your cursor over different parts of your art, and enjoy the ease of clicking and filling discrete areas, just like you would in a coloring book. You can manually select fills from the Swatches panel, including patterns and gradients, and they will be loaded into the Live Paint Bucket as fill colors.
Coloring and experimenting with the filled areas of this geometric pattern took just a couple of minutes—so much less tedious than it might be with other methods! (Figure 6)

Figure 6. Using Live Paint to color this complex pattern was a snap.
When you use Live Paint for the first time, it will highlight fills but not strokes. To change this behavior, hold down the Shift key.
The cursor will change into a paintbrush. Hover the brush tip precisely over the edge of a shape in the Live Paint group. The path will become highlighted, and you can click to apply a stroke.
Just like with Live Paint fills, you can navigate among color swatches with the arrow keys and apply them to your strokes. Your most recently selected stroke weight will be applied by default; change this setting in the Stroke panel (Window > Stroke), in the Properties panel, or in the Control Bar.
Live Paint Bucket Options, Tips, and Techniques
Double-click the Live Paint bucket tool or press Return/Enter while it’s selected to bring up the Live Paint Bucket Options dialog box (Figure 7). This is where you can control whether to paint fills, strokes, or both, and whether to show the color swatch preview above the cursor. As mentioned earlier, this is also where you can change the highlight color for Live Paint strokes and fills. The Highlight Width applies to fills; strokes are always highlighted with a 1 pt line.
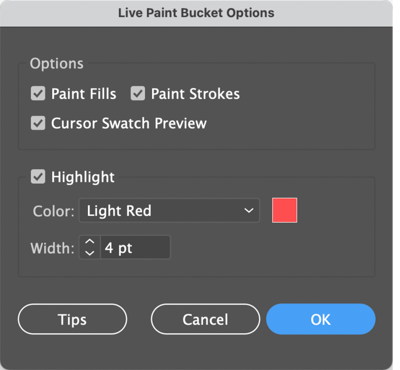
Figure 7. The Live Paint Bucket Options dialog box
One of Live Paint’s unique features is its ability to color artwork that has gaps. Gaps can be a deliberate part of the drawing style, or accidental. While any open path in Illustrator can have a fill color, Live Paint looks for completely enclosed or nearly enclosed areas to fill. (A completely enclosed area created by two open paths is valid.) Select a Live Paint group with gaps and choose Object > Live Paint > Gap Options.
Gap detection is on by default, and you can specify what size gaps Live Paint should recognize. Experiment with the options; Preview is enabled by default, and gaps are shown in the specified color.
I set the paint to stop at Large Gaps and was able to color this entire flower that I sketched loosely with the Pencil tool using the Live Paint Bucket (Figure 8). For the large outer petals, Live Paint recognized five separate areas to fill, detecting the gaps between the three at the bottom (Figure 9).
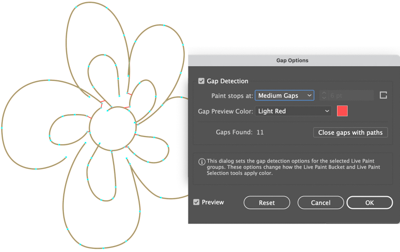
Figure 8. By adjusting the gap options, you can use Live Paint to color areas of your artwork without having to close the paths.

Figure 9. The filled artwork
Live Paint Selection Tool
Once you have created a Live Paint group, you can target any of its elements individually without changing their fill by using the Live Paint Selection tool (Figure 10). It’s underneath the Live Paint Bucket in the Toolbar, and you can activate it with the default keystroke Shift+L.

Figure 10. The Live Paint Selection tool, with its special cursor shown on the right
This tool makes it easy to select multiple areas or strokes in a Live Paint group so you can manually apply fills and strokes. Click individual Live Paint elements successively while holding down Shift, or drag a marquee across them.
Illustrator refers to filled areas of a Live Paint group as faces and to the paths as edges. Double-click a face with this tool to select all contiguous faces that are not separated by a painted edge (easily seen when you have filled adjacent areas using Gap Detection). And here’s a neat trick: Triple-click a face to select all faces with the same color in the Live Paint group, even if they’re not adjacent.
Press Enter when the Live Paint Selection tool is active, or double-click it to show options similar to those of the Live Paint Bucket. I unchecked Select Fills to easily target the outer edges of my geometric design, and once selected—as indicated by the gray screened overlays (Figure 11)—I increased the stroke weight to give my design a nice, heavy outer outline (Figure 12).

Figure 11. Selecting the outer edges of your Live Paint group…

Figure 12. … can easily let you adjust their stroke weight.
Special Features of Live Paint
Here are a few additional things to keep in mind when working with Live Paint.
- When you create a Live Paint group, Illustrator treats it in a special way. The Layers panel (Window > Layers) will display a group labeled “Live Paint” (you can rename it). Within that group, you will find each of your original paths.
- You can work with a Live Paint group even if it’s deselected. Try this: Click a blank spot on your artboard to deselect the group, then hover over or click it with the Live Paint Bucket tool—magic!
- When selecting an entire Live Paint group, you can apply transparency, use Recolor Artwork, apply certain effects such as distortions, or add new fills and strokes with the Appearance panel. However, these features won’t work on individual paths, faces, or edges selected within the Live Paint group.
- When you move, resize, or edit a selected path within the group the Live Painted fills and strokes will adjust where possible (Figure 13). Use the Direct Selection tool to access individual shapes within the group. Moving one shape over another for the first time within a Live Paint group creates new faces and edges that the Live Paint tools will recognize.

Figure 13. The intersection of these live-painted circles adjusted automatically as I moved them apart with the Direct Selection tool. Moving the circles completely apart will eliminate the intersection shape while retaining the Live Paint group.
- When moving shapes apart you may clear regions that were created by overlaps with other paths. In this case, moving the shape back won’t automatically restore the previous appearance; you must use Undo.
- Merge two Live Paint groups by choosing Object > Live Paint > Merge. Illustrator will turn on gap detection for the new group and may close some gaps with new paths.
- Finally, you can release or expand a Live Paint group, under Object > Live Paint > Release or Expand. Releasing will change everything back into regular paths with no fill and a .5 pt black stroke, so you lose all the color fills and stroke settings that you live painted. Expanding a Live Paint group changes it into paths that retain the fills and strokes you applied, with each discrete area as its own shape.
Live Painting Is Fun!
Live Paint makes coloring your artwork fun. It’s reminiscent of using analog tools such as paint brushes and crayons.
Illustrator neatly keeps your fills within the lines, lets you change colors easily, and retains your ability to edit the original paths. Give live painting a try—and enjoy!
Commenting is easier and faster when you're logged in!

Recommended for you
How to Transform Effects While Drawing in Illustrator
Learn how to set up effects ahead of time, so that transformations occur automat...

Changing the Text Color Inside Multiple Table Cells in InDesign
So, you want to set the fill or stroke color of text inside a table cell? What a...

How Resolution Affects Image Proxy Quality
When working with images into your InDesign layouts, did you ever notice how som...