
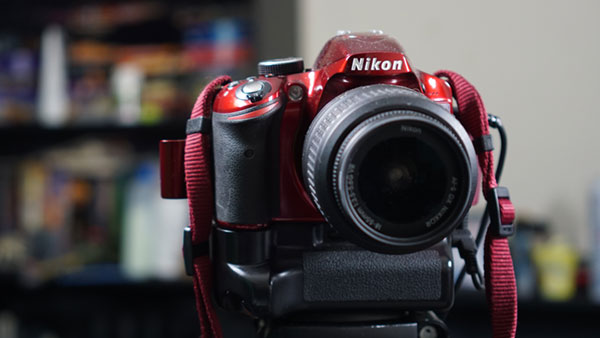
Getting into DSLR Video for the first time can feel a bit overwhelming. While having a background in photography can help, there are still some things you may not have anticipated having to deal with when making the shift to video. In this article I will cover some of the things that need to consider when shooting video with your DSLR camera for the first time.
Shooting in Manual Mode is a Must
If you’re going to be shooting DSLR Video shooting in manual mode is a must, since you’ll need control over the shutter speed, the aperture, and the ISO of your DSLR camera. Not only will this allow you to control the overall look of your video, but it is necessary in order to get smooth and consistent video footage that won’t problematic when editing later on.

For your shutter speed you will need to follow the 180 Rule, which essentially states that whatever your Frame Rate (24 FPS, 30 FPS, 60 FPS) happens to be, your shutter speed should be double that. In most cases you’ll be shooting in either 24 or 30 Frames Per Second (FPS), so you’ll need to set your shutter speed to about 1/50 or 1/60. This will give you smooth video. If you shoot at 60 FPS, then you’ll likely need a shutter speed of 1/125 for smooth video.
Choosing a Frame Rate
In the movie/video settings of your DSLR camera, you have the ability choose your Frame Rate. Frames are individual stills that make up the sequences of motion within video, think of it like drawings on a flip book. Twenty-four frames per second gives the look we associate with motion pictures and feature length films. Thirty frames per second is what we typically experience with broadcast television and seems a bit more fluid. If you intend to do fast-paced action sequences and potentially slow-motion when editing, you’ll want to shoot with a frame rate of 60 FPS. This gives you more frames to work with, thus a more fluid image when adjusting the time/rate of a sequence. If you tried to do this at a lower frame rate (and thus fewer frames to work with), the movements will feel jagged or jarring because of how drastic they are instead of smooth and seamless.
Setting Up Audio for Your Videos
While DSLR Cameras have come a long way, the built in audio quality is still lacking. There are several different types of solutions you can use to deal with this. You can use lavalier/lapel microphones that clip on to your clothing and run these directly into your camera, or you can use them with a digital recorder and sync your audio in post production. I prefer to use lapel microphones when self recording.
You can also use shotgun microphones, either mounted on top of the hot-shoe of your DSLR camera, or you can attach them to a boom microphone. Once again you have the option of running these directly to your camera or to a digital recorder. Shotgun microphones are ideal for shooting action or even interviews with multiple people, as well as conferences or performances where you don’t have access to the audio system of the event.
Also, do not leave you audio input levels for your camera set to Auto. You’ll need to go into the audio options in your camera and set the audio levels to Manual and see how they perform with each piece of audio equipment you plug in. Each microphone has its own way of handling audio gain. Make notes of what the appropriate settings are for each of your devices.
Auto Focus vs. Manual Focus
For shooting video most experienced shooters will tell you to use manual focus. If you have poor vision this can be a problem as you won’t be getting tack sharp video. I recommend using “manual auto” when focusing. Essentially when composing the shot you will utilize the auto focus. You’ll then switch to manual and determine how much you can push or pull the focus as a subject gets closer or further away. This means you will have a frame of reference and be able to keep the image as sharp as possible from the start. There are accessories you can get for camera to make this task easier such as a Follow Focus. A Follow Focus allows you to adjust the focus of your camera manually without having to put your hands on the focus ring directly, allowing for smoother focus pulling.
When shooting stationary subjects you can rely completely on auto focus, and if your subject is a person who is sitting still it is better to lock the focus so their movements don’t interfere with the look of the video overall by causing the focus to shift. When shooting action you can take advantage of features like Continuous Focus and Focus Tracking. These features are a bit more advanced and may not be available in some entry level DSLR Video Cameras.
Memory Cards
Choosing quality memory cards for your images is important. Trying to get the cheapest cards possible puts you in a position where you might end up with corrupted image files you can’t open, or you may miss a shot because the camera can’t write the data to the card quickly enough.
The marketing used with memory cards can make it difficult to choose the right one. I use quality brands like Lexar because they are used by photographers who shoot high end sporting events for a living. There are other great brands out there as well but this is my preference and recommendation. If you still need something on a budget, my next recommendation would be Transcend.
Try to use memory cards are Class 10, these cards have faster speeds and will be more reliable when shooting video. If you shoot video for long periods of time consider getting 32GB or 64GB cards as a minimum, with a speed of 600x or 1000x. If you intend to shoot 4K video and your camera is capable of it, consider getting a 128GB memory card with a speed of 2000x, you can use a 64GB 1000x as a minimum or entry to 4K video.
Some Final Thoughts for New DSLR Video Shooters
Transitioning from photography to DSLR video, doesn’t have to be overwhelming or difficult. These tips will help you with the basics that don’t necessarily carry over from photography. If you understand composition, lighting, and the exposure triangle, then the only thing left to learn that hasn’t been mentioned here is video editing. I’ve actually covered some basic information on that to help you get started with video editing.
The best way to become good at shooting video, is to shoot as many videos in as many situations as possible. If you have questions, feel free to reach out in the comments section.
This article was last modified on August 28, 2015
This article was first published on August 28, 2015
Commenting is easier and faster when you're logged in!

Recommended for you

The Photographer’s Guide to Copyright
PhotoShelter offers several free, informative guides for photographers on a wide...
Scanning Around With Gene: The Pioneering Look Magazine
Even if you didn’t read Life magazine when it was in print, you’ve p...
InDesign How-to Video: How to View Extra Image Information
In this week’s InDesignSecrets video, Anne-Marie Concepción shows us how to view...