
Objects in Affinity Designer, like all vector artwork, have two fundamental formatting attributes: fill and stroke. The stroke is the outline around the perimeter. You can control all aspects of an object’s stroke using the Stroke panel. And if you’re an Adobe Illustrator user, this will all be very familiar to you.
Aligning Strokes: Centered, Inside, or Outside
By default, a stroke is centered on the path of your object. You can change this, using the Align setting, to be either inside or outside the object instead. 
Joins: Rounded, Beveled, or Mitered
If your stroke is aligned to the outside your object, then you have a choice of what happens at the corners. Again, there are three options: joins can be rounded, beveled, or mitered (squared off). With mitered joins you can set the miter limit. This is how far the stroke is allowed to stick out at the join. In rectangular objects, it has no effect. But when your object has sharp angles, you will have to increase the Miter value to prevent the stroke from being sheared off (appearing beveled) at the joins. 
End Caps
If your path is open rather than closed – in other words, if the starting point and end point are not joined together – then you can decide how you want the strokes to appear at the ends. Using the Cap control you can set them to be rounded, terminating at the end of the path, or extending beyond the path by the width of the stroke. 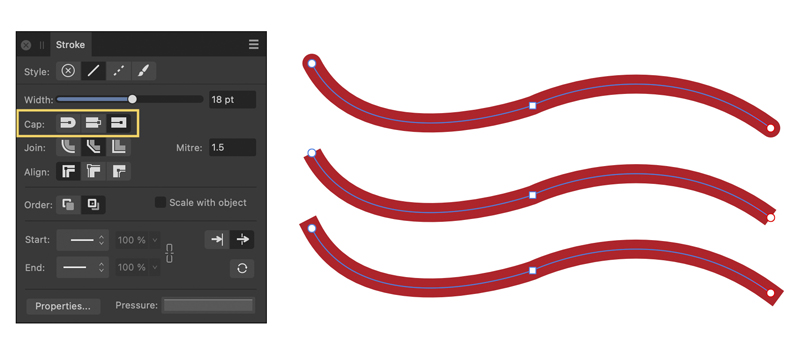
Arrowheads
Arrows can be added to either the start or the end of any path. Click the icon next to the words
Start and End, and you’ll see a range of 25 different arrowheads to choose from – including one featuring the Affinity logo. 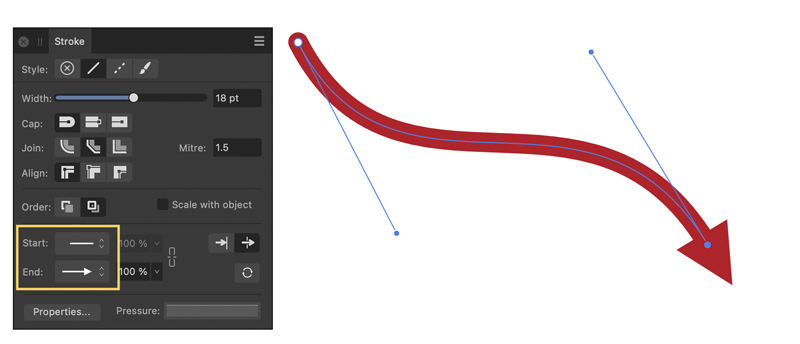 Use the scales to the right of the arrow type to choose how large the arrowhead should be, relative to the size of the stroke. A simple slider allows you to set the size from 25%–500%.
 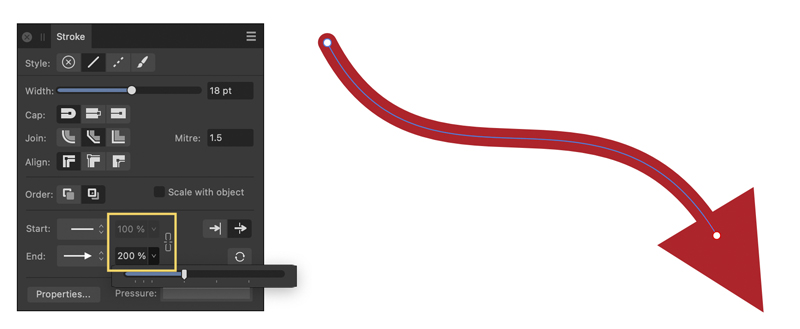 There are also buttons to place the arrow within the line or at the end of the line, and to swap the arrow head and tail.
Pressure Controls
At the bottom of the Stroke panel is the Pressure section, which features a graph pop-up on the right and a Properties button on the left. Click the Properties button and you’ll see this dialog box, which allows you to set the brush width, size variance, and opacity variance, with sliders and a Pressure graph. Here, I’ve chosen a large Size Variance value. The preview gives an indication of the effect. 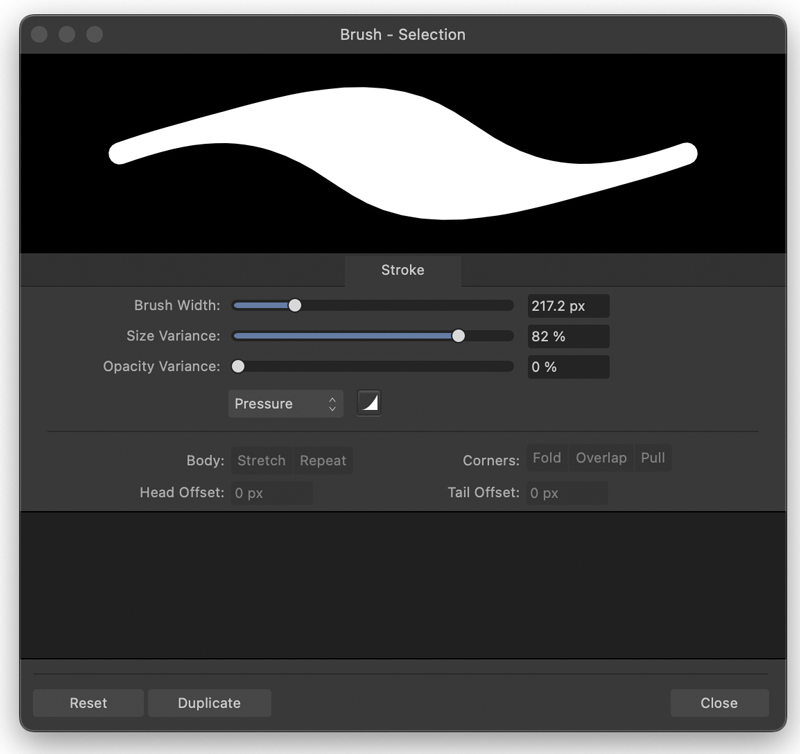 When you open the Pressure graph, you can drag to set points on the curve: the shape you draw will be the profile of the stroke that’s applied to your selected object. This makes it easy to set a variable stroke width of any shape.
Opacity
Setting the Pressure control just to Opacity allows you to fade the object along the stroke. You can also click and drag in the middle of the Pressure graph to add more than just a simple fade. 
Dots and Dashes
Choose the Dashed line option, and your stroke will become dotted rather than solid. By default, all these dots will be joined together.  At the bottom of the Stroke panel are four numerical fields that let you type in the size of the dot and the space that follows it. Setting the Dash to a value of 3, as seen here, produces a dash three times the width of the object stroke. But why is the dot so wide, when it’s set to 1?
 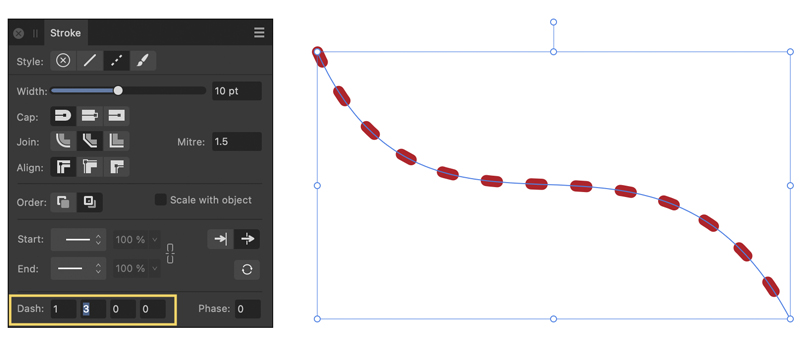 The answer seems to be that a value of 1 adds the thickness of the stroke either side of the dot. If you want a perfectly round dot, set the value to 0.
Commenting is easier and faster when you're logged in!

Recommended for you
Using Blend Modes in Affinity Designer
Learn how to alter the appearance of a layer in Affinity Designer, using what's...

Affinity V2: What’s New in Photo, Designer, and Publisher
The latest version of the Affinity suite is a remarkable upgrade with compelling...

Using Quick FX in Affinity Designer
Learn how to stylize objects in Affinity Designer with effects like Bevel/Emboss...